EasyManuals Logo

Canon imagerunner advance C5550i User Manual

Canon imagerunner advance C5550i
1556 pages
To Next Page IconTo Next Page
To Previous Page IconTo Previous Page
Page #439 background imageLoading...
Page #439 background image
Adjusting Image Quality
13WK-07J
You can scan with optimal image quality suitable for your type of original. For
example, making the color tone beautiful for originals with photos, while making the
contrast sharp for text-only originals, which makes it easy to read.
1
Place the original. Placing Originals(P. 106)
2
Press <Scan and Send> on the Main Menu. <Main Menu> Screen(P. 94)
3
Specify the destination on the Scan Basic Features screen. Scan Basic Features
Screen(P. 408)
4
Press <Options> <Original Type>.
5
Select the type of original and press <OK>.
6
Press <Close>.
7
Press .
Originals are scanned and sending/saving starts.
If the phenomenon called moire (striped pattern noise) occurs when scanning an original, adjust the
sharpness. Adjusting Sharpness When Scanning (Sharpness)(P. 429)
Scanning
427

Table of Contents

Other manuals for Canon imagerunner advance C5550i

Questions and Answers:

Question and Answer IconNeed help?

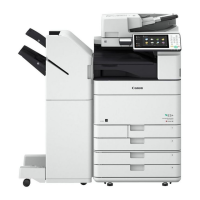
Do you have a question about the Canon imagerunner advance C5550i and is the answer not in the manual?

Canon imagerunner advance C5550i Specifications

General IconGeneral
TypeColor Laser Multifunction Printer
Print Resolution1200 x 1200 dpi
Scan ResolutionUp to 600 x 600 dpi
Paper CapacityStandard: 1, 200 sheets; Maximum: 6, 350 sheets
Hard Disk Drive250 GB
Duplex PrintingYes
Operating System CompatibilityWindows, Mac OS, Linux
FunctionsPrint, Copy, Scan
Print SpeedUp to 50 ppm
Copy SpeedUp to 50 ppm (Letter)
ConnectivityUSB, Ethernet, Wi-Fi
Display10.1-inch TFT LCD WSVGA Color Touch Panel
Warm-up TimeApproximately 30 seconds
Memory4 GB RAM
Fax ResolutionUp to 400 x 400 dpi
Dimensions620 mm x 742 mm x 932 mm (W x D x H)

Related product manuals