Step 5
Belting
28 docs.carbide3d.com support@carbide3d.com
Required Components
See Figure5‑2:
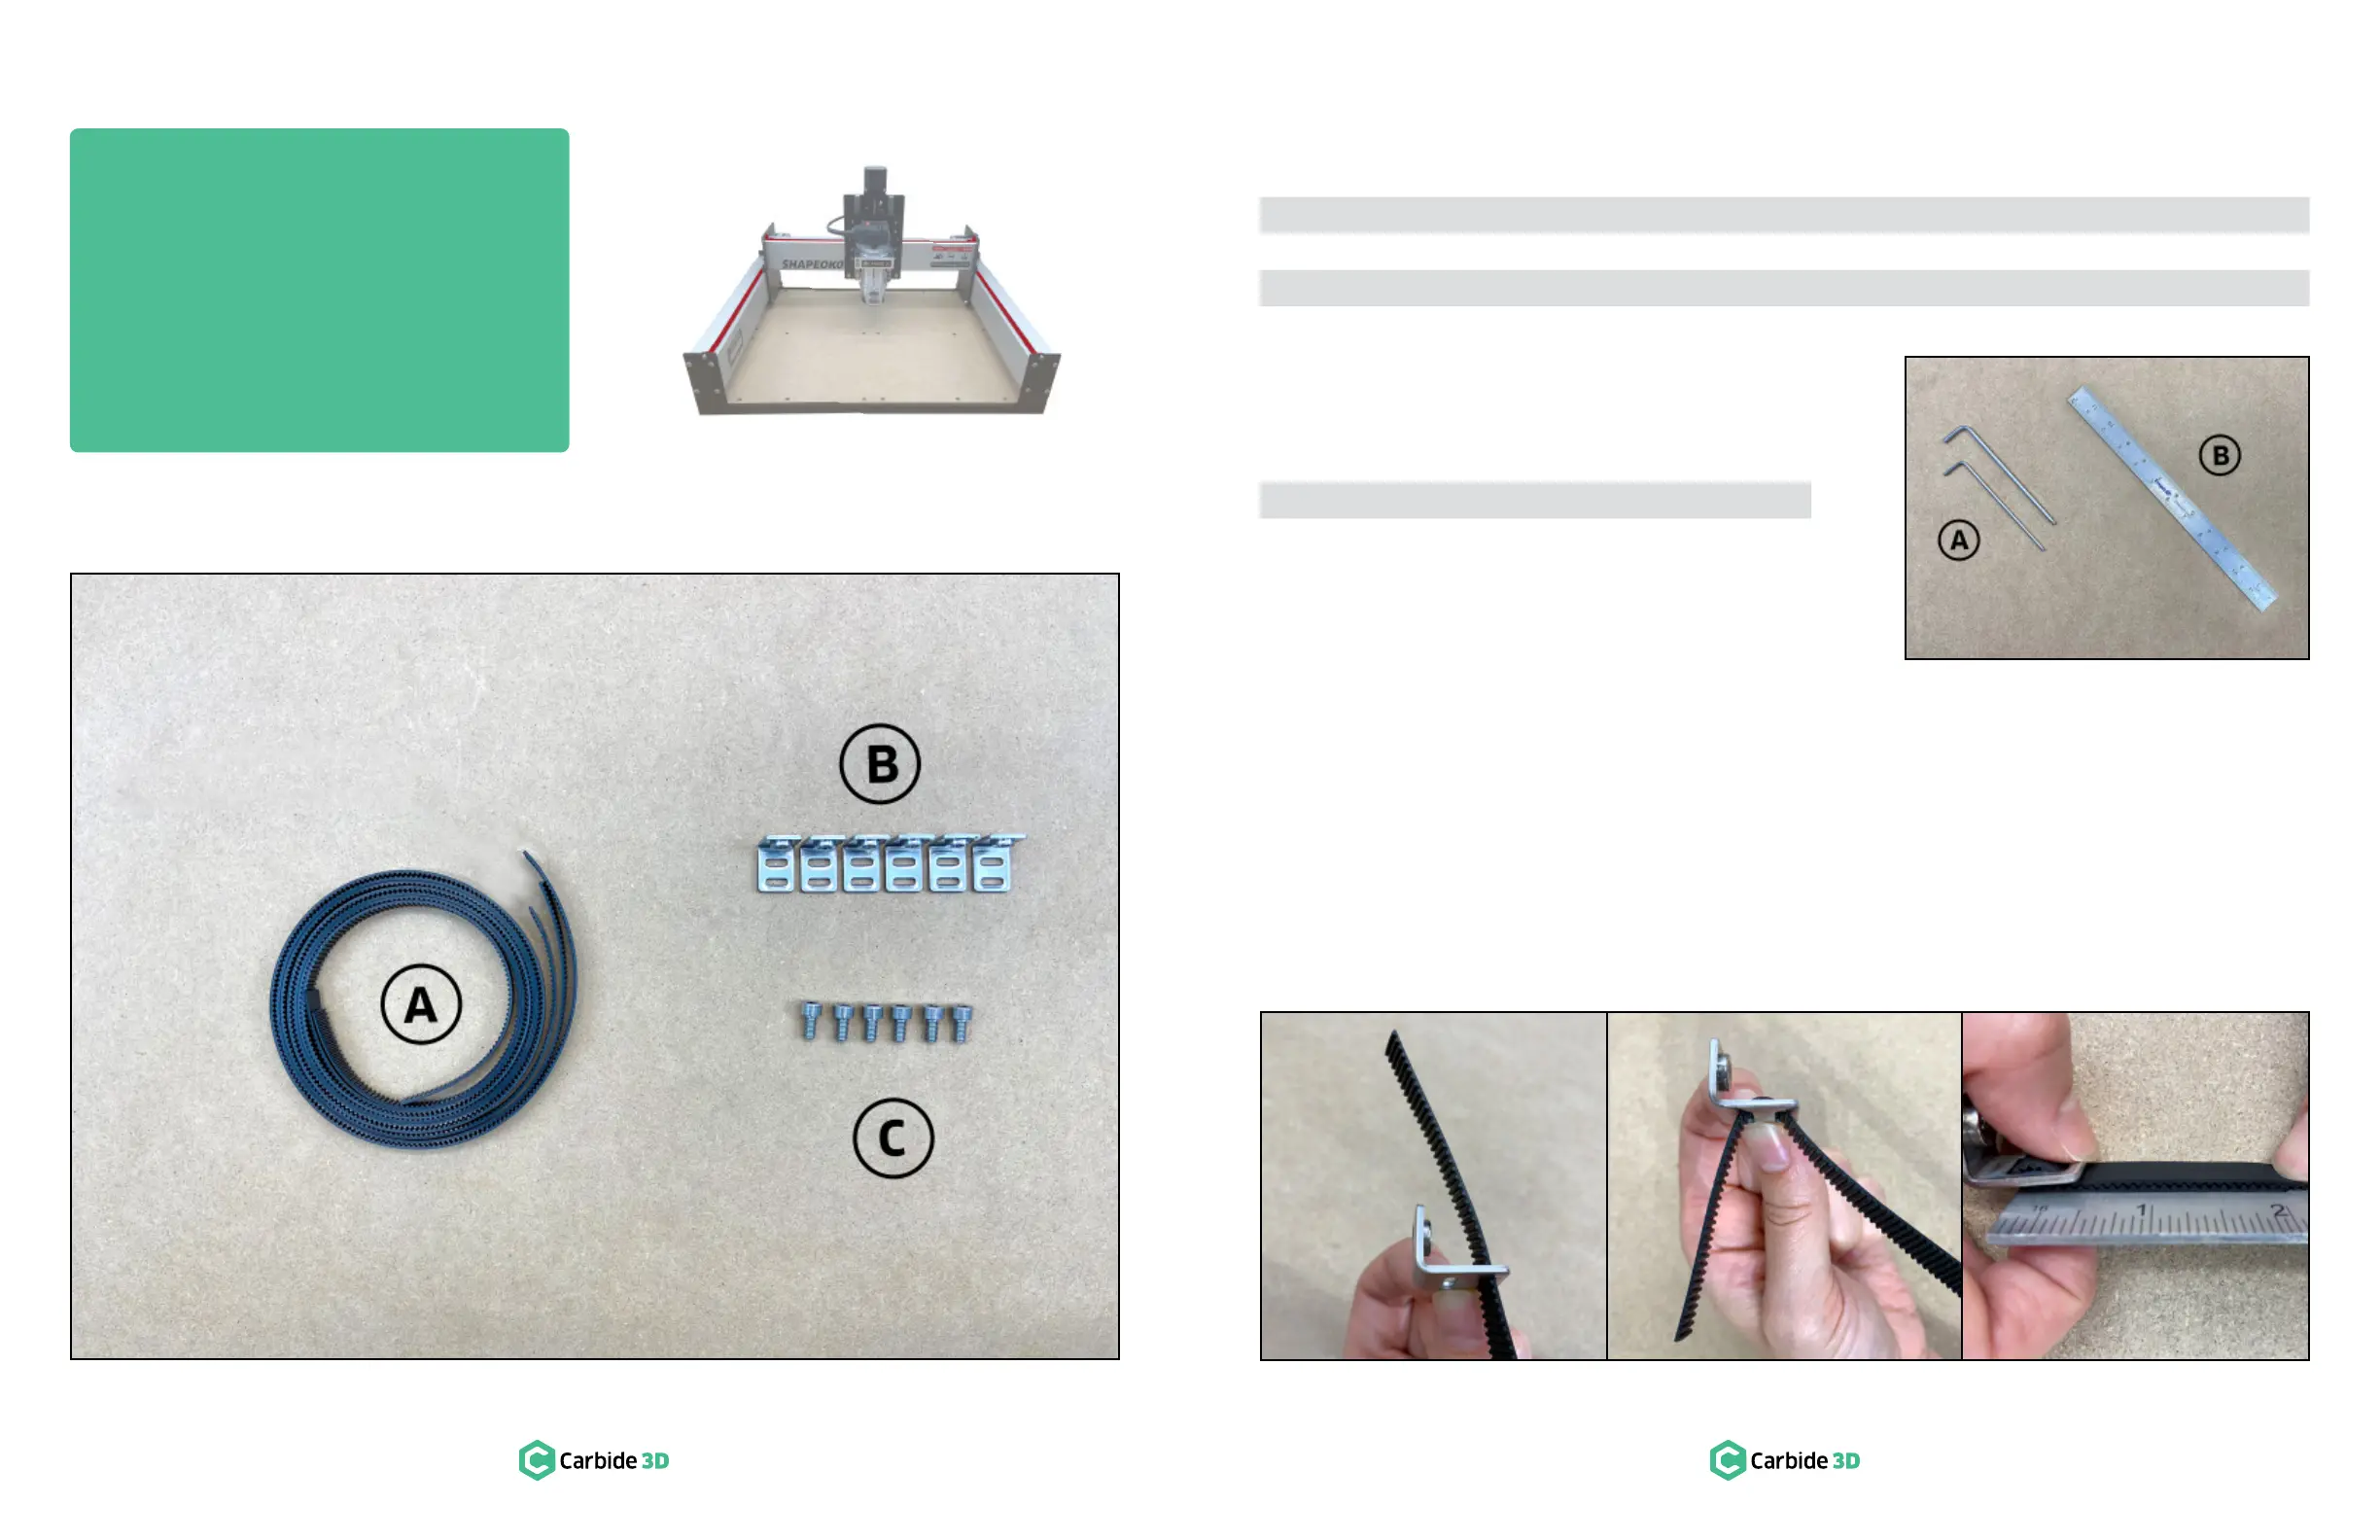
Item Description Location Qty
A Steel-Core Toothed Belt
Shapeoko 3 Final Assembly Box
3
B Belt Clip
Shapeoko 3 Final Assembly Box
C
M5
× 10mm Socket Head Cap Screw
Shapeoko 3 Final Assembly Box
Required Tools
See Figure5‑3:
Item Description Qty
A 3 and 4mm Hex Key 2
B 1
Belts and Belt Clips
Belts are secured to the rails using belt clips. Each belt clip has a PEM nut on the short leg and two parallel
slots on the long leg. All six belt clips will attach to the ends of the three belts as follows. See Figure5‑4.
1. Thread 2 / inches of belt through the outer slot of the belt clip with teeth facing toward the PEM nut.
2. Loop this end of belt down and through the inner slot of the clip. Pull the belt tight against the belt clip.
The length of the short end should now be about 2 inches.
3. Bring the two sections of belt together. Interlock the teeth and extend the belt away from the PEM nut.
Figure5-2 Figure5-4
Figure5-3
 Loading...

