Step 9
Level and Square
48 docs.carbide3d.com support@carbide3d.com
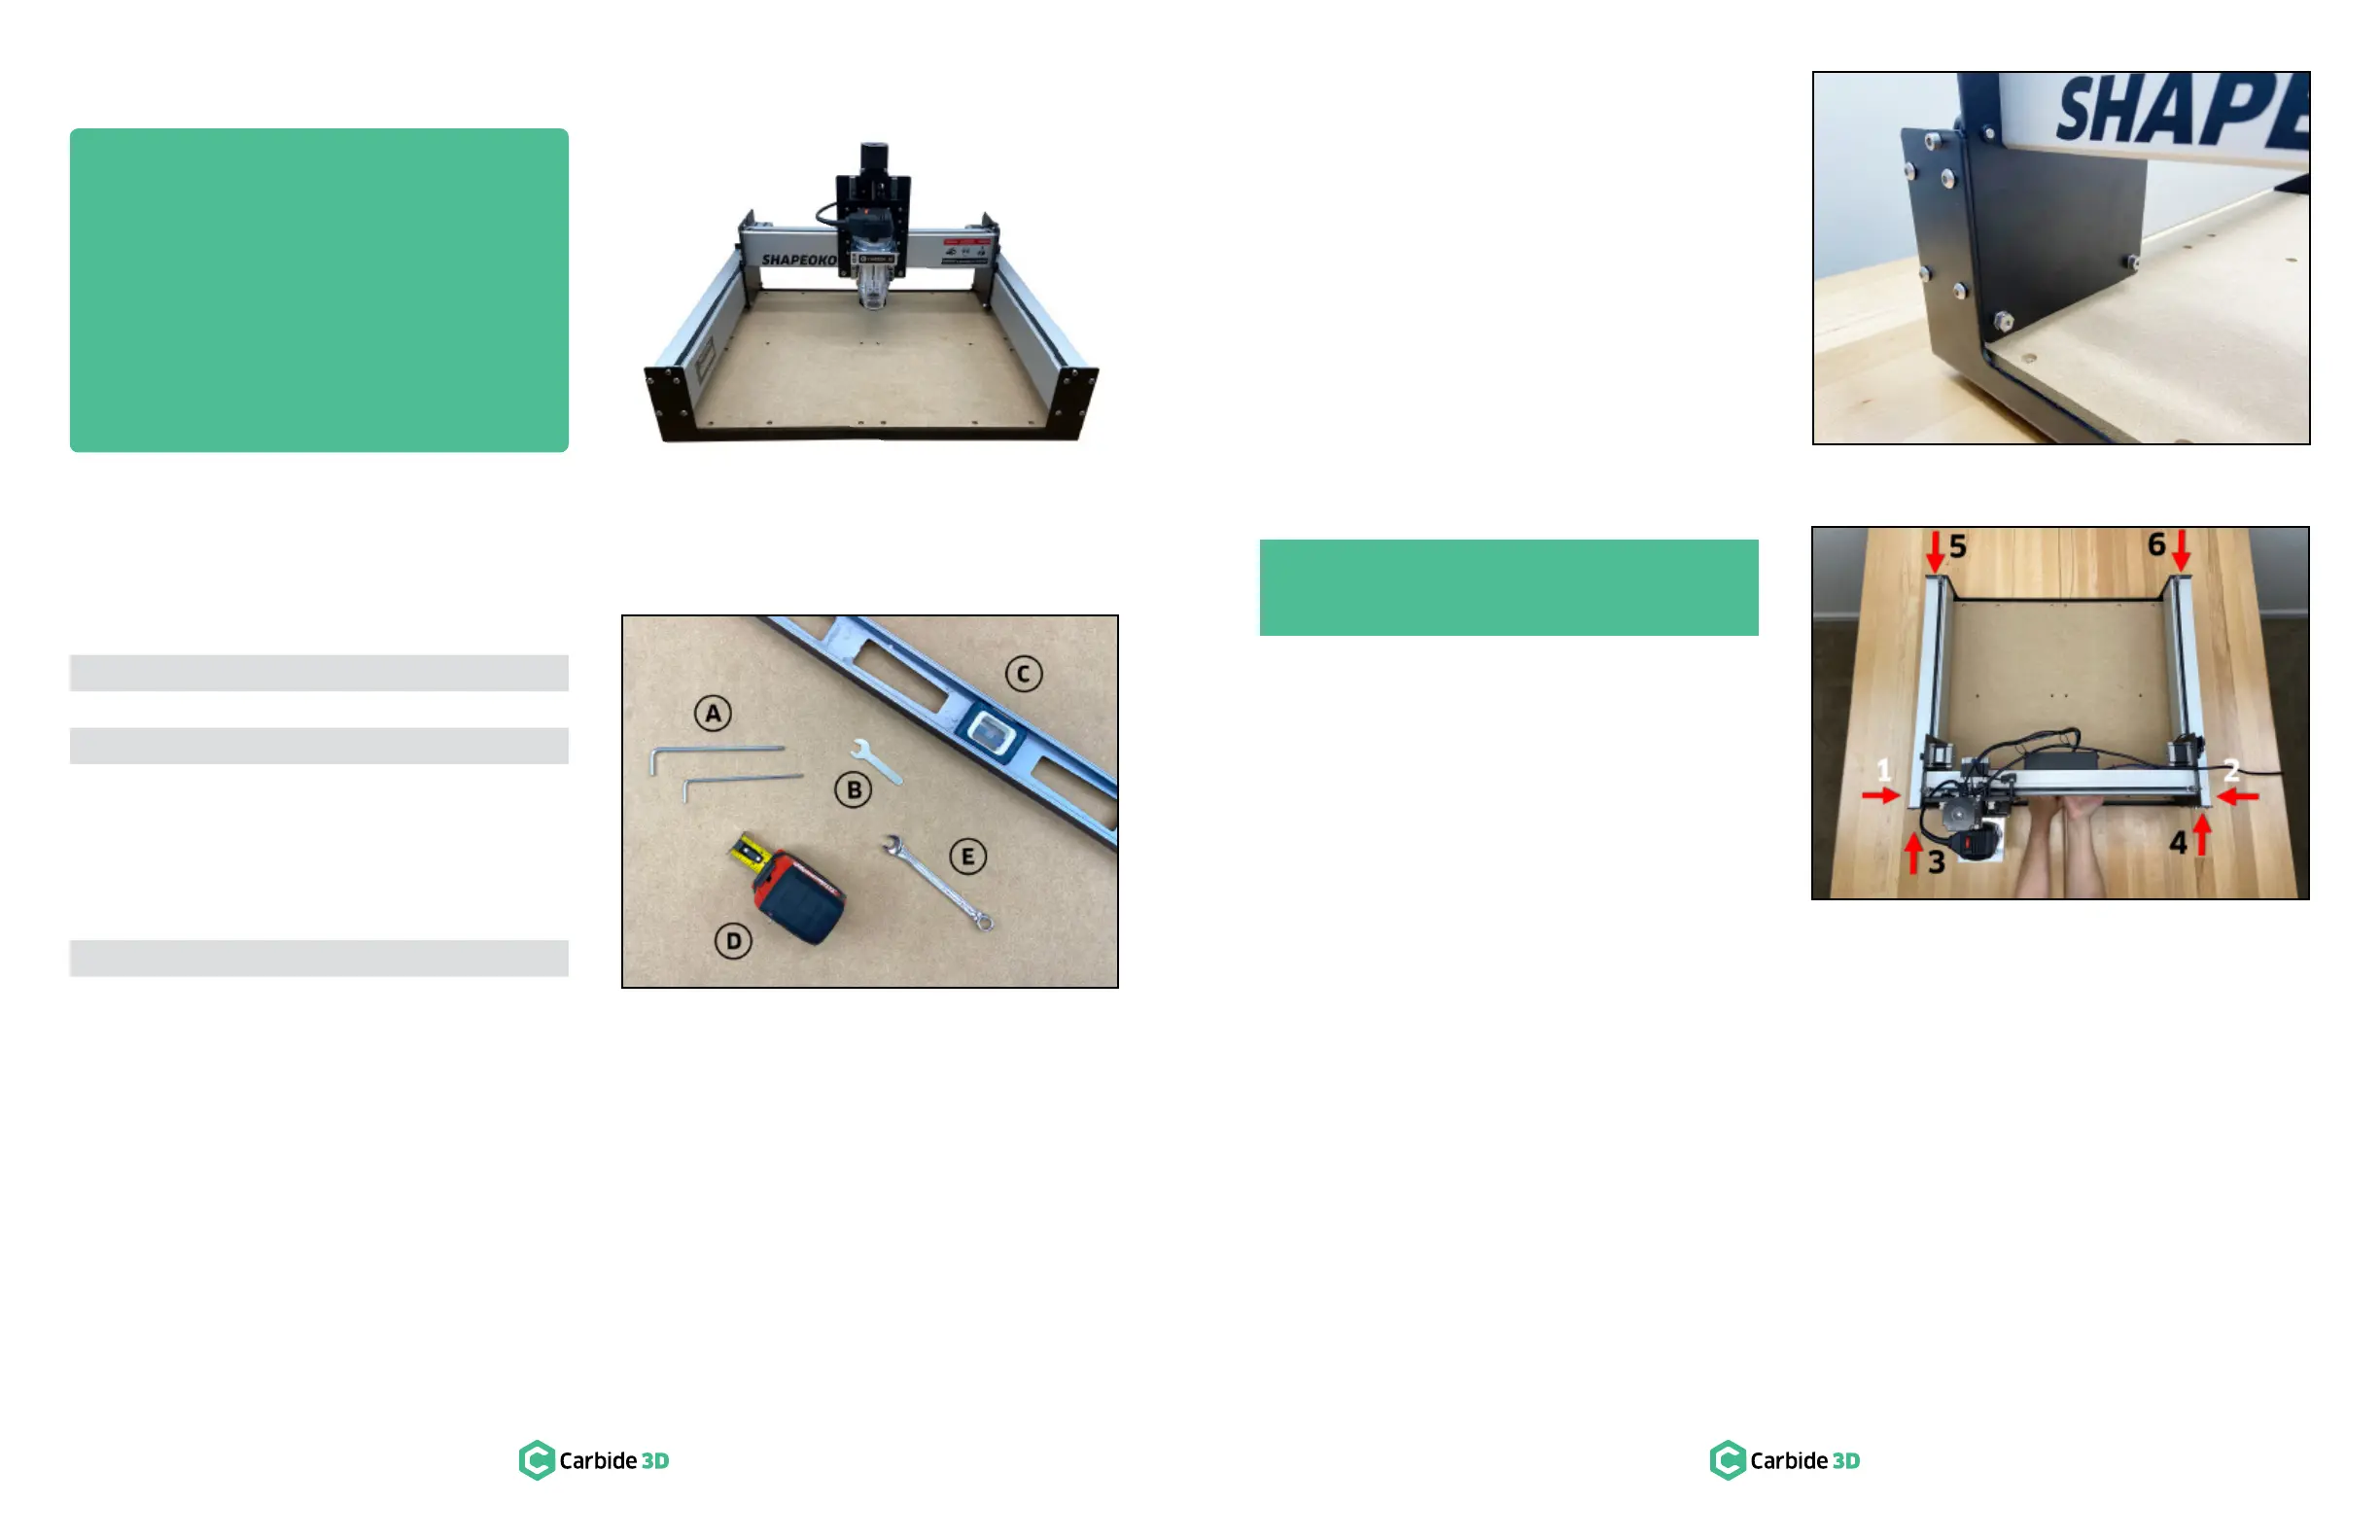
Required Tools
See Figure9‑2:
Item Description Qty
A 3 and 4mm Hex Key 2
B 10mm Wrench 1
C 1
Recommended Tools
See Figure9‑2:
Item Description Qty
D Tape Measure 1
E 10mm Combination Wrench 1
Confirm Level
1.
Confirm Tension of the V‑Wheels
The V-wheels were tensioned in step 4.
1. Figure3‑4 and 3‑5
for a detailed explanation of eccentric nuts and instructions on tensioning V-wheels.
Square the Machine
The machine is gradually brought into square by
tightening again while SIMULTANEOUSLY holding
the X-rail parallel to the front and rear endplates.
1. Use the 4mm hex key to loosen all twenty-four
×12mm button head cap screws / turn
2. If necessary, use the 3mm hex key to loosen
×25mm button head
cap screws securing the baseplate to the
endplates (these screws were not tightened in
3.
loose, HOLD the X-rail FORWARD, bringing
both Y-carriage plates squarely into contact
with the front endplate. See Figure9‑3.
4. MAINTAIN FORWARD PRESSURE and use
the 4mm hex key to fully tighten the sixteen
×12mm button head cap screw sets
1-4, in numbered order, shown in Figure9‑4.
5. MAINTAIN
REARWARD PRESSURE and use the 4mm
×
shown in Figure9‑4.
×
baseplate.
Congratulations! Assembly is now complete!
PRO TIP: During this step of the assembly, it
may be helpful to have another set of hands.
Figure9-3
Figure9-4
Figure9-2
 Loading...

