docs.carbide3d.com support@carbide3d.com 47
Secure the Power Cord
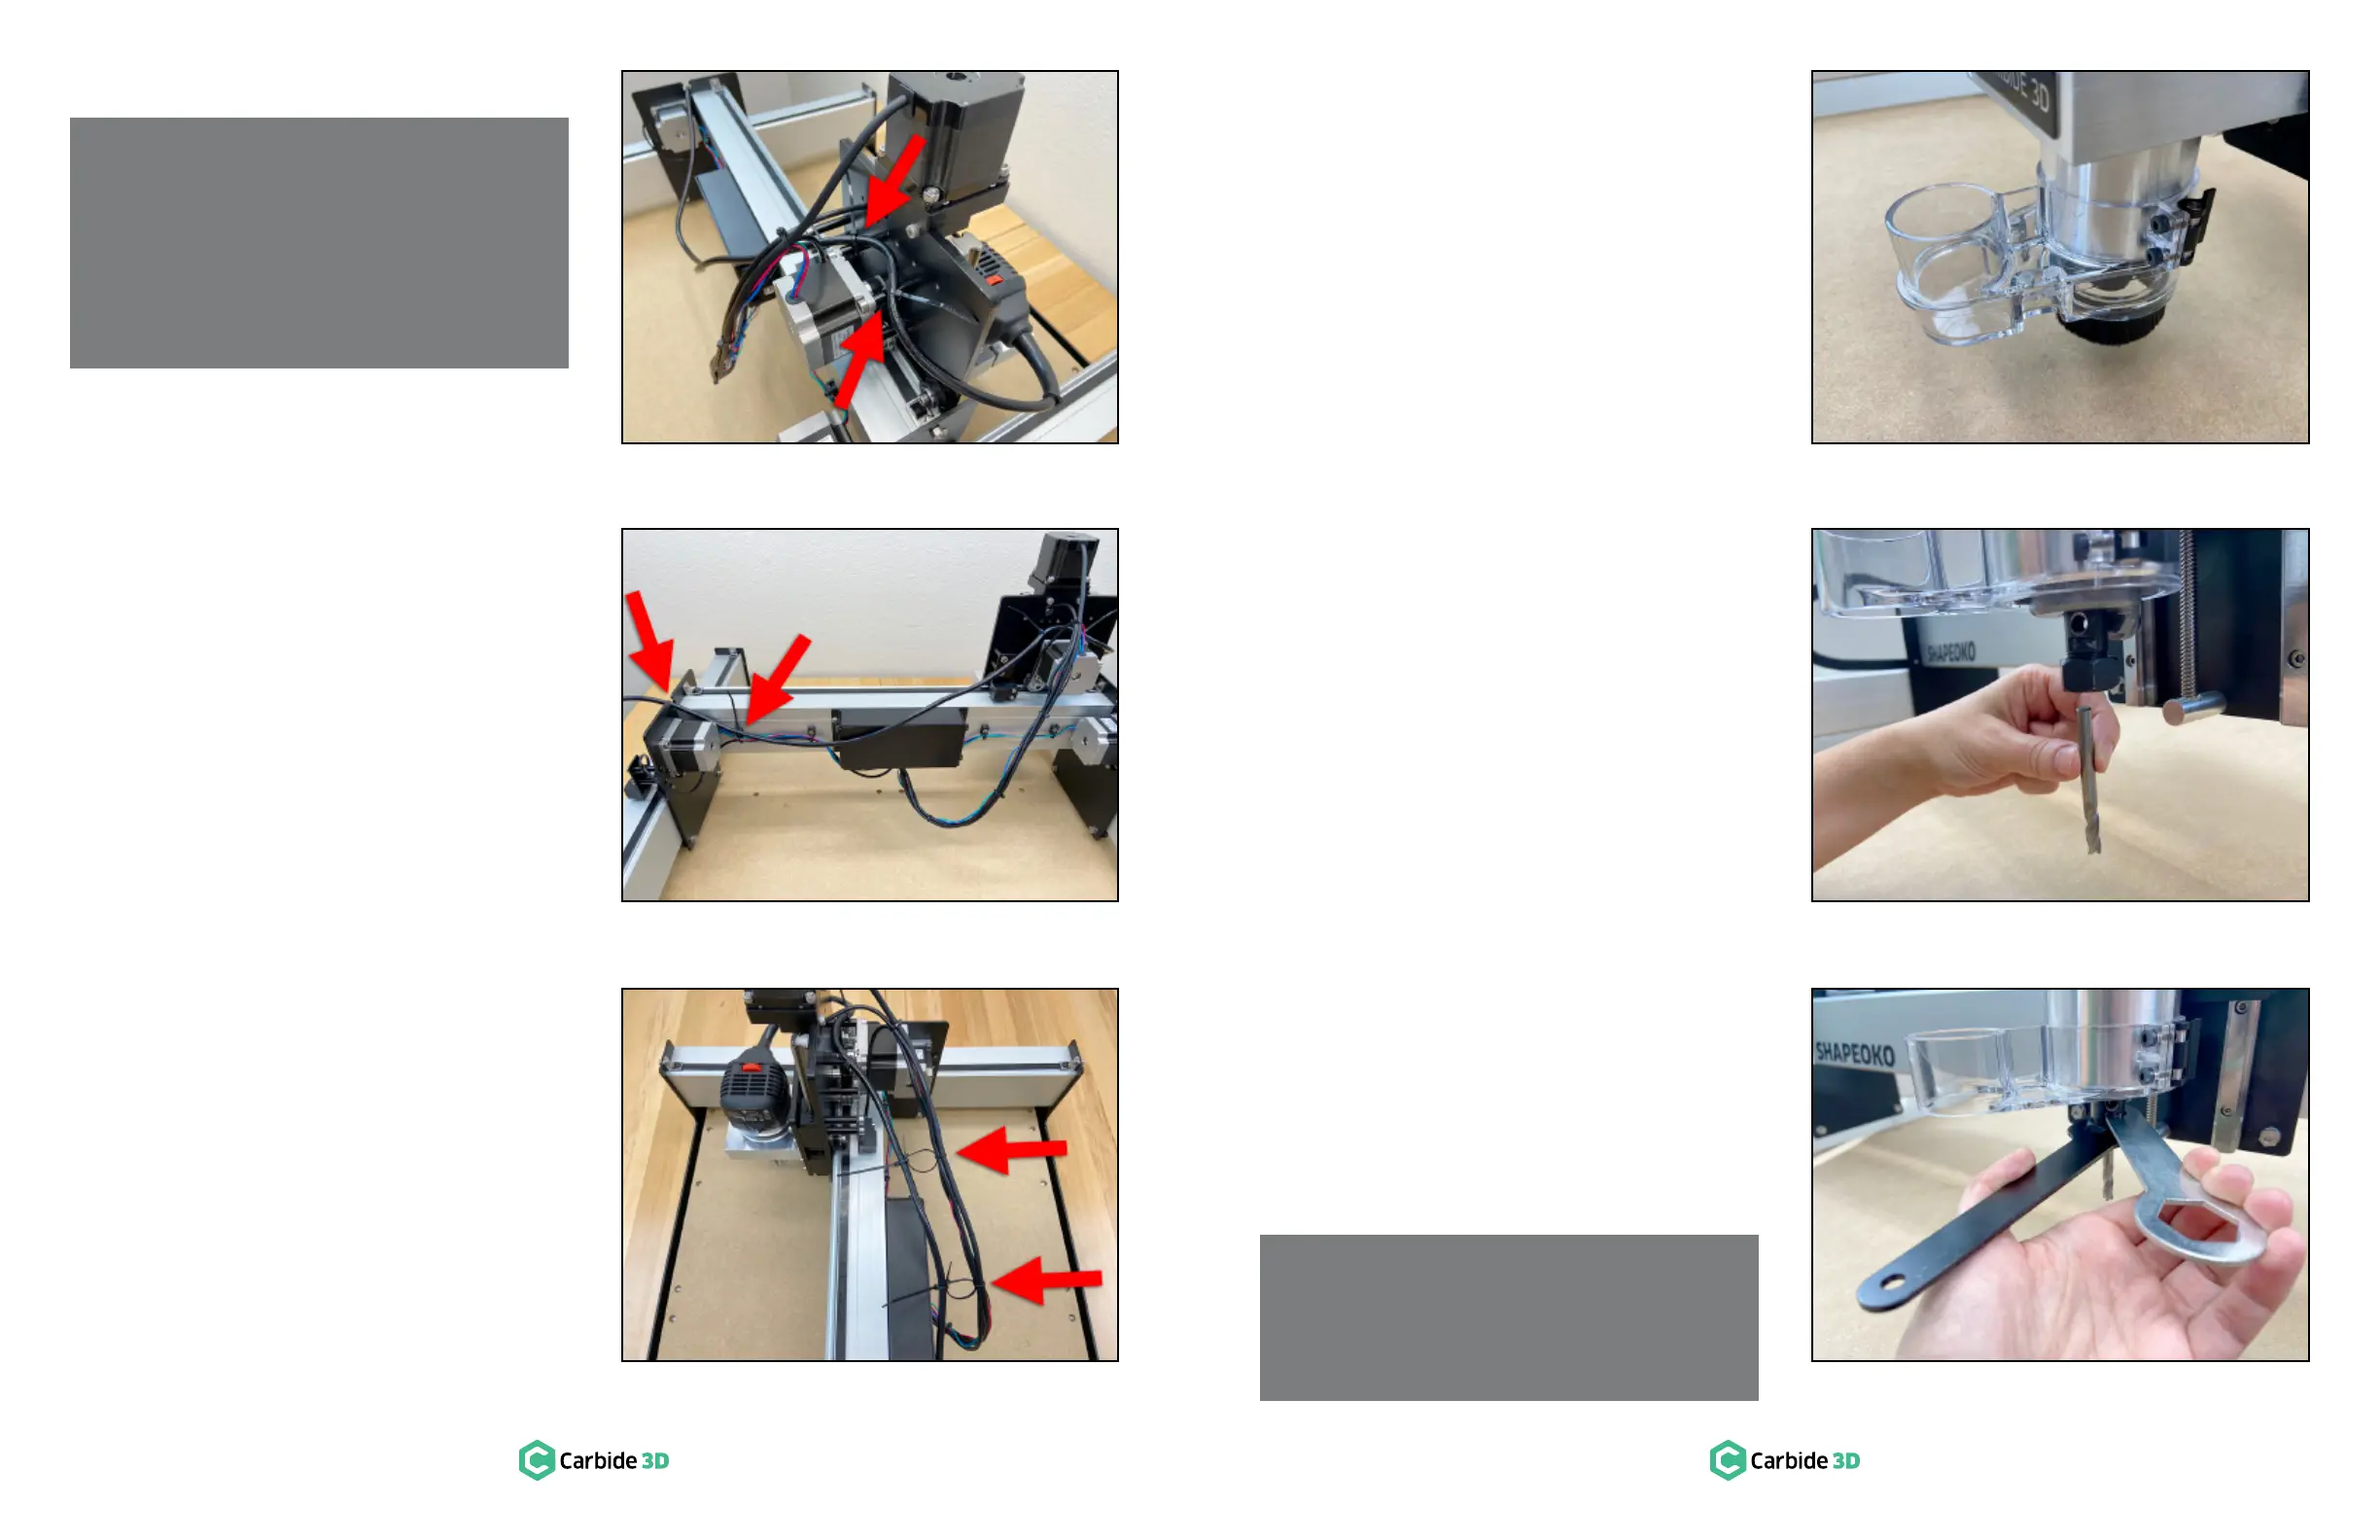
1. Route the power cord towards Y1-rail and
back behind the Z-Plus. Thread the cord
between the X- and Z-proximity cables,
toward the Y2-carriage, and let it rest on the
top two X-motor standoffs. See Figure8‑5.
2. Secure the power cord to the top two
Figure8‑5. Ensure the cord is taut enough that
it cannot be pinched between the Y1-carriage
and the Z-Plus, yet loose enough that the
3. Position the Z-Plus next to the Y1-carriage,
and loosely extend the power cord across the
machine and through the cutout at the top of
the Y2-carriage. See Figure8‑6.
4.
cord to the cable tie mount closest to
attachment point. See Figure8‑6.
The power cord will now be secured to, and
behind the Z-Plus using cable ties formed into
cable ties you used to secure the cable bundle as
attachment points for the new “standoff loops.”
5. Thread a cable tie through one of the existing
ties on the cable bundle and create a 1-inch
loop. Repeat with a second cable tie.
power cord to the two “standoff loops.”
7.
down the ends of all cable ties.
Install Sweepy Dust Boot
1. Fully seat the upper half of the dust boot onto
the router’s lower motor housing with the
quick release to tighten. See Figure8‑8.
2. The lower half locks into place using
neodymium magnets for easy install and
Install an End Mill
Compact Router. For all other routers, refer to the
router user manual for detailed operating, safety,
and end mill installation information.
The Carbide Compact Router includes a 0.25″
collet cone, a collet nut, a 22mm collet nut wrench,
a 13mm spindle wrench, and the Shapeoko 3 kit
comes with a #201 /
Install the End Mill
1. Clean and insert the end mill shank into the
loosened collet a minimum of 0.75″
the entire length of the collet cone and nut. See
Figure8‑9.
2. Use the 22mm collet nut wrench and the
13mm spindle wrench to tighten the collet
nut securely. See Figure8‑10
you can press and hold the shaft lock while
tightening with the 22mm collet nut wrench.
Never tighten the collet nut without an end
mill inserted into the collet cone.
Remove the End Mill
1.
NOTE: Plug the compact router into an outlet
with a dedicated on/off switch. Ensure this
is accessible while the machine is running,
in case you need to shut off the Shapeoko 3
immediately.
NOTE: The router’s power cord, if improperly
routed and secured, can cause electromagnetic
interference with the machine’s other cables.
To keep contact to a minimum through the
machine’s entire range of motion, cable ties
formed into loops, are used as “standoffs”
between the power cord and the main cable
bundle behind the Z-Plus.
Figure8-5
Figure8-6
Figure8-7
Figure8-8
Figure8-9
Figure8-10
 Loading...

