44 docs.carbide3d.com support@carbide3d.com 45
Required Components
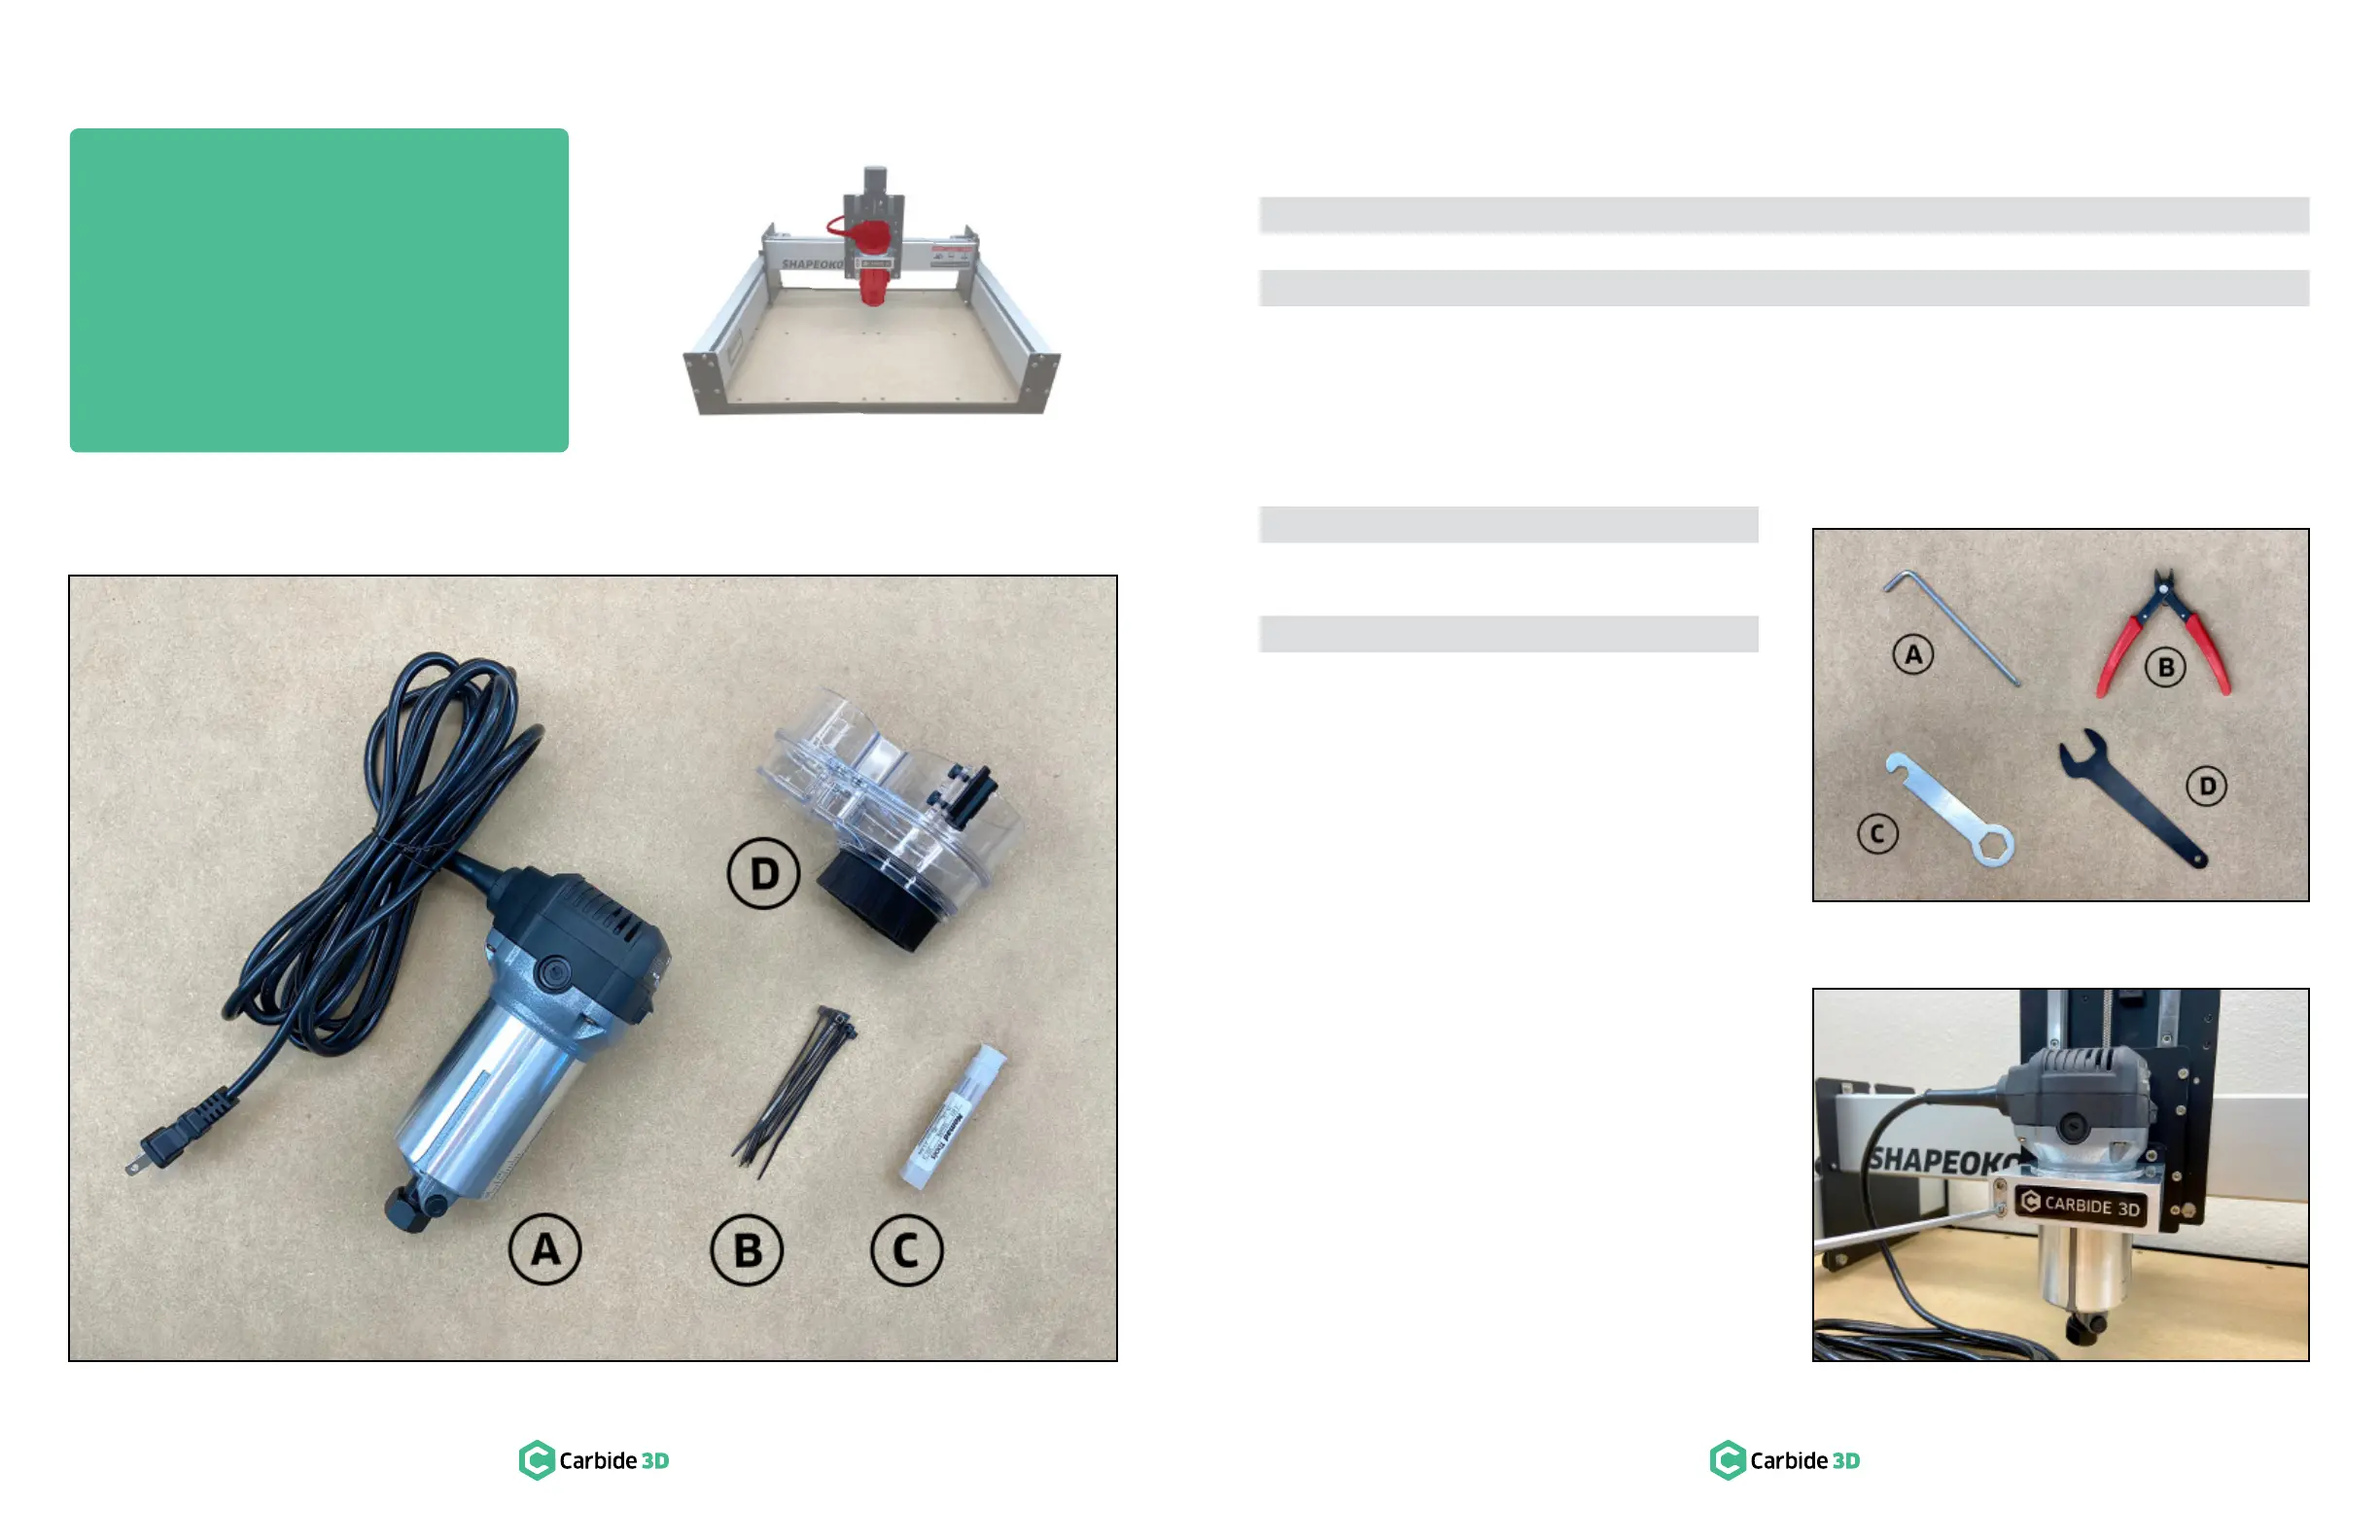
See Figure8‑2:
Item Description Location Qty
A Compact Router Compact Router Box 1
B Cable Ties Shapeoko 3 Final Assembly Box 7
C #201 ¼-inch Square End Mill Cutter Shapeoko 3 Final Assembly Box 1
D Sweepy Box 1
Required Tools
See Figure8‑3:
Item Description Qty
A 4mm Hex Key 1
B
Flush Cut Pliers or Scissors (not
1
C 13mm Wrench* 1
D 22mm Wrench* 1
*Found in the Carbide Compact Router box.
Install the Compact Router
Compact Router, require the use of the router mount
Before installing any router, the Z-carriage must be
lowered. To lower, press down on the top edge of the
Z-carriage plate, in front of the linear rails, with your
1.
M5
×55mm socket head cap screws on the front
of the router mount.
2. Insert the router into the mount until the taper of
the router’s body meets the adapter ring. Extend
.
See Figure8‑4.
3. Use the 4mm hex key to secure the compact
×55mm
socket head cap screws on the front of the
router mount as shown in Figure8‑4.
Figure8-2
Figure8-3
Figure8-4
Step 8
Compact Router
 Loading...

