52 docs.carbide3d.com support@carbide3d.com 53
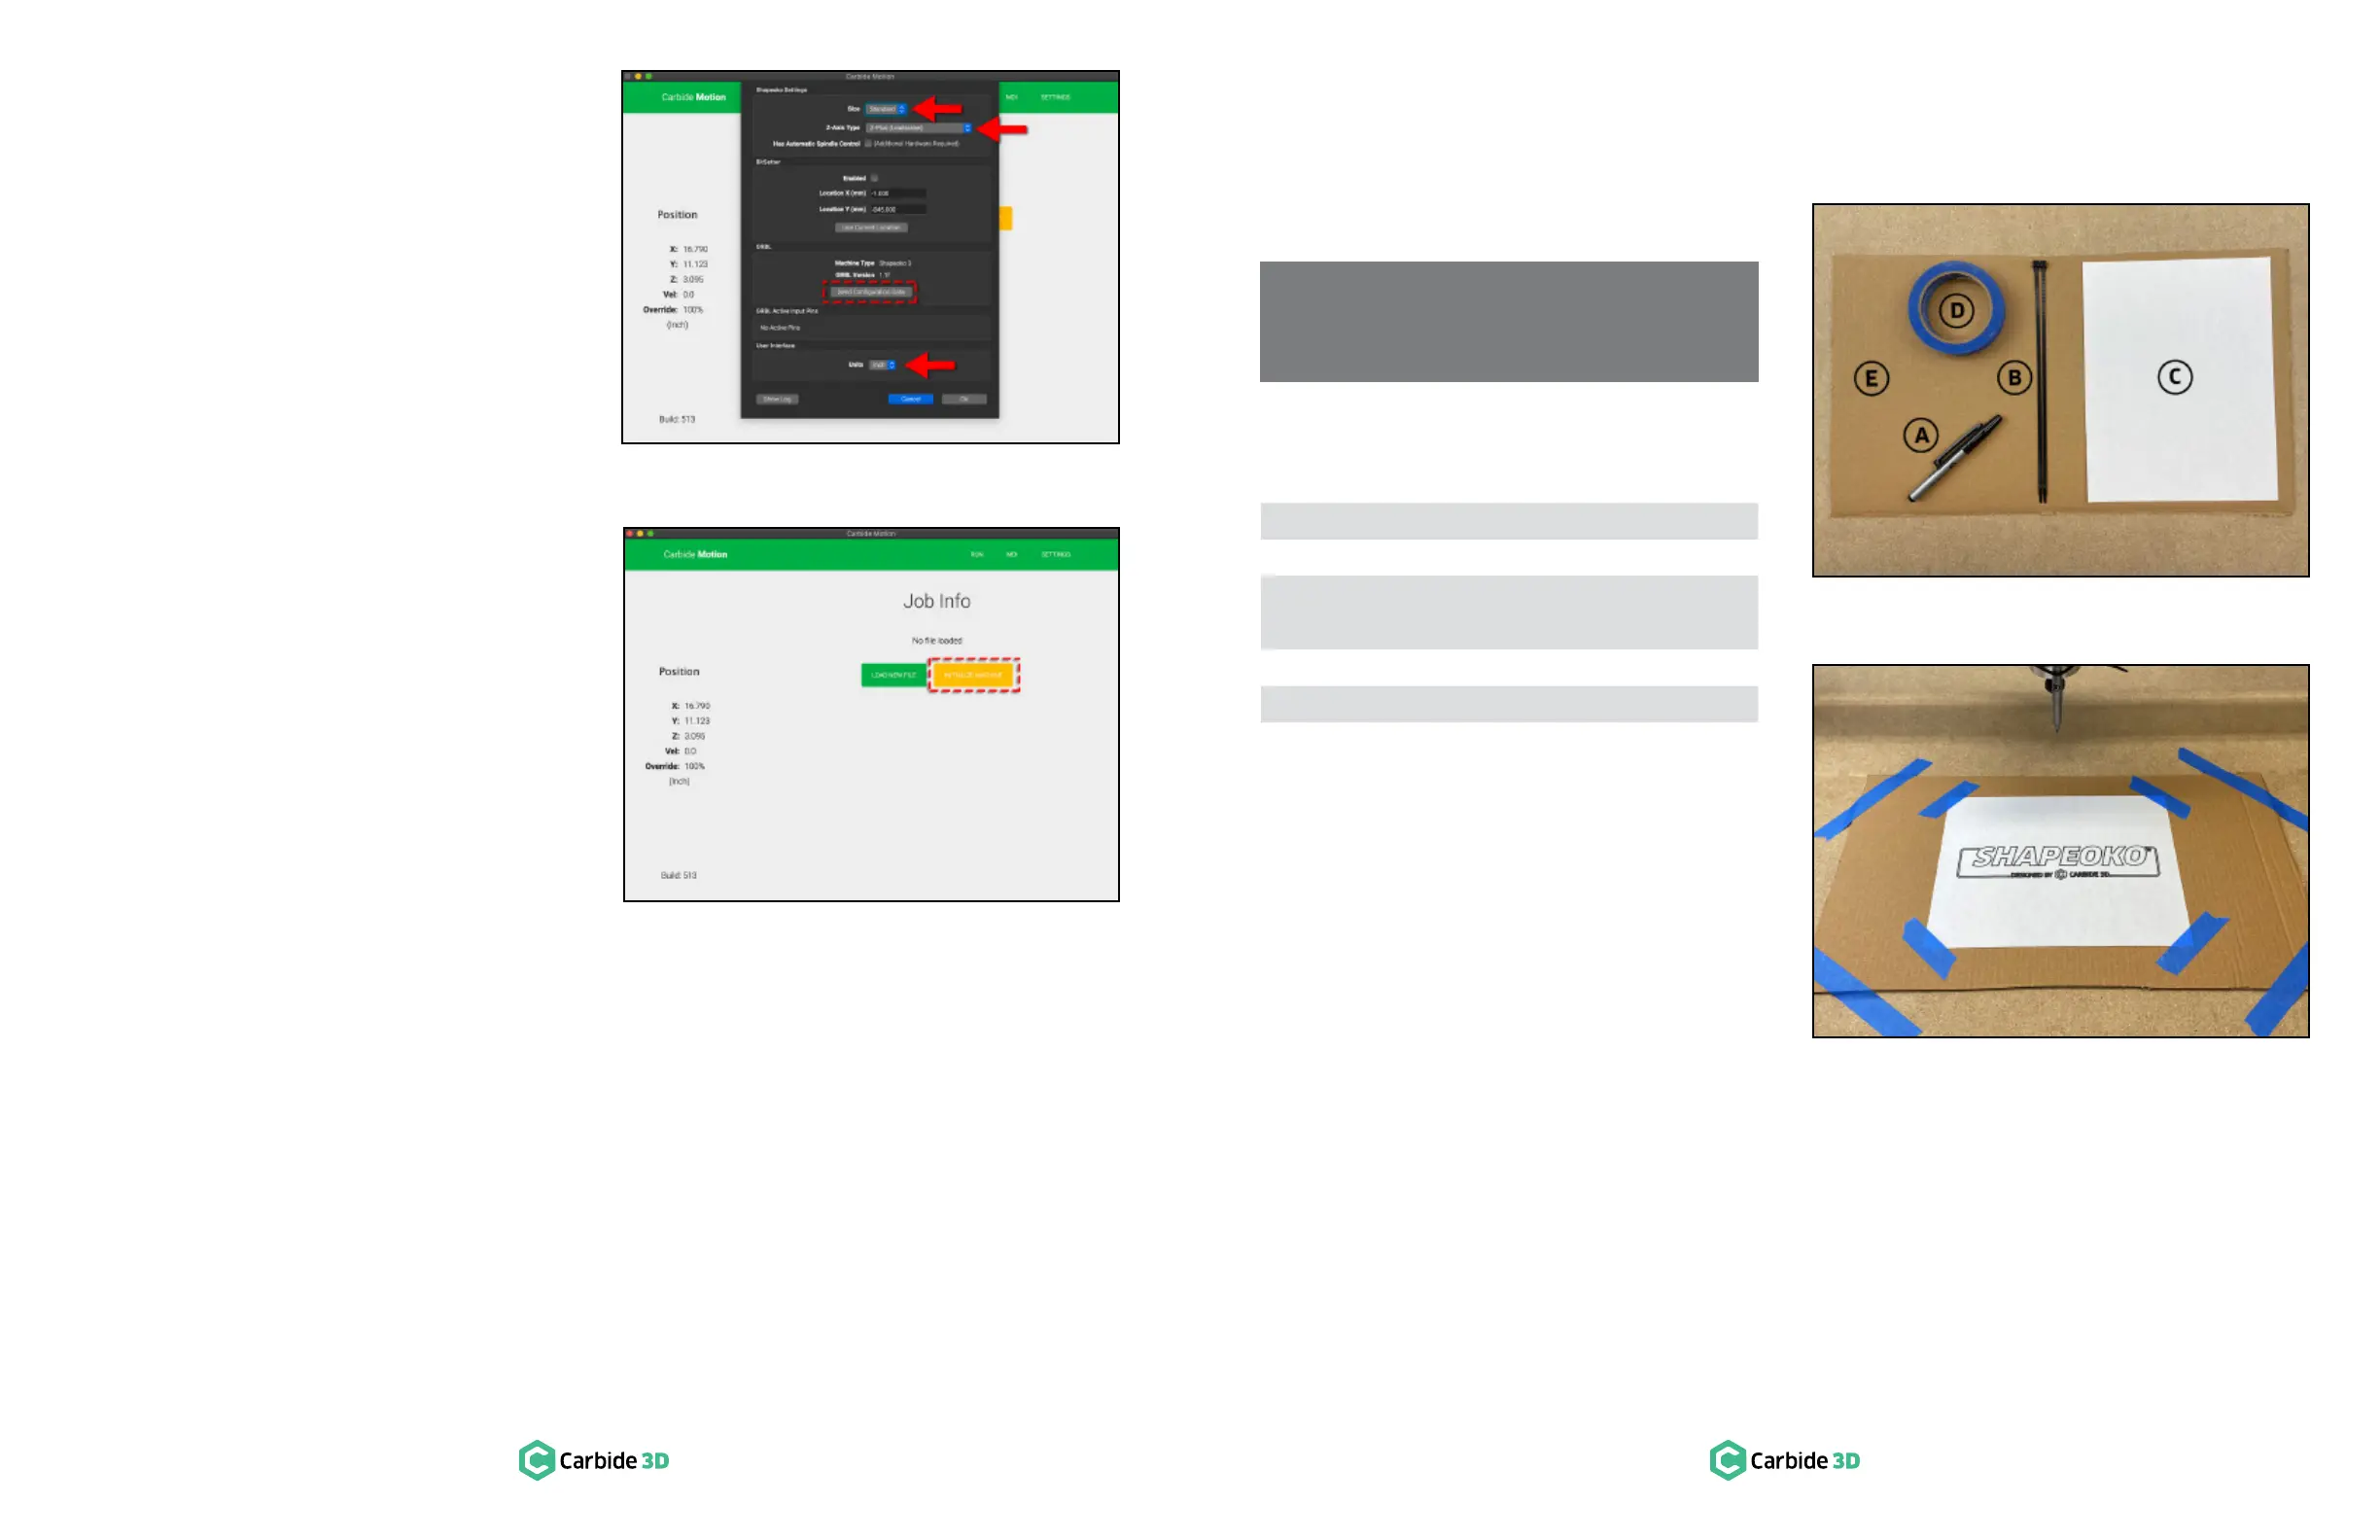
2. Choose “Standard” from the Size dropdown
listZ-Axis Type
dropdown list, and “Inches” or “MM” from the
Units dropdown list. See Figure11‑3.
3. Click the Update Shapeoko Conguration
button in the middle of the dialog window. See
Figure11‑3.
4. A progress bar will appear at the top of the
OK button in the
bottom-right corner of the window to close it.
Initialize the Machine
1. Click the yellow Initialize Machine button.
See Figure11‑4
sequence and your machine will do the
following:
a.
is engaged. The Z-Axis will then back off
slightly before re-engaging the switch and
the Z-Axis to machine origin.
b.
c.
until one of their switches is triggered,
at which time they will follow the same
pattern as the Z-Axis: engage the homing switch, back off, re-engage, and then back off again.
2.
Troubleshooting Homing Issues: docs.carbide3d.com/software-faq/home-switch-troubleshooting
Run the Test Project
Required Components
See Figure12‑1:
Item Description Qty
A Permanent Marker 1
B Large Zip Tie 2
C
Letter-Sized, A4, Paper (not
1
D 1
E 1
Complete the Test Project
To complete the test project (see Figure12‑2
follow the instructions: docs.carbide3d.com/
tutorials/hello-world.
NOTE: We recommend you use the test
project as a practice run before moving on to
cutting projects.
Figure11-4
Figure12-1
Figure12-2
Figure11-3