Step 1
Inventory
4 docs.carbide3d.com support@carbide3d.com 5
Unbox the Shapeoko 3
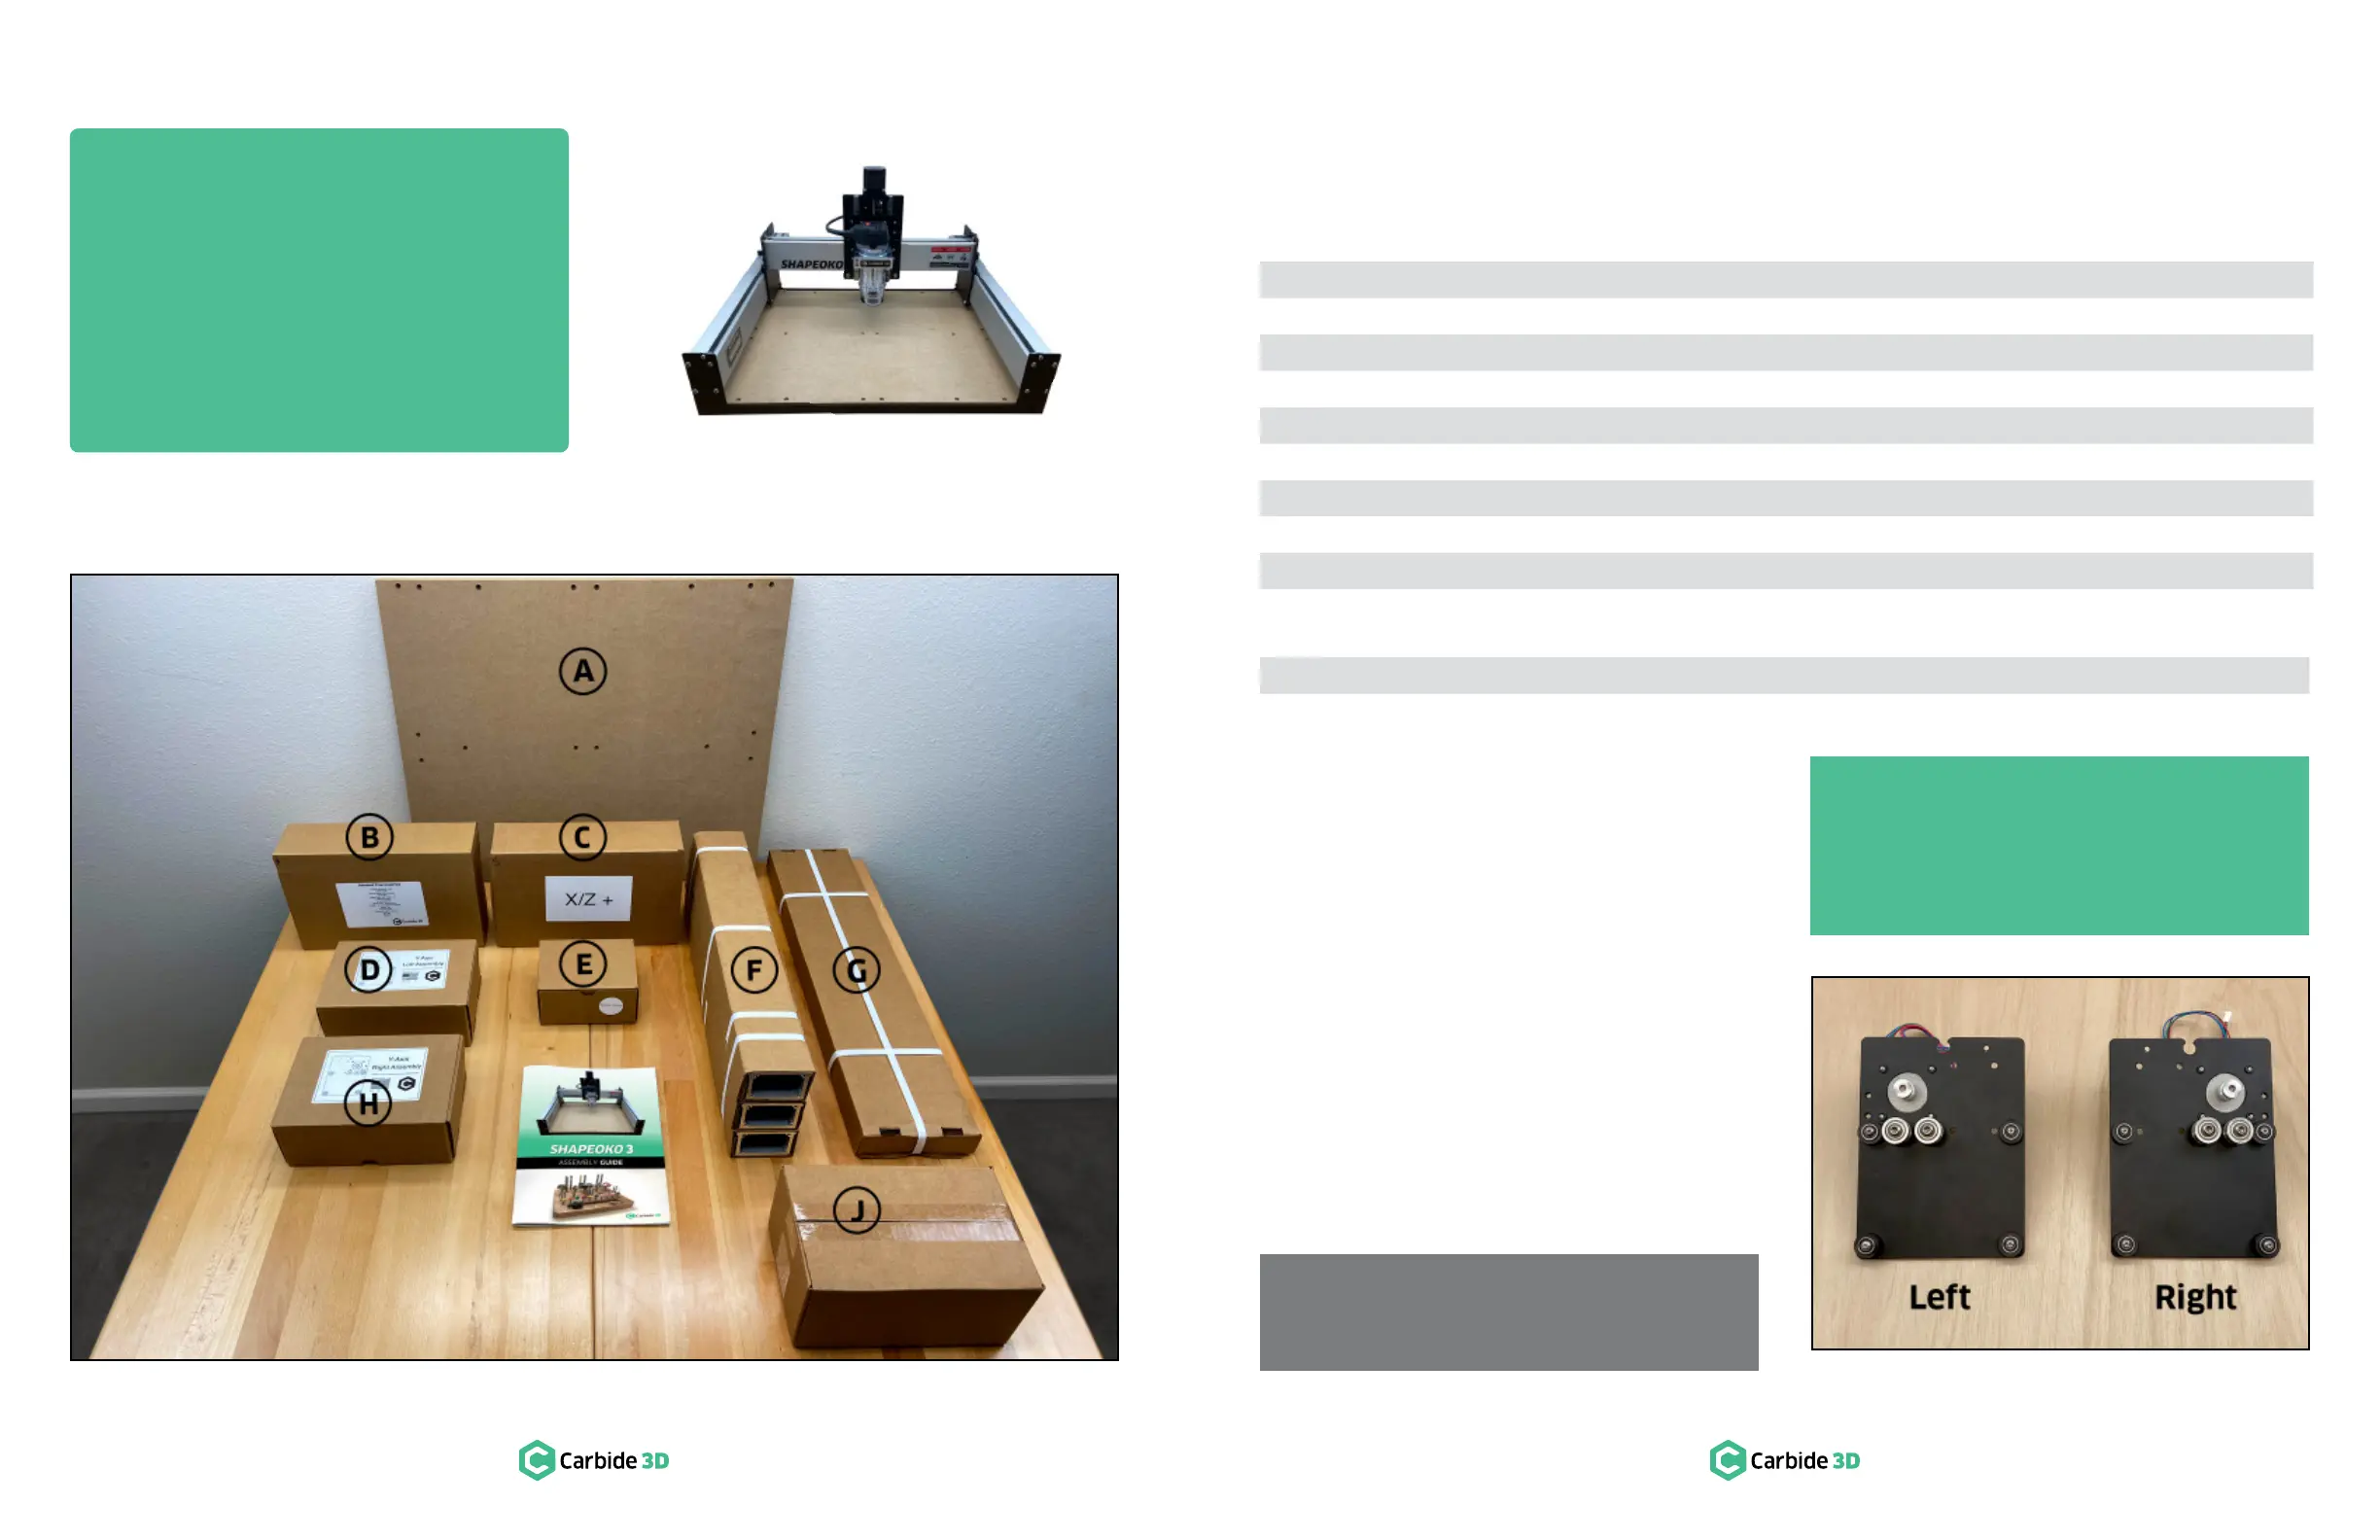
Figure1‑2.
Item Description Qty Other Information
A 1 28.3″ × 22.8″ × 0.75″
B Shapeoko 3 Final Assembly Box 1 Contains Hardware and Components Needed for Assembly
C X/Z+ Box 1 Contains Z-Plus Carriage, Components, and Hardware
D Y-Axis Left Assembly Box 1 Contains Y-Axis Left Carriage
E Sweepy Box 1
F Aluminum Extrusion Package 1 ″ × 7.5″ × 3.8″ Package Contains 3 Unique Extrusion Rails
G Endplate Package 1 ″ ×″ × 2″ Package Contains 2 Identical Endplates
H Y-Axis Right Assembly Box 1 Contains Y-Axis Right Carriage
I Shapeoko 3 Assembly Guide 1 This Printed Assembly Guide
Optional Items
J Carbide Compact Router Box 1 Contains the Compact Router and Accessories/Tools
Take Inventory
the checklists on the following pages. Inspect items
for damage and quantity, then carefully set each
aside until they are needed for assembly.
Y‑Axis Left Assembly &
Y‑Axis Right Assembly Boxes
match the carriages shown in Figure1‑3. The
Right and Left Assembly are mirror images.
PRO TIP: Your Shapeoko 3 kit was carefully
packaged by hand. If, after completing your
inventory, you nd that something is missing or
damaged, contact us at support@carbide3d.com
and we’ll ship it to you ASAP.
NOTE: Save both of the Y-Axis Assembly boxes.
We will use them to support the gantry during
assembly.
Figure1-2
Figure1-3