10 docs.carbide3d.com support@carbide3d.com 11
Additional Required Tools
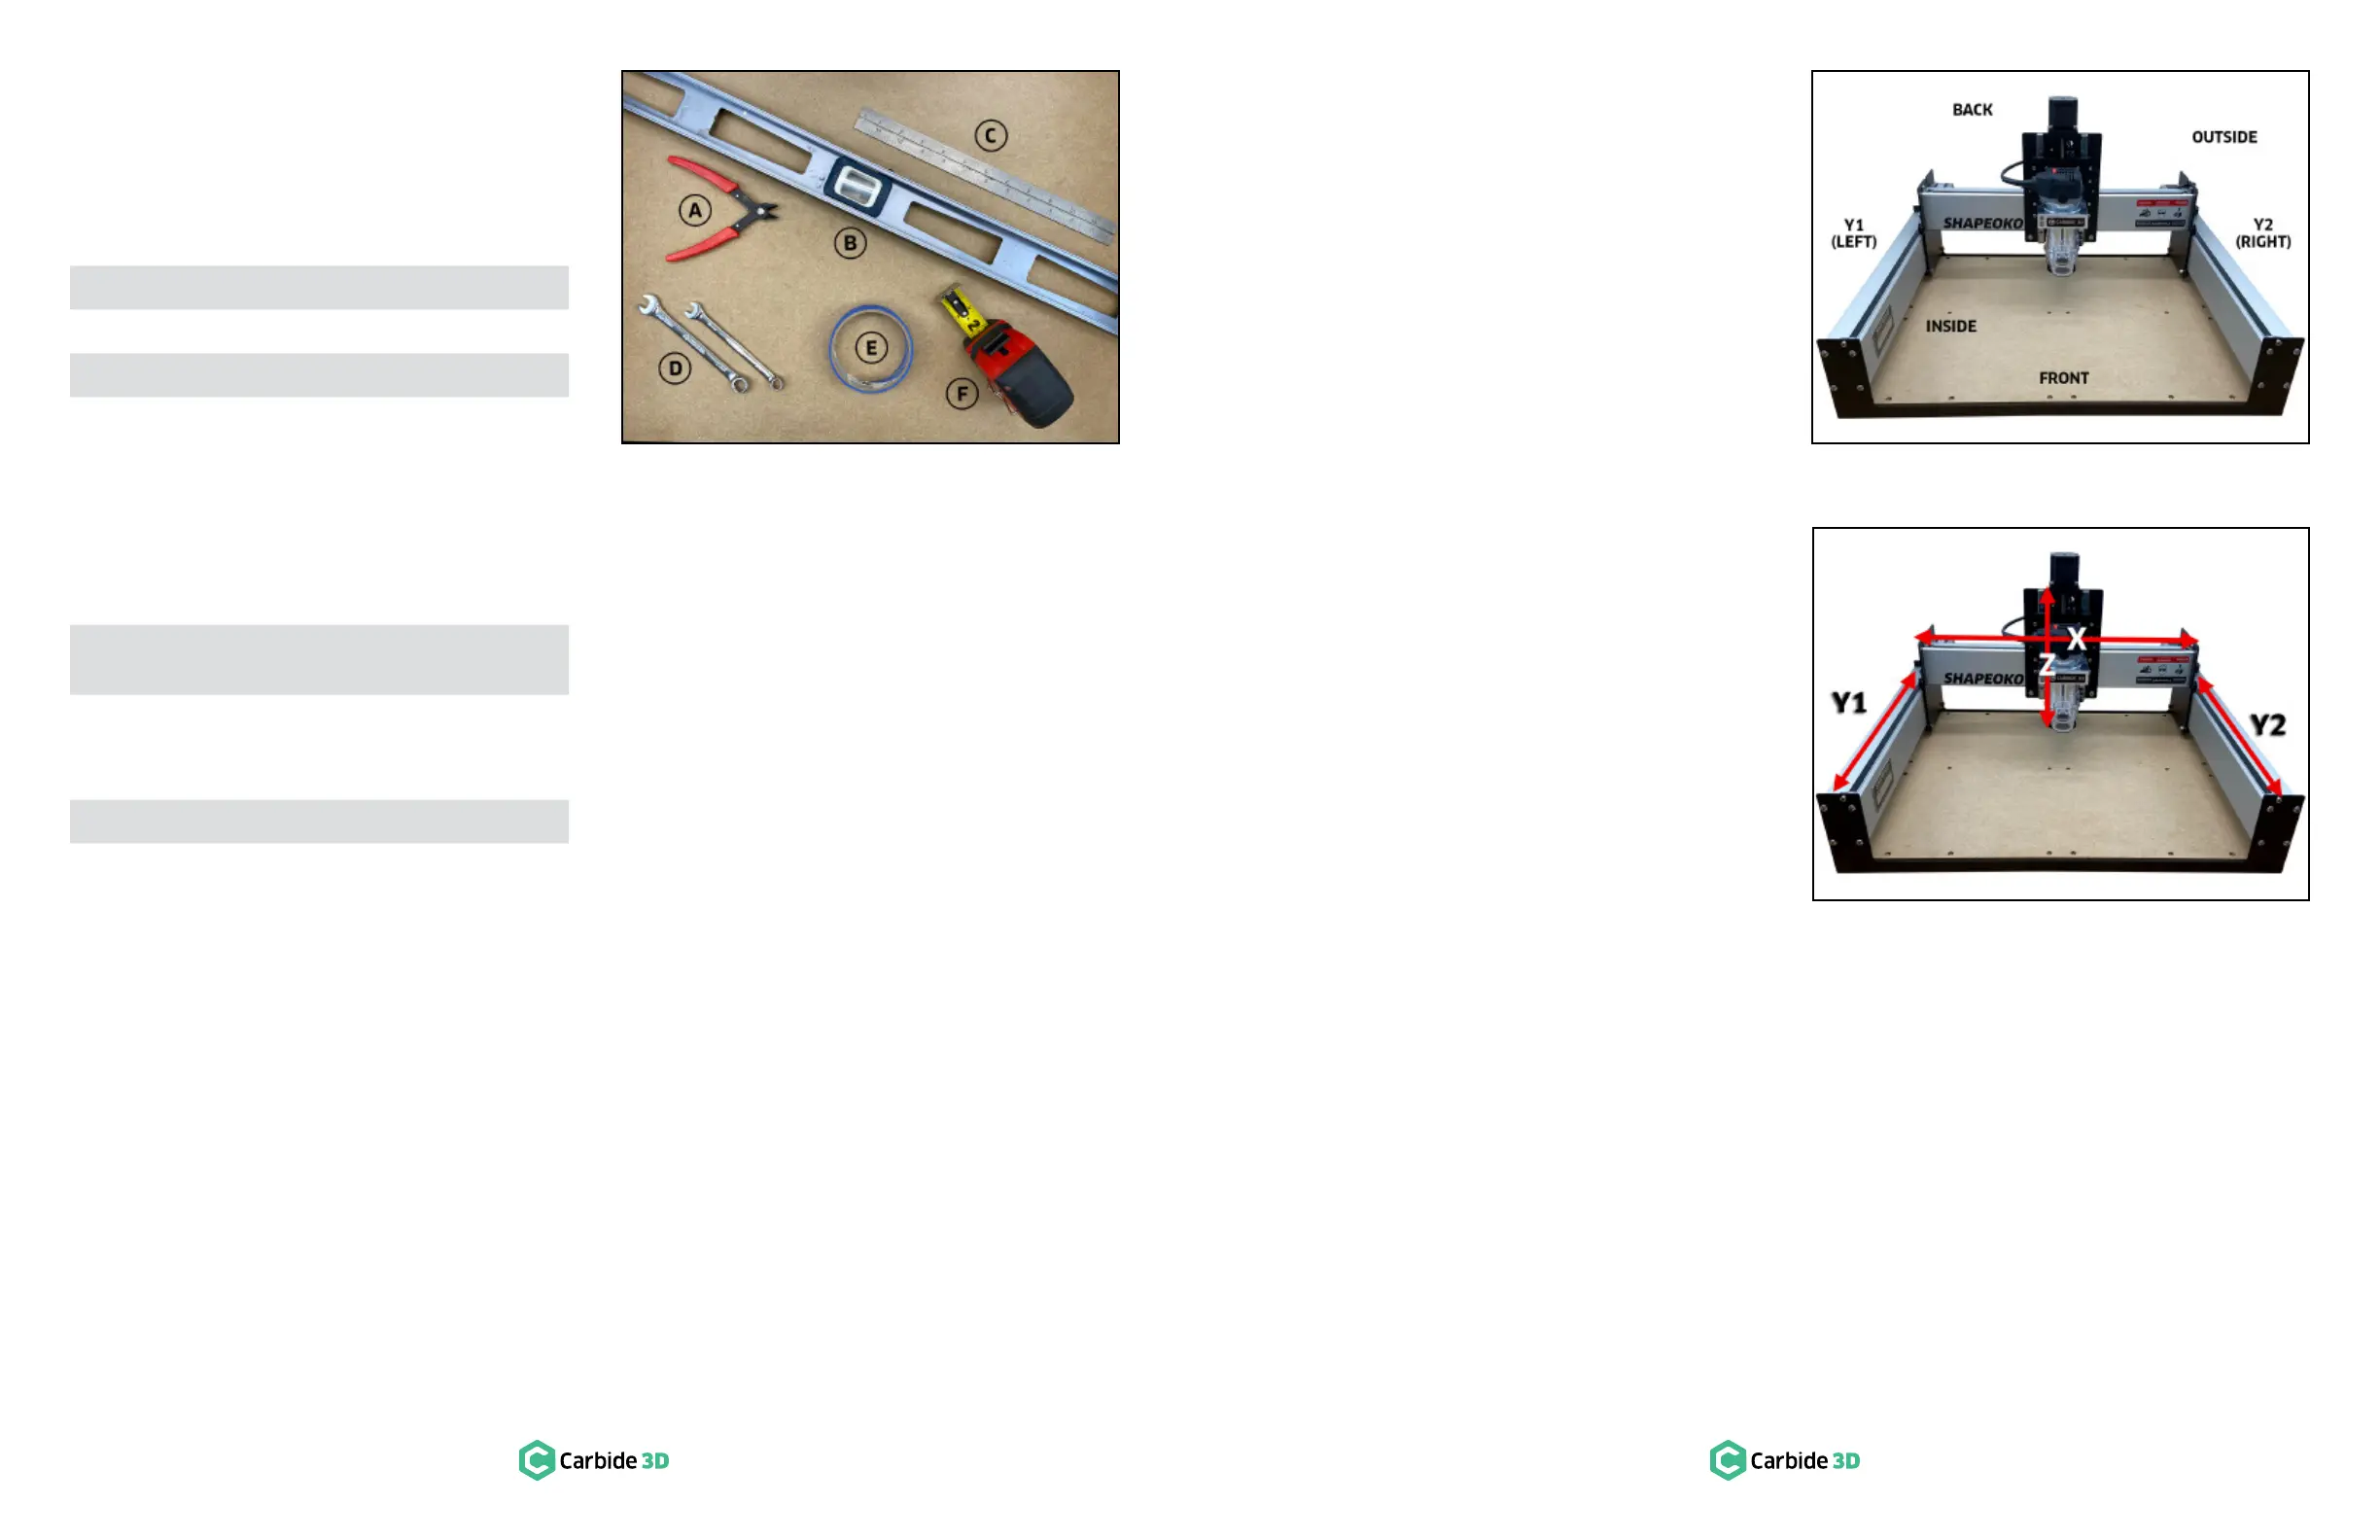
The following tools are not included in your
Shapeoko kit, but are required for assembly. See
Figure1‑11:
Item Description Qty
A Flush Cut Pliers or Scissors 1
B 1
C Ruler 1
Recommended Tools
The following tools are recommended for assembly,
but not included. See Figure1‑11:
Item Description Qty
D
8 and 10mm Combination
Wrench
2
E
Easy-Peel Masking Tape (e.g.
blue painter’s tape; nothing that
1
F Tape Measure 1
Before You Begin Assembly
This guide contains many instructions with a
directional reference, such as: left, right, front,
back, rear, inside, outside, etc.
standing in front of, and looking at, the machine as
shown in Figure1‑12
of the machine.
familiarize yourself with the machine’s directional
and down. See Figure1‑13.
Figure1-11 Figure1-12
Figure1-13