8200-M119-O1 Rev B 2XX-OU Installation 1
INSTALLATION
To Begin Installation
1. Unplug the indicator AC power cord from the AC socket-outlet.
2. Remove the three acorn nuts securing the Battery Access Cover to the bottom of the
indicator and then remove the battery tray on the Model 215 or the battery (if equipped) on
the Model 210.
3. After removing the battery tray or battery, remove the 12 acorn nuts securing the back
panel to main housing, and then loosen a gland connector for the Light Bar cable.
4. Lift the back panel from the main housing, taking care not to stretch the cable and wires
between the panel and main housing. Lay the back panel on the workbench next to the
indicator.
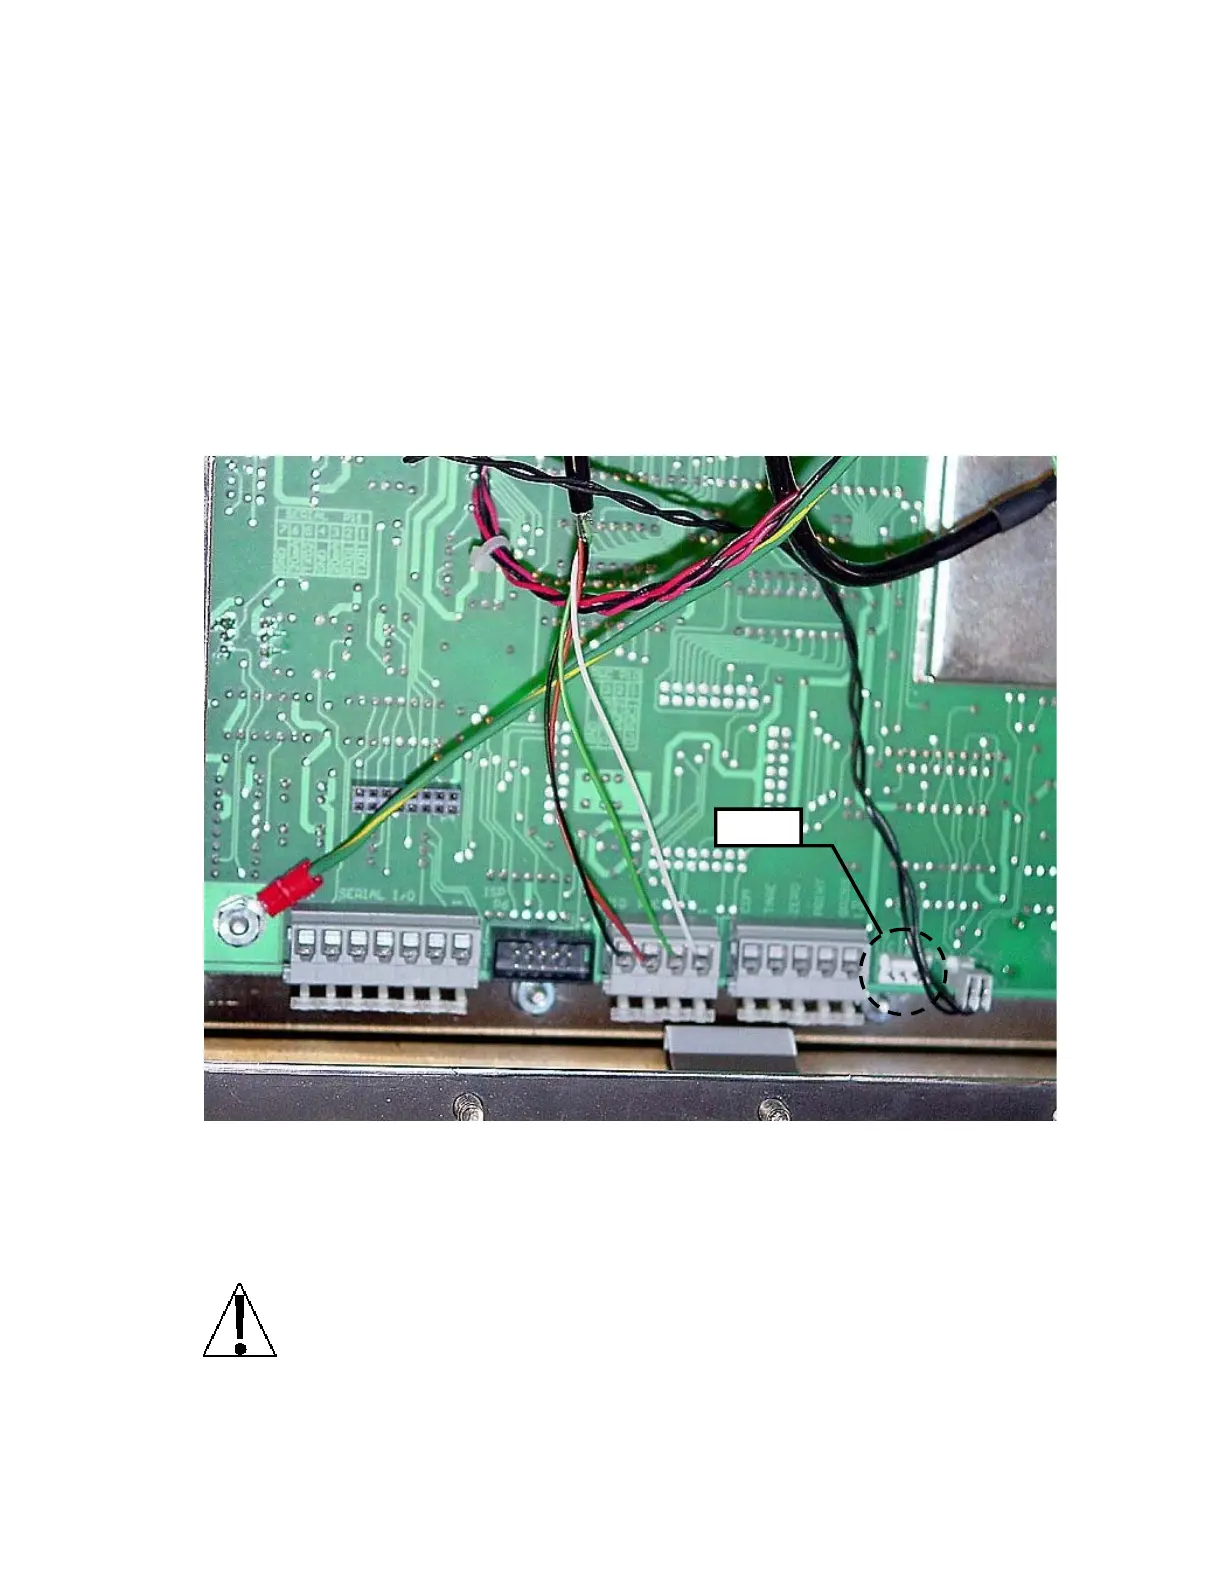
5. On the indicator main board, locate the IIC P8 connector.
6. Note that on the 215 indicator, the battery charger is connected to the IIC bus connector.
Disconnect the battery charger cable coming from the power supply cover on the back
panel. This will disable the charger.
NOTE: Battery charging and the 2XX-OU are mutually exclusive. Only one can
work at a time in the 215 indicator.
IIC P8

 Loading...


