10
ENG
ir33plus +0300028EN rel. 1.1 - 05.05.2017
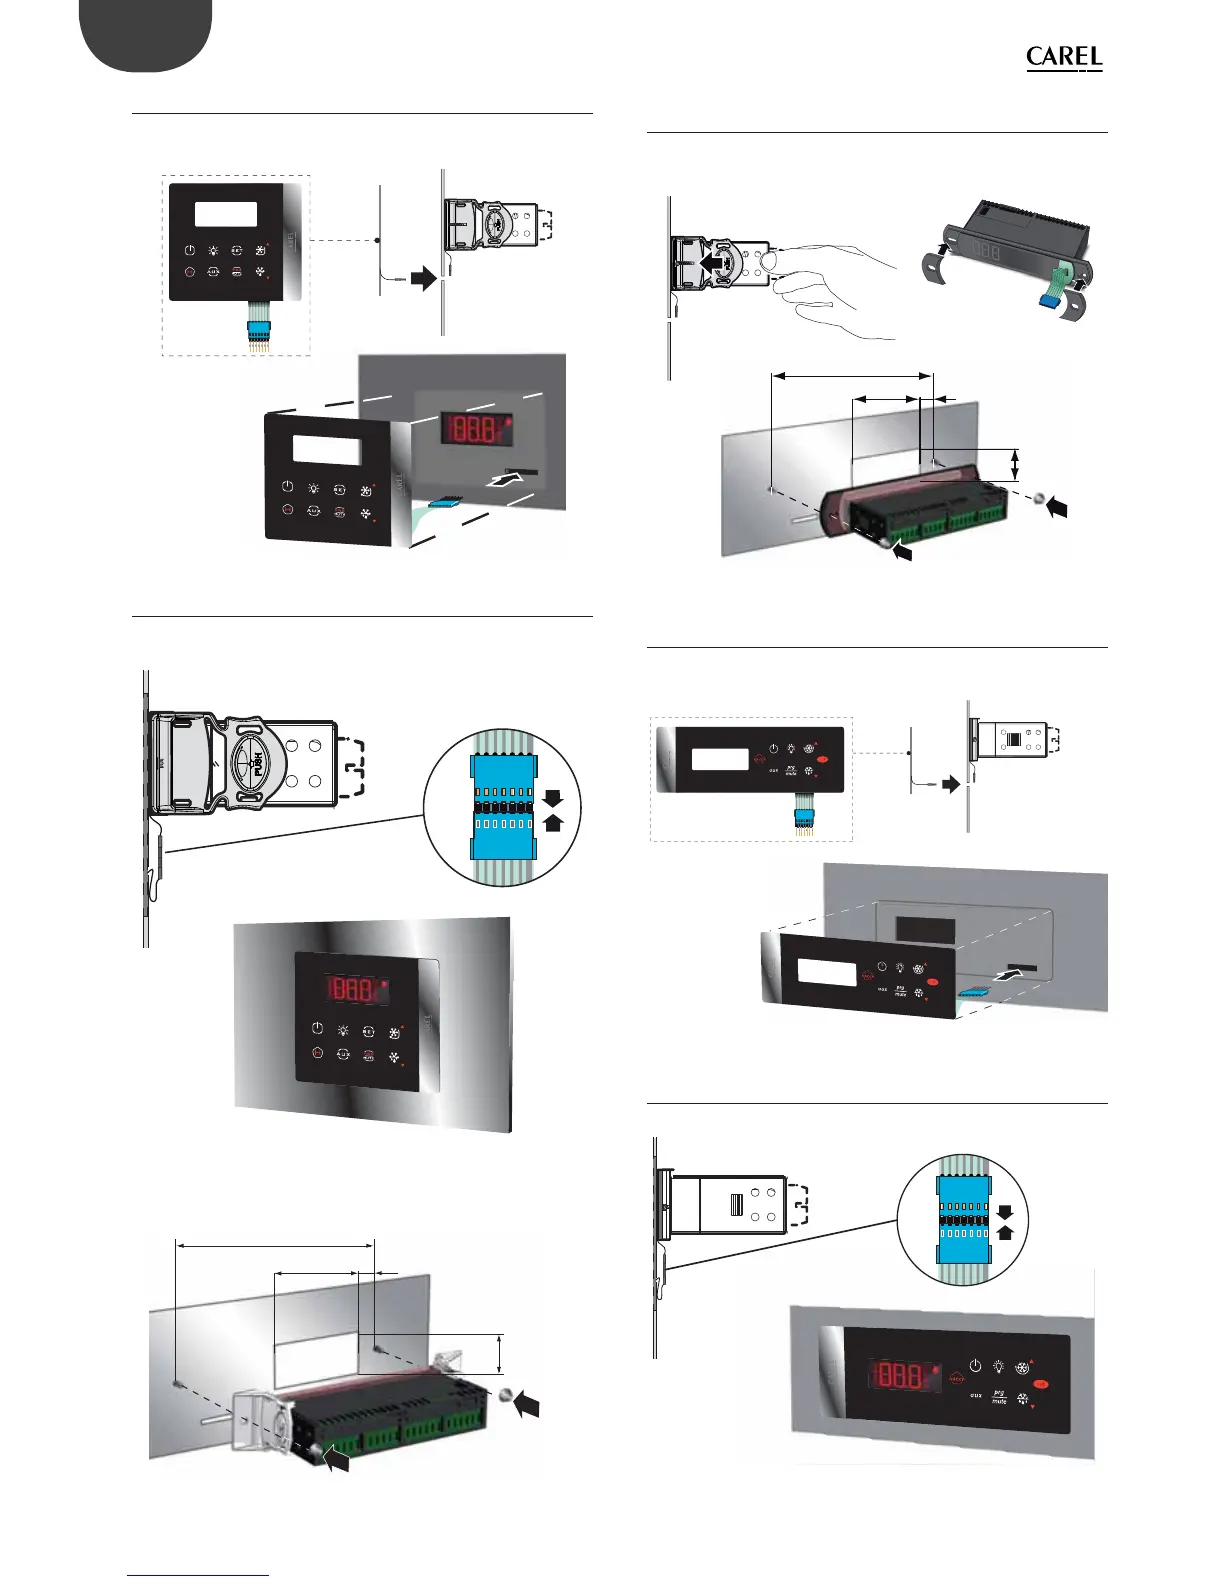
STEP 2
Apply the side fastening brackets to the controller and use the screws to
fasten it to the panel.
Fig. 2.h
STEP 3
Insert the ribbon cable in the opening, attach the connectors and apply
the membrane keypad.
Fig. 2.i
ir33+ wide, ir33+ small wide
Installation similar to ir33+.
165 mm
21 mm
55 mm
26,1 mm
Fig. 2.j
easy wide, easy small wide
STEP 1
Apply the two covered brackets to the controller. Drill the holes with
the spacing shown in the gure and make the opening for inserting the
ribbon cable. Two screw studs must be tted inside the panel.
165 mm
21 mm
from 25 to 26 mm
from 53,5 to 55,5 mm
Fig. 2.k
STEP 2
Fasten the controller to the panel using the nuts and attach the
connectors.
Fig. 2.l
STEP 3
Insert the ribbon cable in the opening and apply the membrane keypad.
Fig. 2.m
 Loading...