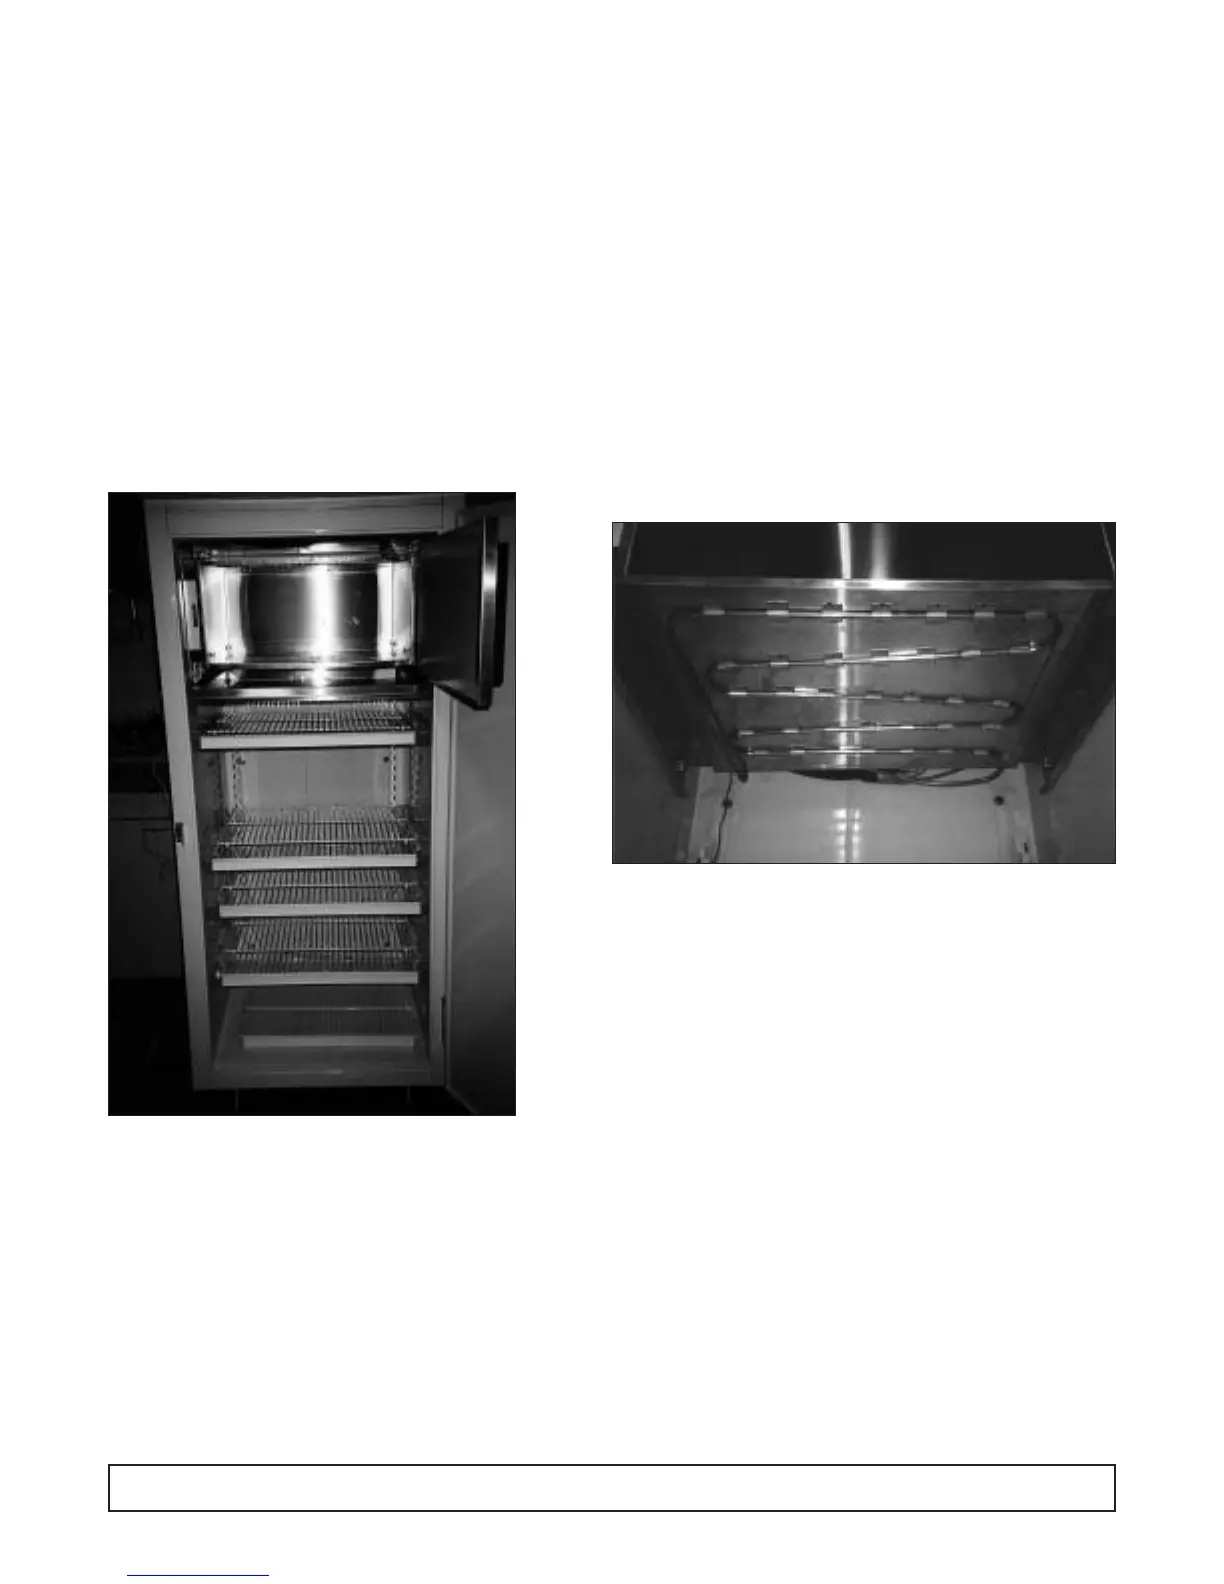
EVAPORATOR LAYOUT
This cabinet is of standard design with the exception
of a freezer compartment located at the top interior of
the cabinet - “A”.
Depending on the application and number of door
openings, this cabinet will need to be manually
defrosted. A stainless steel pan has been provided to
collect the water during a manual defrost.
TO DECONTAMINATE
Should more extensive cleaning and decontamination
be necessary, the freezer door can be removed and the
evaporator assembly pivoted down for complete access
to the cabinet interior. The seam of silicone rubber
sealant may also be removed and replaced if needed.
TO REMOVE FREEZER DOOR
1. Open freezer door and remove top thumbscrew
securing hinge support bracket to the cabinet wall.Tilt
bracket forward and lift door off hinge pin.
2. Remove second fastener and hinge support bracket.
TO TILT FREEZER EVAPORATOR
ASSEMBLY DOWN
1. Pull tray and remove it from under freezer compart-
ment.
2. Remove freezer door.
3. Remove thumbscrews, lower left and right front side
of evaporator freezer interior.
4. Carefully swing down front edge of evaporator freez-
er assembly for full access to back of freezer and
upper interior cabinet walls. Thermostat bulb may
have to be disconnected.
5. Reverse process to reassemble.
NOTE: Door may be hard to open for a short period after closing.
Wait a few seconds to allow interior air pressure to balance.
DEFROSTING AND CLEANING
To delay the need for a complete defrost, a plastic
scraper may be used to scrape frost off of evaporator
freezer surfaces.
However, a complete defrost will be required periodi-
cally. To defrost, perform the following:
1. Unload product from cabinet.
2. Turn master power supply switch to “OFF,” and
unplug power supply plug.
3. Collect defrost water in tray under evaporator
freezer. A pan of warm water set in the freezer, or
a fan blowing into it, will speed the process.
4. Wipe all freezer and drain tray surfaces clean.
Let it dry.
5. Remove shelves and shelf standards if necessary
to wipe down and dry refrigerator compartment.
6. Return all components; plug in power supply cord;
turn master supply switch to “ON.”
7. Once cabinet has attained desired temperature
reload cabinet with product.
AA
AA
66 EVAPORATOR LAYOUT