FB, FE, FF1E, FFM, FG, FH, FJ, FMA, FT, FV, FX, FY, FZ, F54, PF: Service and Maintenance Instructions
Manufacturer reserves the right to change, at any time, specifications and designs without notice and without obligations.
2
Units are designed for upflow application only. Local codes may linit
this free-air-return type unit to installation in single-level applications.
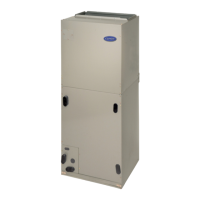
Fan Coil Description and Troubleshooting
FY5, FH4, PF4 (even sizes) and FF1E (even sizes)
Fan Motor
The motor is two or three speed direct drive. High-speed lead is black,
low-speed lead is red, and common lead is yellow. Be sure proper blower
speed has been selected.
The motor is turned on through two different routes. The first occurs
when thermostat calls for the fan in cooling, heat pump, or fan-only
mode. A 24VAC signal is sent to relay, causing relay to close its
normally open contacts, turning fan on.
The second occurs when there is a call for electric heat. A 24VAC signal
is sent to heater sequencer/relay, causing it to close, directing 230V
through the normally closed contact of fan relay, turning fan on. The fan
remains on until sequencer/relay opens.
If motor does run, test motor for an open winding or a winding shorted to
motor case. If either is present, replace motor.
Electric Heater Service
Service can be completed with heater in place. Shut off power before
servicing.
Limit Switch
Refer to the (Electric Heater Function and Troubleshooting on p24)
section of this manual.
Sequencer
Refer to the (Electric Heater Function and Troubleshooting on p24)
section of this manual.
Transformer
A 40-VA transformer supplies 24V power for control circuit. Check for
208/230V on primary side of transformer. If present, check for 24V on
secondary side.
NOTE: Transformer is fused. Do not short circuit.
Fan Relay
Relay coil is 24V. Check for proper control voltage. Replace relay if
faulty.
Cleaning or Replacing Refrigerant Flow-Control Device
Refer to Fig. 28 and instructions given in (Piston Body Cleaning and
Replacement on p30).
The refrigerant flow-control device is protected by a wire mesh strainer.
It is located inside the 3/8-in. liquid tube at field braze joint next to
flow-control device. Access to strainer is through field braze joint.
Sequence of Operation
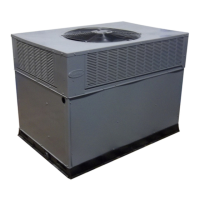
Condensing Unit
COOLING—When thermostat calls for cooling, the circuit between R
and G is complete and single-pole single-throw relay FR is energized.
The normally open contacts close causing blower to operate.
The circuit between R and Y is also complete. This completed circuit
causes contactor in outdoor unit to close which starts compressor and
outdoor fan.
HEATING—When thermostat calls for heating and FAN switch is set
on AUTO, the circuit between R and W is complete. The heater
sequence SEQ is energized which closes contacts of relay. There will be
a time delay. This completed circuit energizes all heating elements HTR
and blower motor.
Heat Pump
COOLING—On a call for cooling, the thermostat makes circuits R-O,
R-Y, and R-G. Circuit R-O energizes reversing valve, switching it to
cooling position. Circuit R-Y energizes contactor starting outdoor fan
motor and compressor. Circuit R-G energizes indoor unit blower relay
starting indoor blower motor.
When thermostat is satisfied, its contacts open de-energizing contactor
reversing valve and blower relay. This stops compressor and fan motors.
HEATING—On a call for heating, the thermostat makes circuits R-Y
and R-G. Circuit R-Y energizes contactor starting outdoor fan motor and
compressor. Circuit R-G energizes indoor blower relay starting blower
motor.
Should temperature continue to fall, R-W circuit is made through
second-stage room thermostat bulb. Circuit R-W energizes a sequencer
bringing on supplemental electric heat.
When thermostat is satisfied, its contacts open de-energizing contactor
and sequencer. All heaters and motors should stop.
CES013003-00, 01 (HK61EA002, HK61EA006) Control
Boards
This section examins the functional operation of the PCB components.
Printed Circuit Board (PCB) Component
Layout of the actual PCB is depicted inFig. 1 and Fig. 2.
1. The low-voltage stripped leads are used to connect the 24V side of
transformer to indoor thermostat and outdoor section.
2. A 5A fuse is used to protect the low-voltage transformer secondary.
3. The fan relay is controlled by thermostat and turns fan on and off.
4. A plug is used as the connection for PCB power and electric
heaters. Note the pin numbers on plug.
5. A time-delay relay circuit keeps fan motor running for
approximately 90 seconds after G is de-energized. The time-delay
can be defeated by cutting jumper JW1.
Unit Functions
Transformer
1. Proper Wiring of Transformer Primary or High Side
Yellow wire from Molex plug is wired to C terminal on transformer
and black wire from PCB relay (normally-open) terminal is wired
to 208V or 230V terminal on transformer. Units are factory wired at
230V terminal.
2. Proper Wiring of Transformer Secondary or 24V Side
Red wire of transformer is wired to T terminal on PCB and brown
wire of transformer is wired to C terminal on PCB.
NOTE: T terminal on PCB is used to protect the transformer. T terminal
is connected through the fuse to R terminal on PCB.
Indoor Fan
1. Wiring
Indoor fan motor yellow lead is wired to C terminal on transformer.
The red, blue, or black speed lead is wired to SPT terminal on fan
relay part of PCB. Units are factory wired on medium speed (blue
lead connected).
NOTE: Unused fan speed leads must be capped or taped off to prevent
direct short to cabinet surface.
2. Functional Control
a. Thermostat and Relay Control
When thermostat calls for the fan in cooling, heat pump, heating,
or fan-only mode, a 24VAC signal is sent to relay. This causes
WARNING
!
ELECTRICAL OPERATION HAZARD
Failure to follow this warning could result in personal injury or death.
Before installing or servicing unit, always turn off all power to unit.
There may be more than one disconnect switch. Turn off accessory
heater power if applicable. Lock out and tag switch with a suitable
warning label.