Section
3
Rear Panel Connections
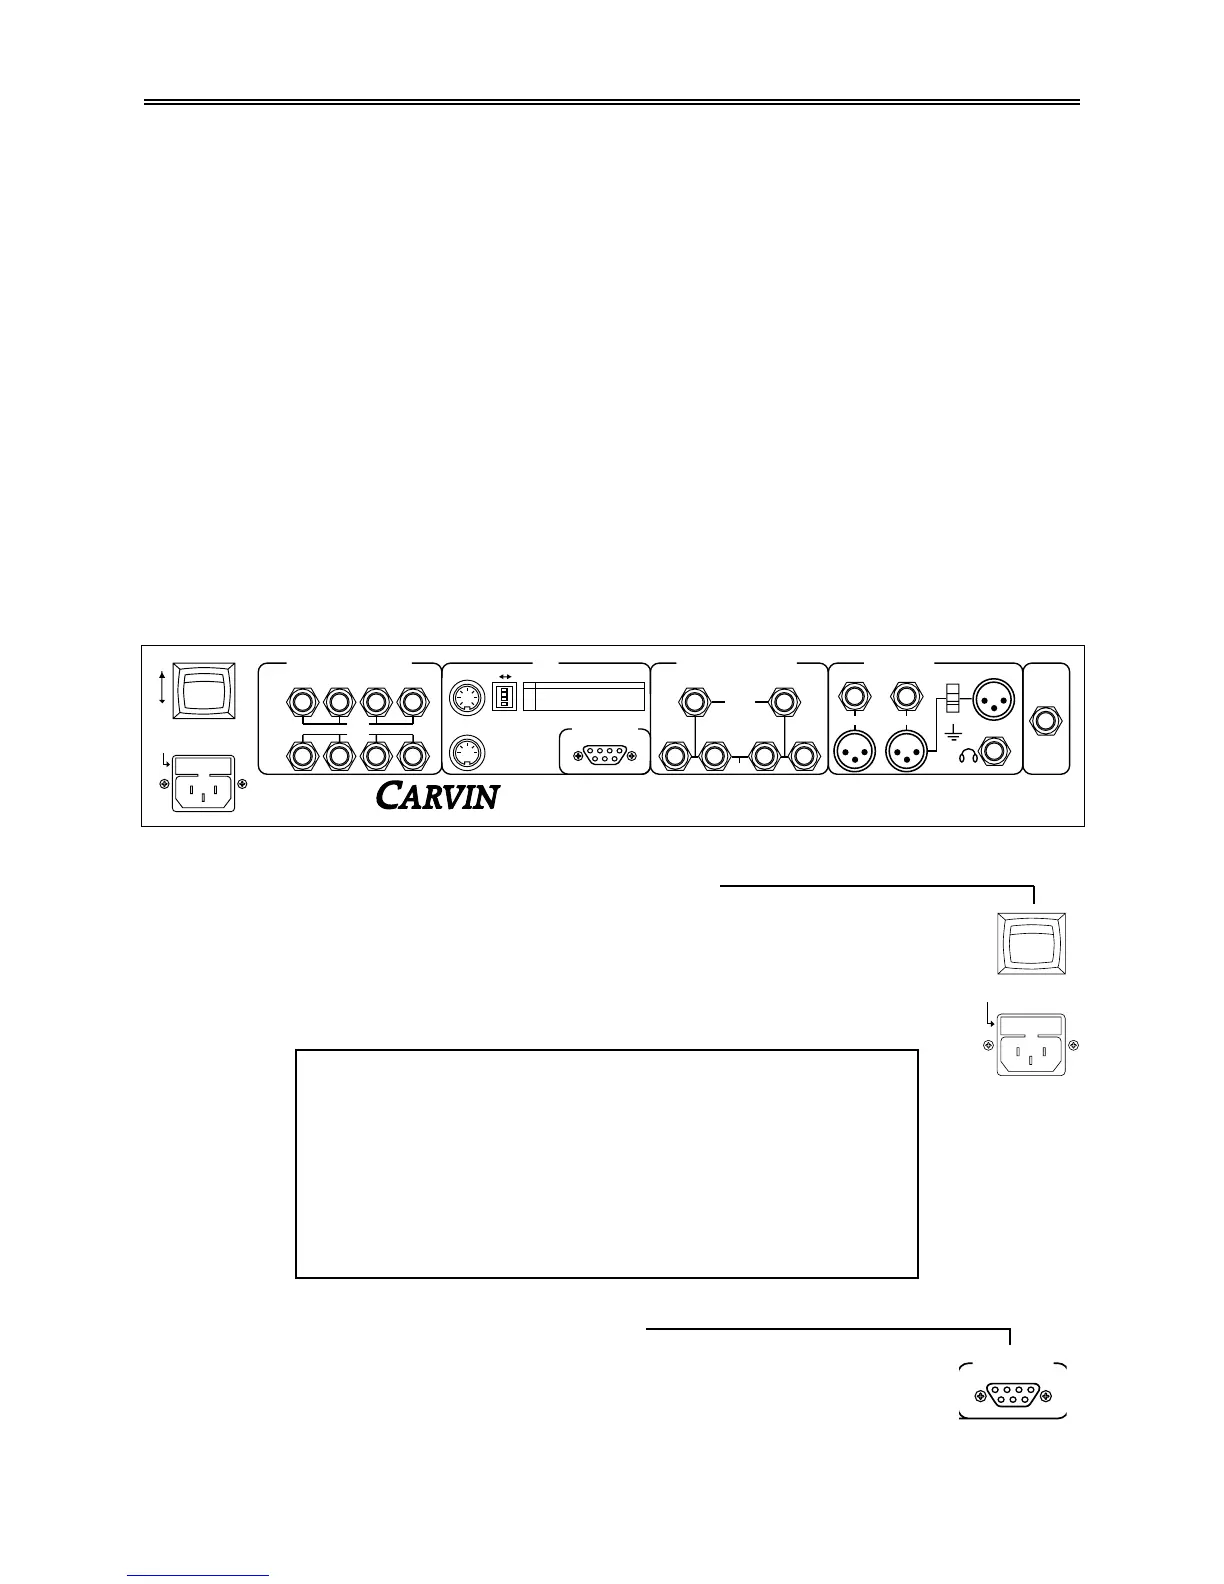
3.0 The Rear Panel Layout
The rear panel is organized with power switch and line cord connector at the far left. The
connections from left to right are: footswitch, MIDI control, channel effects loops, master
effects loops, preamp outputs, and input.
3.1 Power Switch, Line Selector, and Fuse
Use the power switch to turn the preamp on and off. Even though the Quad X-
Amp is a tube preamp, it does not require a standby switch because it does not
use the high power tubes required for power amps. Rather, the Quad X-Amp
uses 12AX7 tubes which run fairly cool and have a very long life.
3.2 The FS-77 Footswitch Connector
This D-9 connector is used to attach the FS-77 footswitch. Connect and
disconnect the footswitch only when the power is turned off. Connect no other
cables here as the Quad X-Amp employs power supply voltages that could
damage other gear if inadvertently connected here.
Quad X-Amp Rear Panel Connections Section 3
3-1
ON
FUSE
1155 Industrial Ave., Escondido, CA, 92029
MADE IN THE
USA
120V 0.5A
240V .25A
120-240 VAC
50-60 Hz
POWER
CH 1 CH 2 CH 3 CH 4
SND
RTN
SND
RTN
LEFT RIGHT
EXT. REVERB MASTER
PHONES
Quad X-Amp
LIFT
GND
MONO
INPUT
PRE AMP OUTMASTER EFFECTS LOOPSCHANNEL EFFECTS LOOPS MIDI
CAUTION— TO PREVENT ELECTRICAL SHOCK DO NOT DEFEAT THE SAFETY GROUND ON THE POWER CORD. DO
NOT REMOVE COVER. NO USER-SERVICEABLE PARTS INSIDE. WARNING - TO PREVENT FIRE OR SHOCK HAZARD
DO NOT EXPOSE TO RAIN OR MOISTURE. DO NOT INSTALL A WRONG FUSE VALUE.
LEFT RIGHT
OFF
(MONO)
LEFT
(MONO)
BAL.
FRONT INPUT
DEFEATS
REAR INPUT
RIGHT
FOOTSWITCH
FS-77
IN
THRU
POWERED MIDI IN
PIN 6=GND
PIN 7=+15VDC
SW
1
2
3
4
1
1
1
1
1
2
0
1
1
1
3
1
0
1
1
4
0
0
1
1
5
1
1
0
1
6
0
1
0
1
7
1
0
0
1
8
0
0
0
1
9
1
1
1
0
10
0
1
1
0
11
1
0
1
0
12
0
0
1
0
13
1
1
0
0
14
0
1
0
0
15
1
0
0
0
16
0
0
0
0
MIDI CHANNEL01
How to Set the Amp for 240VAC Power
The fuse and the 115/230volt line switch are built into the AC line
cord connector. To set the amp to operate from 230VAC (50 or
60 Hz) power first unplug the power cord and remove the fuse
holder. Turn the fuse holder over and insert it so that it reads
230V right side up. The amp is now set to operate from 230 VAC.
Fuse Values: 120 VAC : 1/2 Amp
240 VAC : 1/4 Amp