Figure 172
Figure 173
Figure 174
- Plac e the gasket (1) over the block.
The choice of the gasket’s thickness shall be made in
consideration of the cy lin der protrusion measured with
respect to the block’s upper surface.
Figure 175
76153
!
Verify that the engine block stand is clean.
Do no t grease the gasket. It is recommended to keep
the gasket inside packaging until assembly to the
cylinder head.
Gasket assembly shall be made following the
direction of wording printed on the gasket itself so
that this will be readable as indicated in the picture.
74178
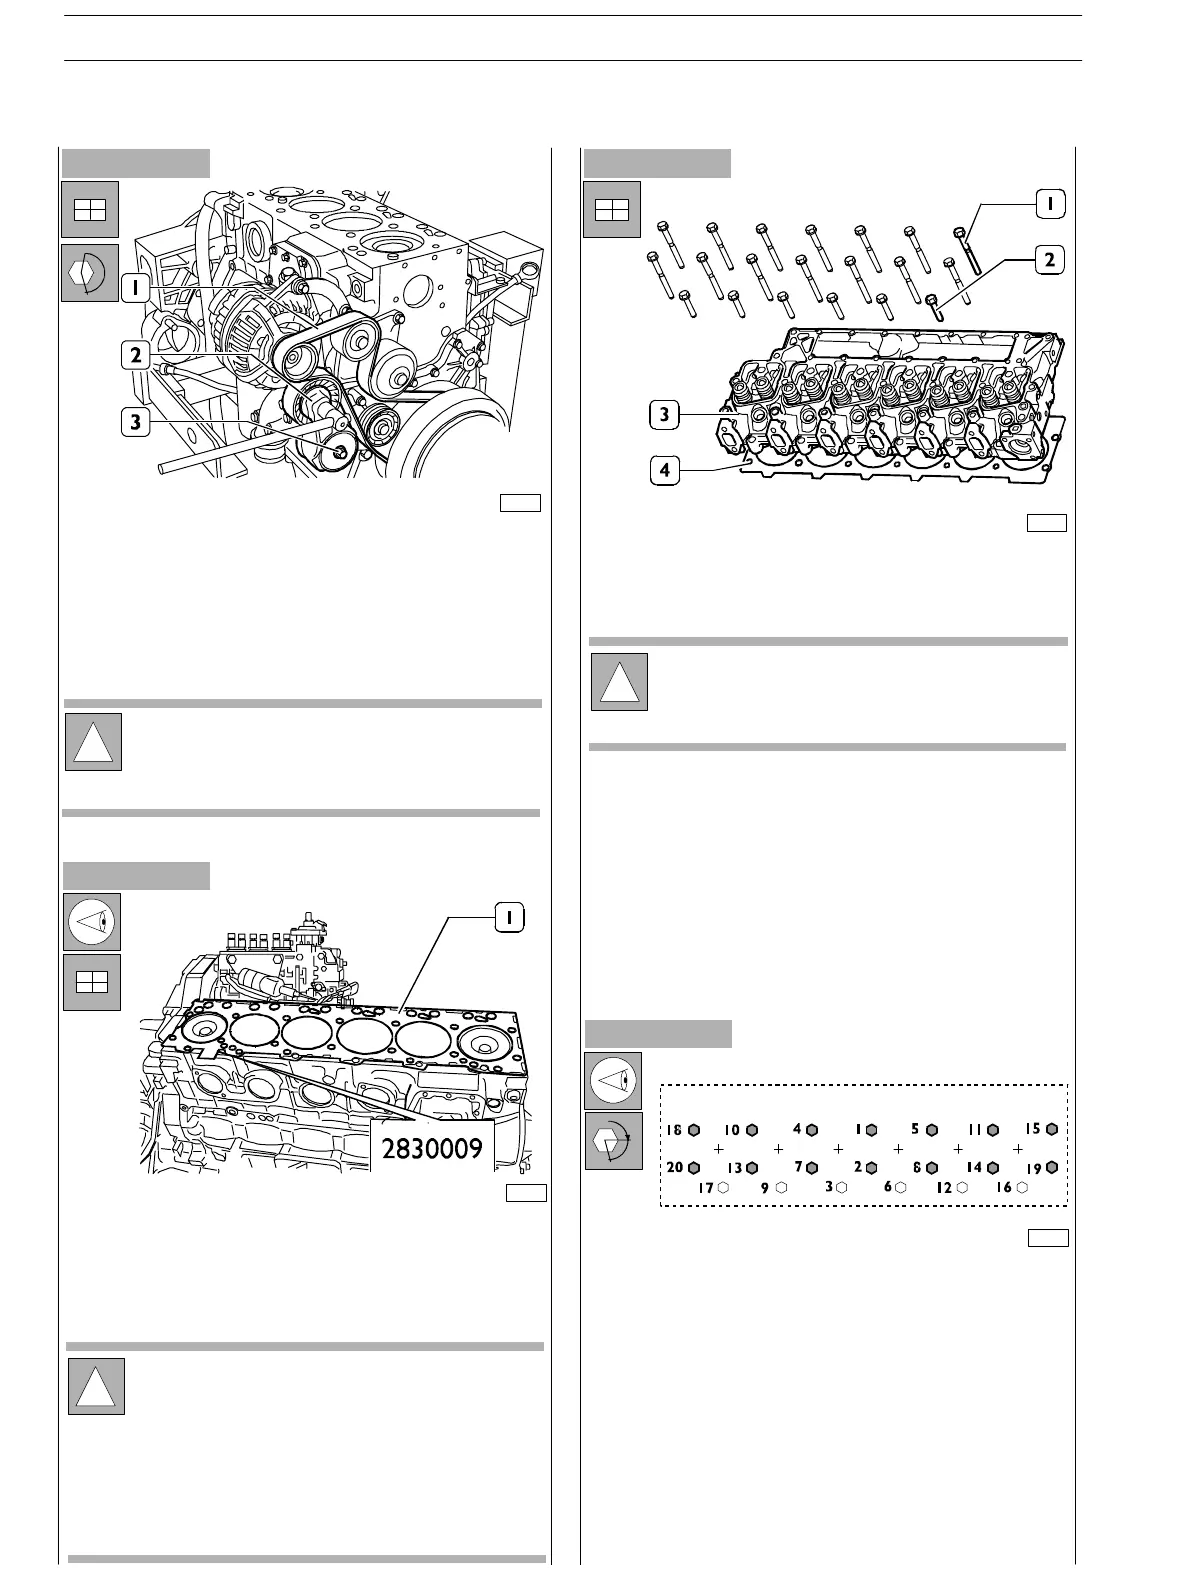
- Refit the automatic belt tensioner (2).
- Tighten the screw (3) to the specified torque.
- Turn the automatic belt tensioner (2) to fit the belt (1)
on pulleys and guide rollers.
- Assemble alternator safety gu ard.
!
In case the same belt priory removed is assembled
again, proceed examining it carefully to check th ere
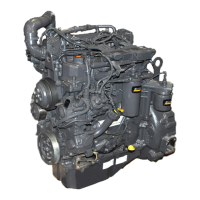
- Place the head (3) over the block and insert screws (1)
and (2).
76152
!
If the valves have been removed from the head, it is
necessary to assemble them before assembling the
head itself on the engine block.
α
76214
- Lubricate cylinder head bolts an d install to head.
- Bolts must be torqued using stitching pattern starting
with the c entre bolts and moving out. Bolts to be
torqued in stages: all bolts torqued to snug torque, then
90 degrees rotation for all bolts. Then a further 90
degrees for the M12 x 140 and M12 x 180.
M12 x 70 50 Nm + 90 deg’s
M12 x 140 40 Nm + 180 deg’s
M12 x 180 70 Nm + 180 deg’s
SECTION 3 − DUTY − INDUSTRIAL APPLICATION
56
E NG I NE S
ED. FEBUARY 2003
zs