17
EN
5.
Set the tape cartridge in place.
•
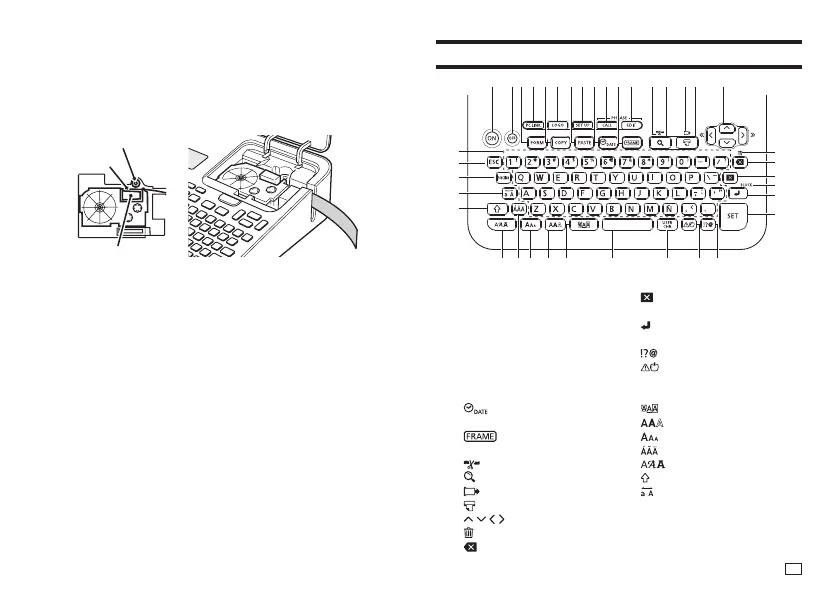
Taking care not to pull on the ink ribbon, pass the tape and ink ribbon
between the print head and the rubber roller (illustration below). Press
down on the tape cartridge until it clicks securely into place.
Important!
An improperly loaded tape cartridge can cause the ribbon to break.
Rubber roller
Tape
Print head
6.
Close the tape compartment cover.
•
Press down on the cover until it clicks securely into place.
•
Do not pull with excessive force on the tape or try to force tape back in
while the tape cartridge is loaded in the printer.
Removing a Tape Cartridge
1.
Press OFF to turn off the printer.
2.
Press the tape compartment cover open button and open the cover.
3.
Grasp the left and right sides of the tape cartridge with your fi ngers and
lift straight up.
•
The print head is hot immediately after printing, so wait until it is cooled
down before removing the tape cartridge.
Main Key Functions
①②③④⑤⑥⑦⑧⑨⑩⑪⑫ ⑬⑭⑮⑯ ⑰
⑱
⑲
⑳
㉑
㉒
㉓
㉔㉕㉖㉗㉘㉙㉚㉛㉜
㉝
㉞
㉟
㊱
㊲
①
ON
⑳
(Delete)
②
OFF
㉑
BLOCK
③
FORM
㉒
(Line break)
④
PC LINK
㉓
SET
⑤
COPY
㉔
(Symbol)
⑥
LOGO
㉕
(Illustrations)
⑦
PASTE
㉖
USER CHR (User characters)
⑧
SET UP
㉗
(Space)
⑨
(Date)
㉘
(Effect)
⑩
CALL (Phrase memory)
㉙
(Style)
⑪
㉚
(Size)
⑫
EDIT (Phrase memory)
㉛
(Accent)
⑬
(Cut)
㉜
(Font)
⑭
(Preview)
㉝
(Shift)
⑮
(Feed)
㉞
(Caps)
⑯
(Print)
㉟
FUNCTION
⑰
(Arrow keys)
㊱
ESC
⑱
(All Text Clear)
㊲
(character keys)
⑲
(Back space)