– 21 –
Removing the console PCB (M901-CNA1/CNA2, M901-LCA1)
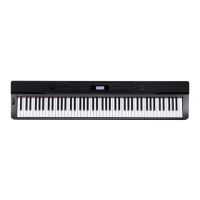
1. Undo 13 screws on the M901-CNA1 PCB.
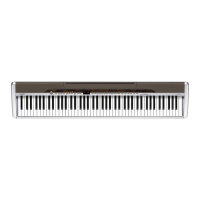
2. Undo 12 screws on the M901-CNA2 PCB.
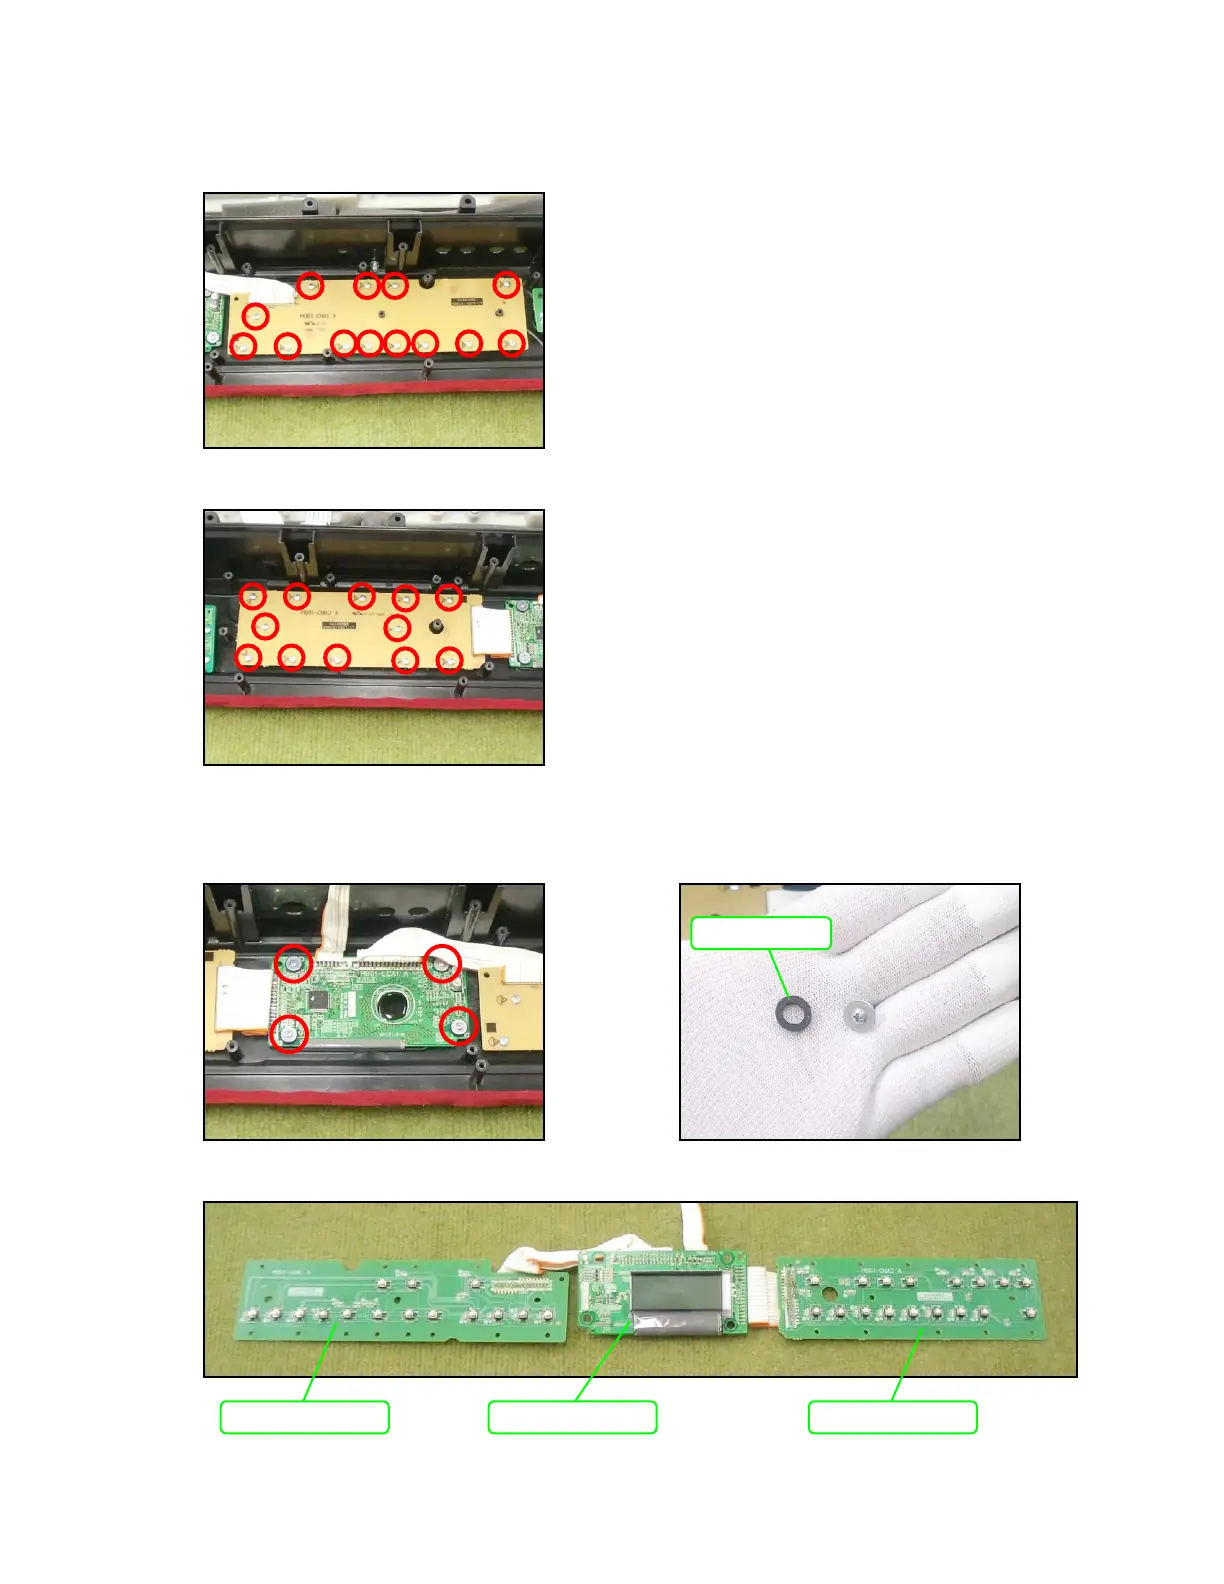
3. Undo four screws on the M901-LCA1 PCB.
NOTE: The spacer may come loose in this step. Be sure to place the spacer back in place when
reassembling.
4. Remove the M901-CNA1 PCB, M901-CNA2 PCB and M901-LCA1 PCB.
Spacer
M901-CNA1 PCB M901-LCA1 PCB M901-CNA2 PCB
 Loading...