TROUBLE SHOOTING (GAS SAFE ENGINEER ONLY)
10
1. The Piezo will not spark.
Check: The battery in the remote handset. The remote control handset generates an infrared signal
t
hat will be received by the sensor situated at the front of your fire. The signal requires a direct
line of sight from the handset to the fire sensor. Ensure that the bulbous side of the I.R sensor
is facing the front and there are no obstructions.
The controls are powered by 6 x AA batteries. When the power becomes low a beeping
s
ound will continue every time the fire is in use. Please replace with good quality Alkaline or
L
ithium 6 x 1.5V AA.
If the electrode is cracked or broken - Replace the pilot assembly.
If the HT lead is shorting out on the burner body - Locate where the short is occurring, isolate
and/or re-route the lead.
I
f the HT unit/lead is faulty - Replace as necessary.
Note: The remote control system consists of four main replacement component parts:
a
. Thermocouple and pilot. b. Motorised gas control valve. c. Control panel. d. Battery pack. Please
s
ee page 12 for details of the layout including electrical connections. In order to access components
a.b and c, it will be necessary to remove the burner tray. Refer to page 11 for the breakdown.
2. The Pilot will not light (but the Piezo is sparking).
Check: If the gas is reaching the pilot - Check joints and connections.
If the pilot jet is blocked - Inspect and clean.
If the pilot is still not passing gas - Replace the pilot assembly.
3.
The Pilot lights but goes out.
Check: If the Thermocouple is loose/disconnected at the control valve - remake the connection.
If the Thermocouple is faulty - Replace.
If the Electro magnetic valve is faulty - replace valve.
4.
The Burner will not light readily from the pilot.
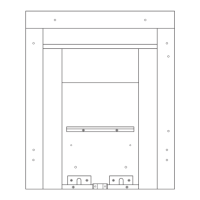
Check: If the coals are obstructing the pilot to burner path ie. Are the coals blocking the opportunity for
the pilot to light the burner - Relay the coal set as per Ceramic Component Layout Instructions.
(pages 18-19).
5.
The fire makes a roaring noise when lit.
Check: That the front coal is seated correctly and the pilot hole is positioned correctly over the pilot
assembly.
IF ANY PART OF THE PILOT ASSEMBLY IS SUSPECTED AS BEING FAULTY THE COMPONENT MUST BE REPLACED.
6. The flames appear blue (after the fire has fully warmed up). The coals/ceramic liners have soot
deposits.
Check:
That the coals have not moved from the original setting - Relay the coals as per the Ceramic
Component Layout Instructions (pages 18-19).
There may be too little/much ventilation into the room. Identify and then take steps to rectify.
7.
The flame picture is low on the high setting.
Check: For any partial blockages - Check all obvious locations for debris in pipe work and fittings.
Inlet gas pressure, both standing and working gas pressure - Identify problem and take
necessary steps to rectify.
Note: Flame pattern improves with use.
8.
Fumes enter the room when the fire is operating.
Check: Why the chimney is not drawing all the products of combustion up the flue, identify where the
problem lies and rectify, otherwise disconnect the fire and seek professional guidance.