5.2.3 Overview of CAVITAR Capture
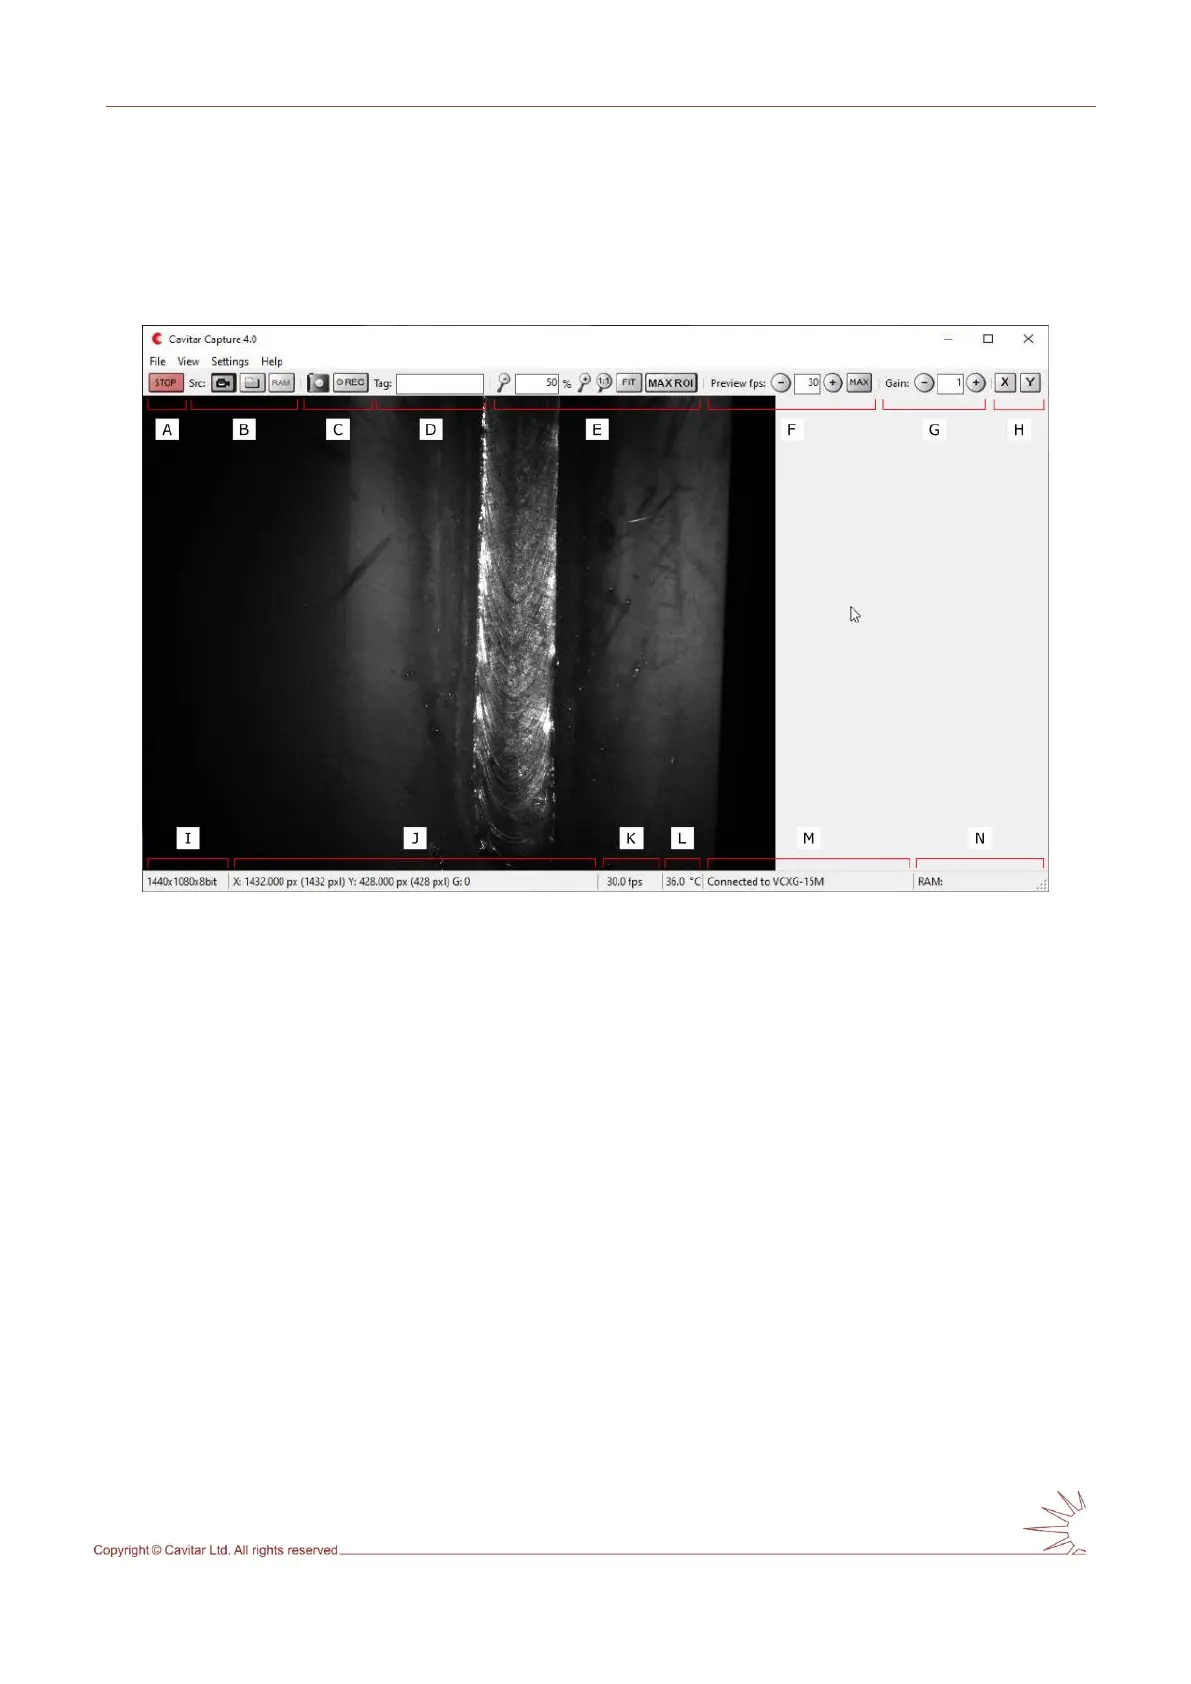
The typical graphical user interface (GUI) of CAVITAR Capture is shown in Fig. 5.10 (after
Start-button has been pressed). The actual appearance of the GUI as well as the contents of
the menus depend on the software version and selected features.
Fig. 5.10. Overview of CAVITAR Capture.
In Fig. 5.10:
A Start/Stop button (for starting and stopping image acquisition)
B Source buttons (source can be camera, hard disk or RAM)
C Snapshot button (for single snapshots) and Record button (starts recording according
to recording settings)
D Tag field (text in this field can be added to recording destination folder and file names)
E Zoom controls (for adjusting the size of the image on screen)
Note: It is also possible to set desired zoom directly from the GUI in the following way:
move the mouse cursor to the upper-left corner of the desired area → press and hold down left
mouse button → move the mouse cursor to the lower-right corner of the desired area → release left
mouse button →press right mouse button and select “Zoom”
F Preview controls (for adjusting the image refresh rate on screen)
G Gain control (for adjusting the brightness of the image)
H Guideline buttons (for adding horizontal and vertical guidelines)
I Image resolution and bit depth information
J Cursor location and the grey scale value of the pixel at cursor location
K Image refresh rate on screen (equals Camera capture rate (Section 5.2.4) if Preview fps
≥ Camera capture rate and equals Preview fps if Preview fps ≤ Camera capture rate)
L Camera temperature (this value shouldn’t exceed 55 ˚C)
M Camera connection information
N RAM usage information