17
ATTENTION:
iThe correct
"lift"
type
arc strike is only obtained by pressing
the torch button after touching the piece
to be welded with the electrode befo-
rehand.
3)
Press the "weld mode" button and
set on one of the 4 options avail-
able:
•
2 STROKE
The TIG weld cycle is
done by pressing the
torch button, while weld-
ing will stop when you
release it.
•
4 STROKE
TIG welding is done as
follows:
A)
Pressing the torch
button strikes up the
arc and the current
stays at the INITIAL
value
B)
Peleasing the torch
button will start the
SLOPE UP (if pre-
sent) and the PRIN-
CIPAL CURRENT
will take itself to
value
I
1
C)
Pressing the torch
button will start the
SLOPE DOWN (if
present) and the cur-
rent will take itself to
the FINAL value
(crater current)
D)
Releasing the button
will finish the weld
cycle.
•
CYCLE
TIG welding is done as
follows with this function
on:
• pressing the torch but-
ton will strike up the
arc and the current
stays at the INITIAL
value
• releasing the torch
button will start the
SLOPE UP (if present)
and the current will
take itself to the PRIN-
CIPAL value (
I
1
)
• pressing and releasing
the torch button for
less than 1 second,
the weld current will
take itself to the DI
CYCLE (
I
2
) value; it
will be possible to
move an infinite num-
ber of times between
the two current levels
(
I
1
,
I
2
) by repeating this
operation
• pressing the torch but-
ton and keeping it
pressed down (for
more than 2 seconds)
will start the SLOPE
DOWN (if present)
and the current will
take itself to the FINAL
value (crater current)
• releasing the torch
button will finish the
weld cycle
•
SPOT-WELDING
Spot-welding can be
done for the set time (in
seconds) by pressing
the torch button after
which the arc will auto-
matically switch off
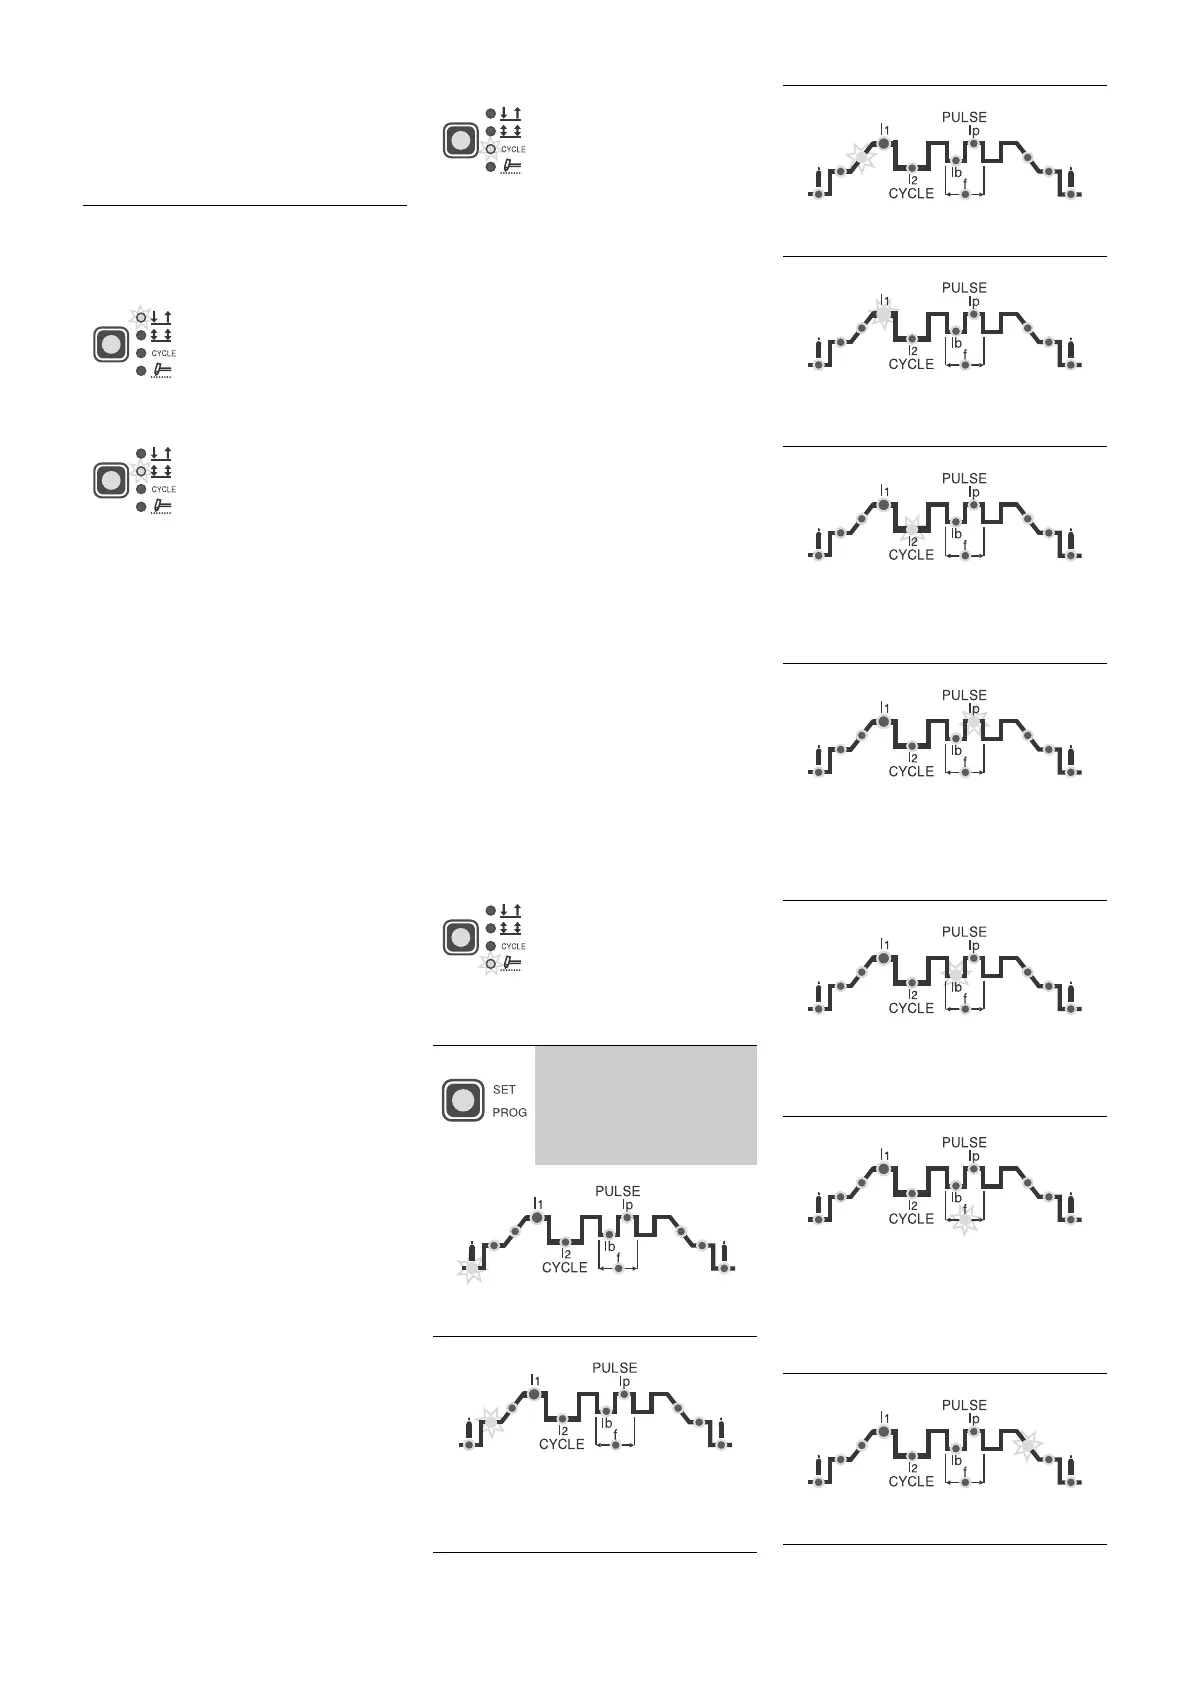
4)
The following weld
parameters can be set
by pressing the
SET/
PROG
button repeat-
edly
PRE-GAS time (0,05 ÷ 1 sec)
INITIAL weld CURRENT (5 ÷ 200A)
ATTENTION:
only programmable with
4 STROKE
or
CYCLE
functions on
SLOPE UP time (0 ÷ 5 sec)
PRINCIPAL weld CURRENT
I
1
(5 ÷ 200
A)
CYCLE CURRENT
I
2
(5 ÷ 200 A)
ATTENTION:
programmable only with
CYCLE
function on
PEAK CURRENT
I
p
(5 ÷ 200 A)
ATTENTION:
programmable only with
ON PULSE
or
EASY PULSE
functions
on
BASIC CURRENT
I
b
(5 ÷ 200 A)
ATTENTION:
only programmable with
ON PULSE
or
EASY PULSE
on
PULSATION FREQUENCY
f
(0,5 ÷ 500
Hz)
ATTENTION:
programmable only with
ON PULSE
or
EASY PULSE
functions
on
SLOPE-DOWN time (0 ÷ 8 sec)
 Loading...