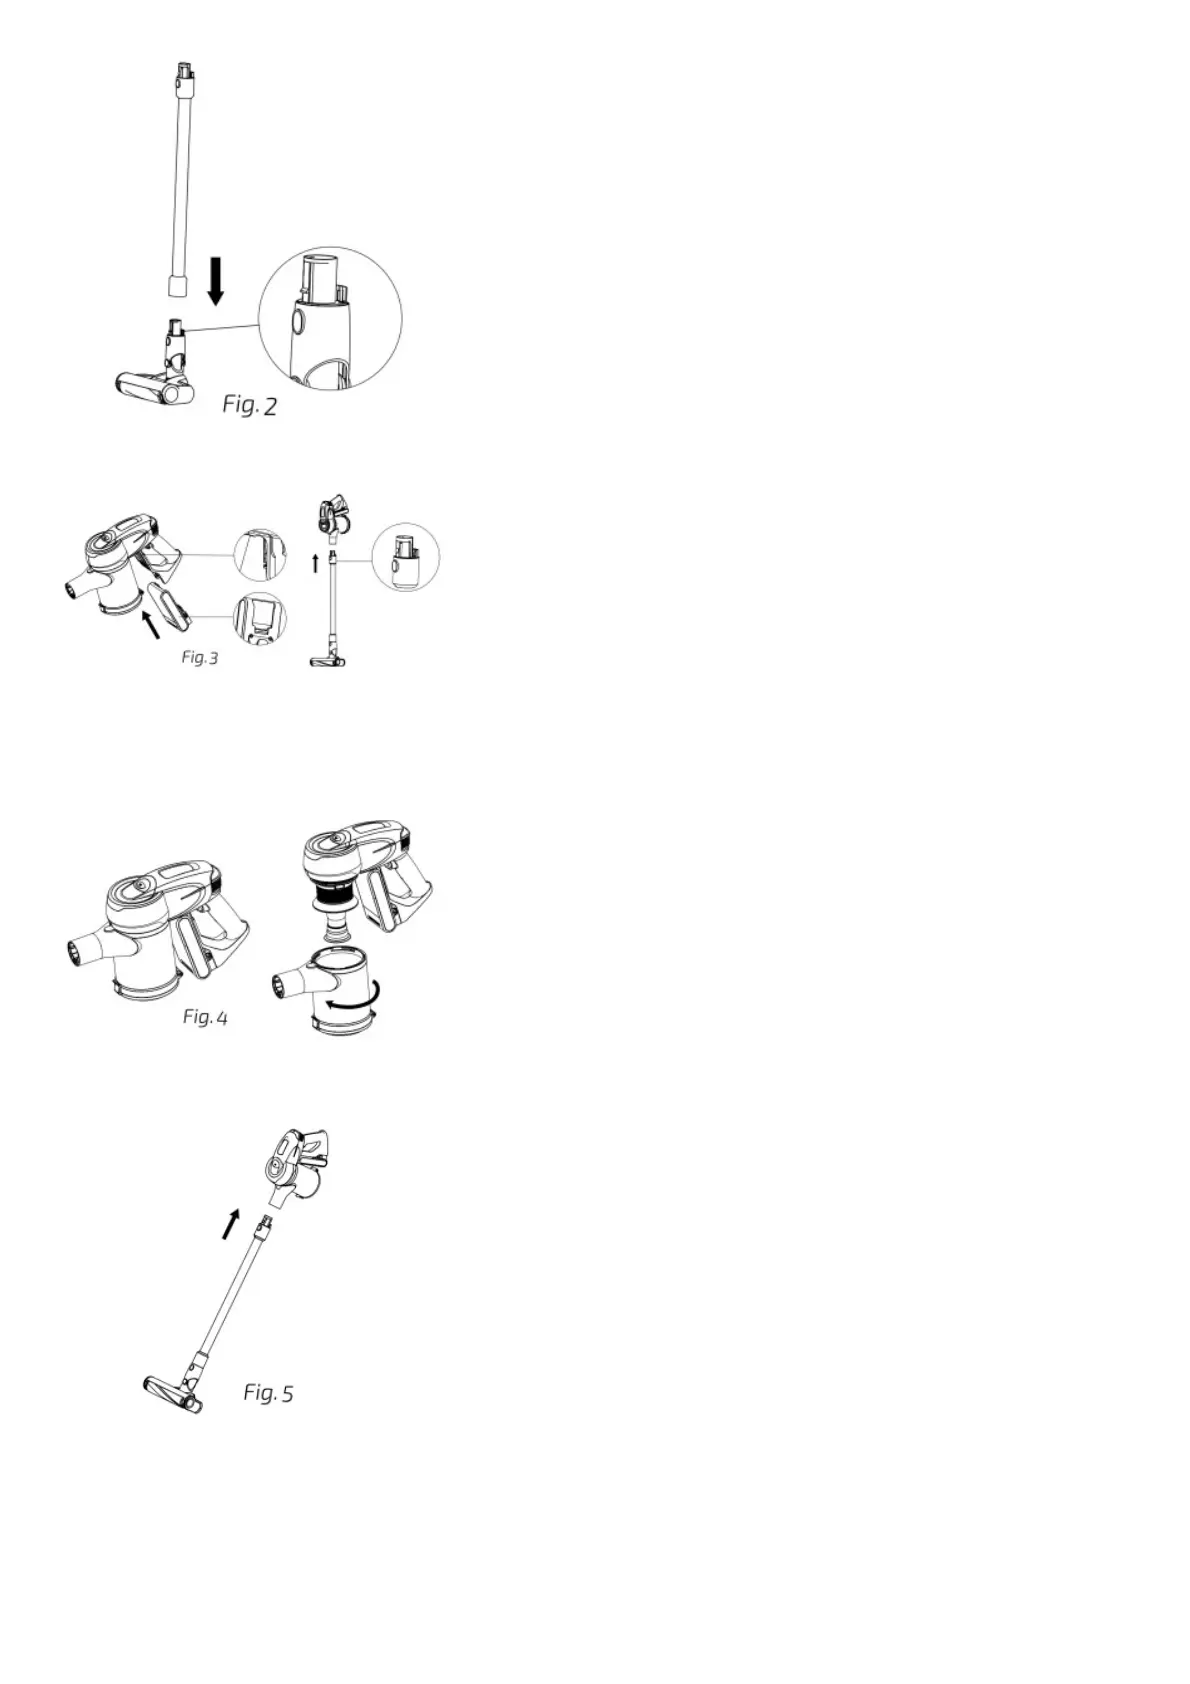
Battery and handheld vacuum cleaner assembly
Introduce the battery in the slot located in the handheld vacuum cleaner. Once it is introduced, move it slightly to ensure it is properly assembled in place.
Fig. 3
Following the illustration below, keep the vacuuming tube vertically, align the tab on the vacuuming tube with the guides in the handheld vacuum cleaner and introduce the tube.
Dust tank assembly
To assemble the dust tank, first separate the handheld vacuum cleaner from the vacuuming tube.
Then, press the vacuuming tube release button with one hand and, holding from the handle with the other one, turn the dust tank anticlockwise to the lock position indicated on the dust tank
edge.
To disassemble the dust tank, turn it clockwise until it reaches the unlock position.
Fig. 4
Suction base, vacuuming tube and handheld vacuum cleaner installation
To complete the full installation of the device, hold the vacuuming tube with the suction base assembled upright and introduce the tube in the handheld vacuum cleaner as shown on the
illustration.
Fig. 5
OPERATION
Handheld vacuum cleaner
Once the handheld vacuum cleaner has been disassembled from the vacuuming:
Press the On/off button to turn the device on.
Press the power push button to select the desired power level.
It will automatically operate in Eco mode. The power level can be adjusted at any moment by pressing this button.
Press once to switch to Daily mode.
Press again to operate it at Turbo mode.
Press the On/off button to turn the device off.
Fig. 6