16.3 9000 Series Supplement
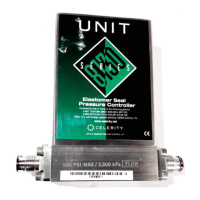
Metal Seal High Temperature Liquid & Solid Source Vapor Mass Flow Controllers
Models 9660, 9661, 9860, 9861, and 9865
16.3.1 Installation Instructions
16.3.1.1 Unpacking
- Verify that the controller was not damaged in transit.
- The following items are part of the 9000 Series controller:
- 9000 Series controller
- 9000 Series remote electronics
- High temperature cable assembly, length 3 ft. P/N 955-000-0003
- Remote clamp bracket P/N 860-004-1015
- Optional 15 pin “D” to 20 pin card edge adapter. P/N 200-104-1000 (Model 9660,
9860, 9861 only)
16.3.2 Site Preparation
Thoroughly clean, dry, and purge all piping associated with the entire flow control system
prior to installing the controller.
16.3.3 Positioning and Mounting the Controller
The controller must be positioned so that the gas flow is in the direction of the arrow
stamped on the controller base. The High Temperature controller is designed and
calibrated to be mounted in the Horizontal position only. Match the mounting holes on the
bottom of the flow controller with those on the mounting surface.
Using two #8-32 screws, mount the flow controller. See drawings 990-111-9660U or
990-111-9865U for mounting hole positions.
The Remote electr
onics must be mounted outside of the high temperatur
e ar
ea. The
controller and Remote electronics are connected through the high temperature cable
assembly. Using the remote clamp bracket, mount the Remote electronics in any position
that is convenient, within reach of the high temperature cable. Longer length cable can be
specially ordered. The temperature limit of the electronics is 0-50°C (32°F-122°F).
16.3.4 Connect to Gas Supply Line
Once the controller is correctly mounted, connect the inlet and outlet VCR fittings to the
gas supply line.
1. Install new gaskets compatible with the gas to be used.
2. Tighten nut finger tight.
3. Tighten in accordance with the fitting manufacturers specifications.
20
©2005 Celerity
, Inc.
#199-001-0006 REV
.F 4/05
Artisan Technology Group - Quality Instrumentation ... Guaranteed | (888) 88-SOURCE | www.artisantg.com