Telescope Basics 16
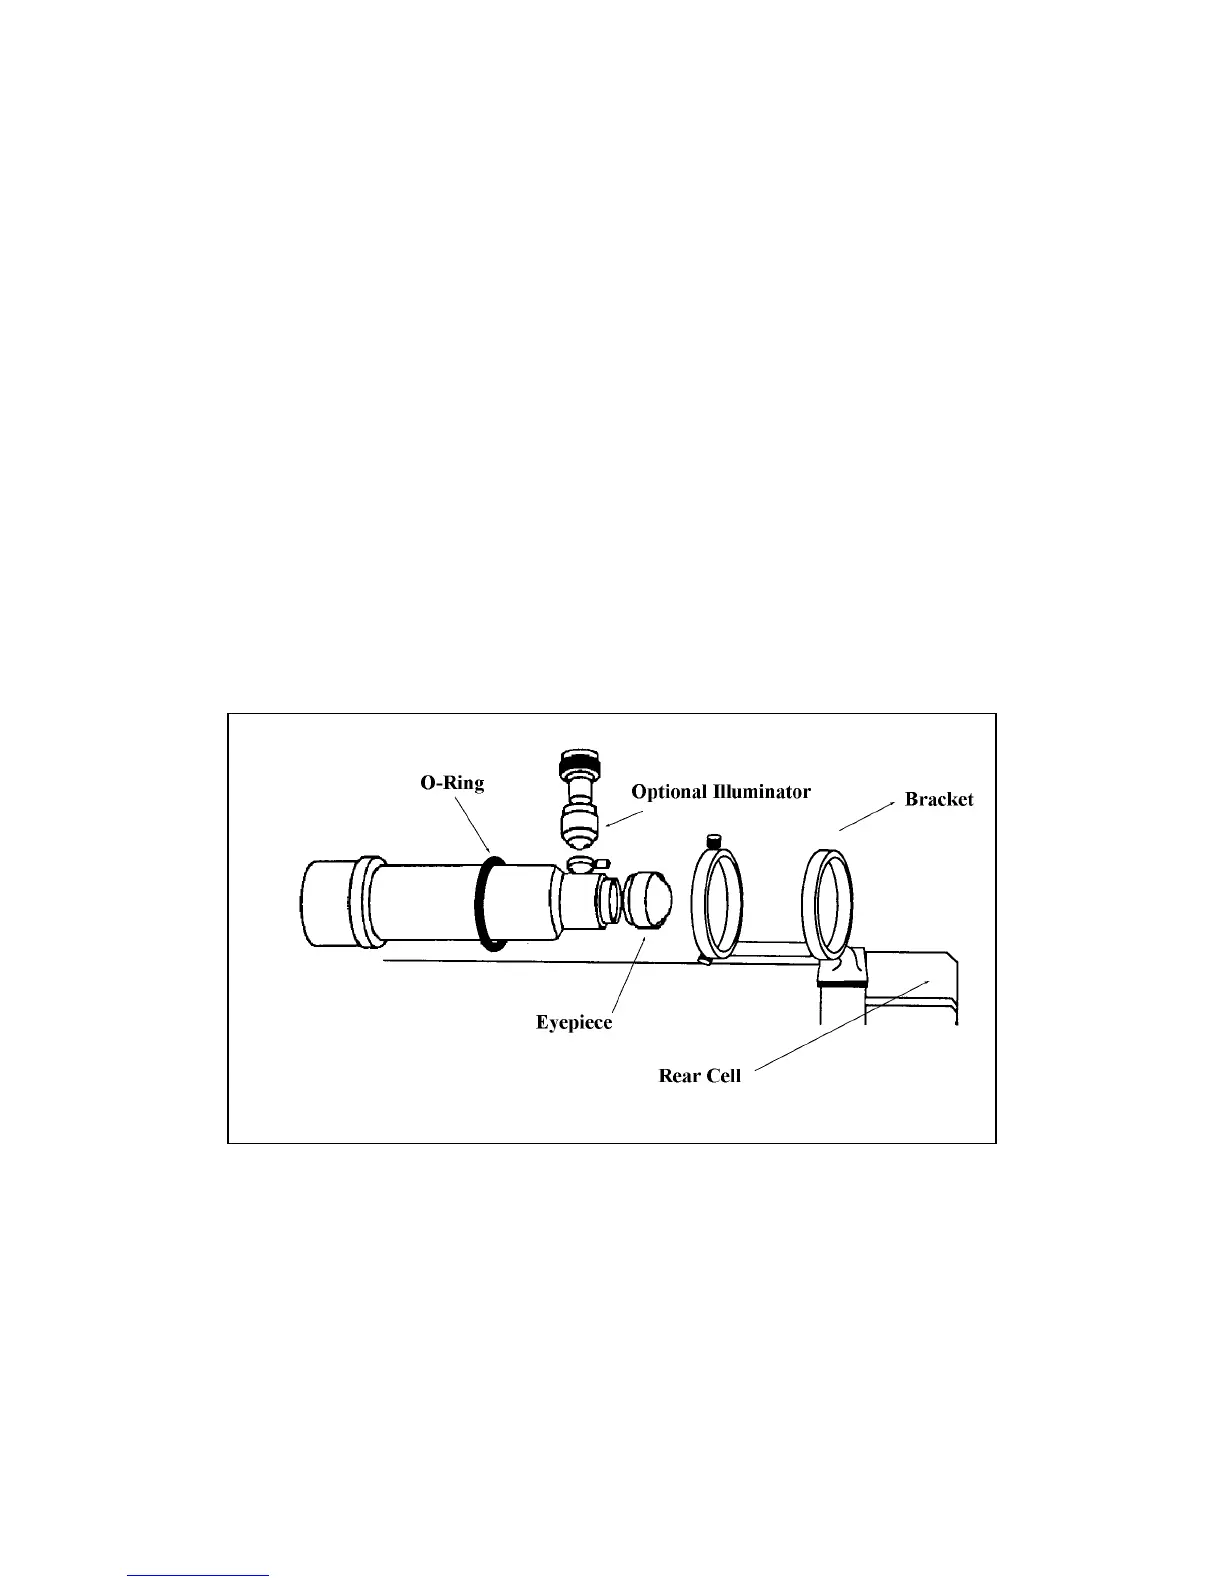
Attaching the Finder to the Bracket
With the bracket firmly attached to the telescope, you are ready to attach the finder to the bracket.
1. Thread the three nylon screws into the front ring of the finder bracket. Tighten the screws until the
nylon heads are flush with the inner diameter of the bracket ring. Do NOT thread them in
completely or they will interfere with the placement of the finder.
2. Slide the O-Ring over the back of the finder-it may need to be stretched a little.
3. Position the O-Ring on the main body of the finder so that it is toward the front (i.e., objective) end
of the finder.
4. Slide the end of the finder where the eyepiece mounts into the front of the bracket. Push it back
until the end of the finder, where the eyepiece attaches, is past the back ring of the bracket , but
NOT so far that the O-Ring is snug inside the back ring.
5. Slide the O-Ring toward the back(i.e., eyepiece end) of the finder.
6. Push the finder back until the O-Ring is snug inside the back ring of the finder bracket.
7. Hand tighten the three nylon-tipped thumbscrews until snug.
Figure 2-7