16
Inserting the material4
4.2 Changing the print ribbon
To facilitate the unwinding of the ribbon, we recommend retracting the mobile carriage (5);
X Remove the top lid (3) (Fig. 9a).
X Rotate the front media guide (15) completely downwards (Fig. 9b).
X Remove the ribbon take-up spool (13) by releasing it and lifting it up. Then insert the cardboard core (M) included
in the supply (Fig. 9c).
X Pull out the ribbon take-up spool (14) by releasing it and raising it, thread the print ribbon through, aligning the slot
with the reference pin on the spindle (Fig. 9c).
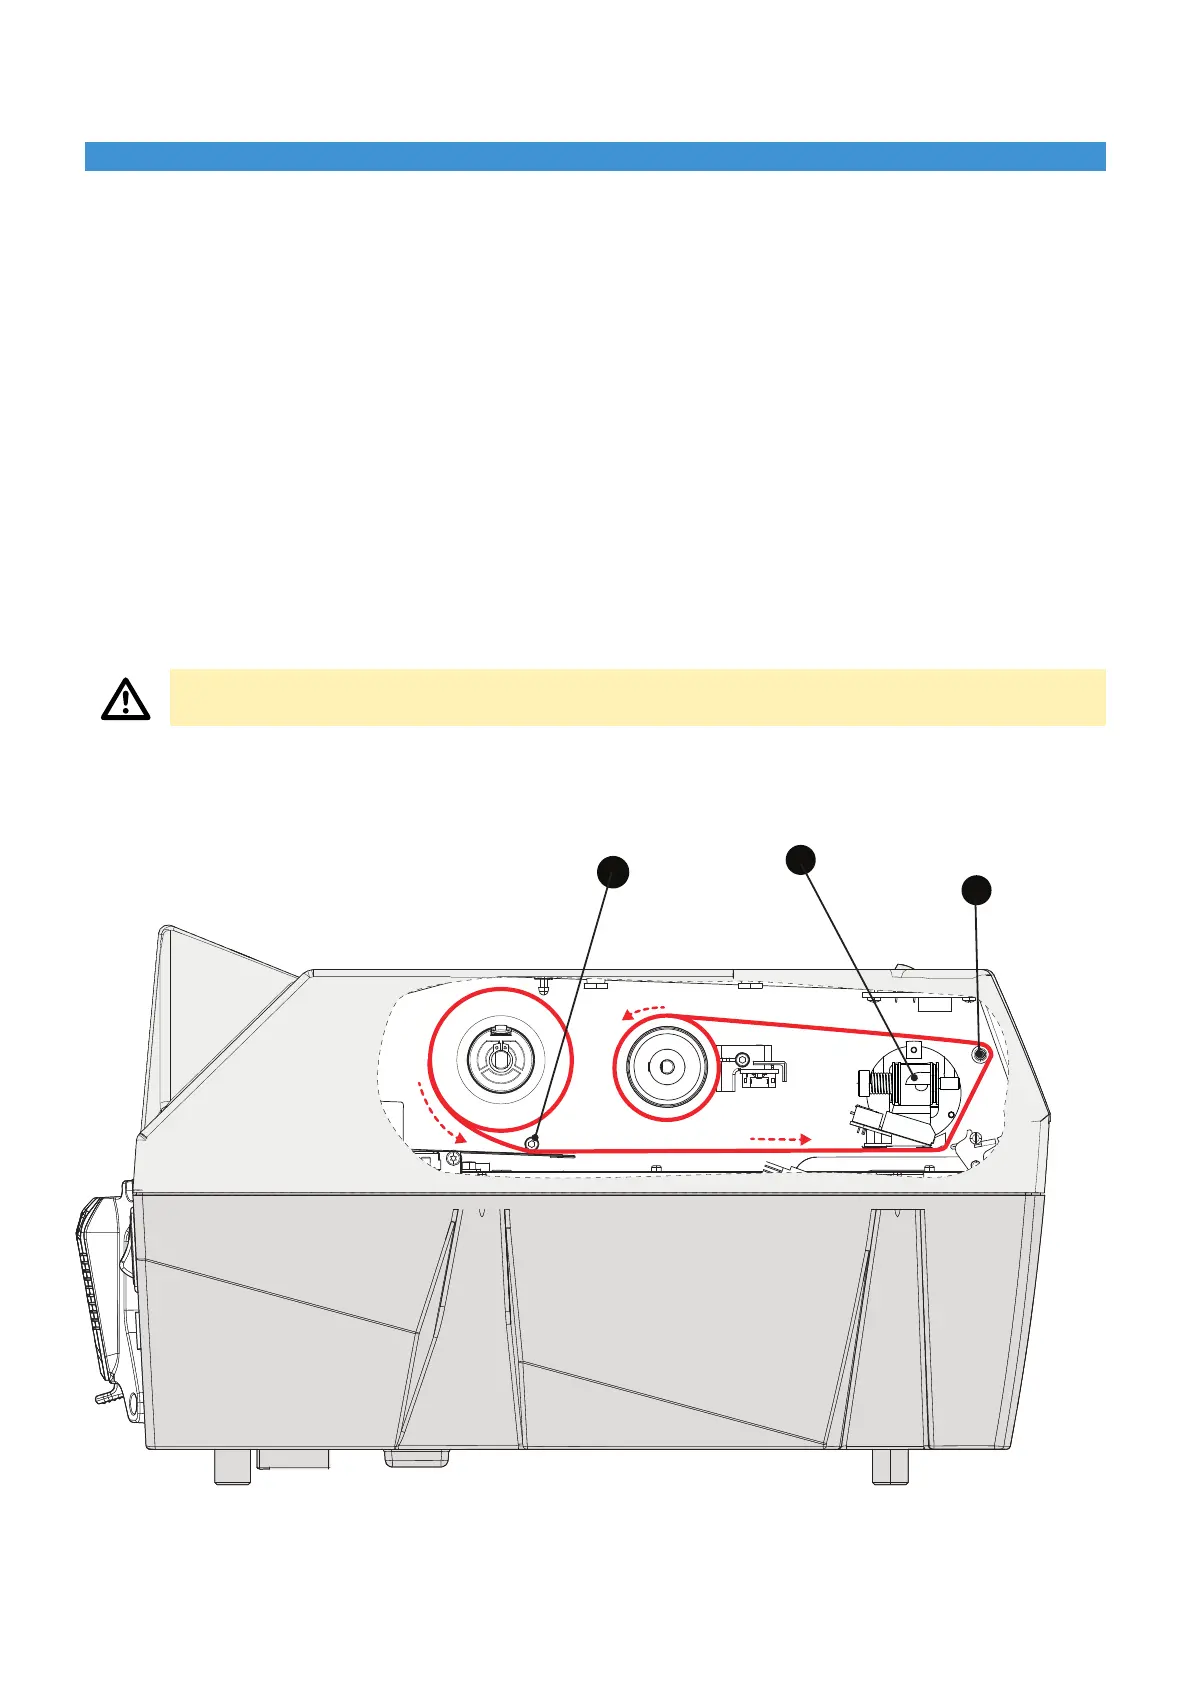
X Unroll the ribbon by passing it under the rear guide (18) (Fig. 9) and then under the print head (20) until it comes
out on the opposite side (Fig. 9d).
X Pull the ribbon further so that it passes over the front guide (19) (Fig. 9).
X Tape the end of the print ribbon to the cardboard core of the spindle (13). We recommend that you wind the print
ribbon tightly around the cardboard core for a few turns in order to achieve correct take-up.
X Then secure the spool (14) in place by pushing it fully into its seating (Fig. 9d).
X Lock the ribbon take-up spool (13) in place by pushing it all the way down so that the ribbon is taut (Fig. 9d).
X Turn the front media guide (15) completely upwards.
X Replace the upper lid (3).
Fig. 9 Print ribbon path
18
19
20
Caution!
Ensure that the media guide is rotated fully upwards


 To Next Page