8
Network
LAN Settings
WiFi Settings
Hostname
DHCP:
IP:
SUBNET
MASK:
GATEWAY:
DNS:
DOMAIN:
MENU
Network information
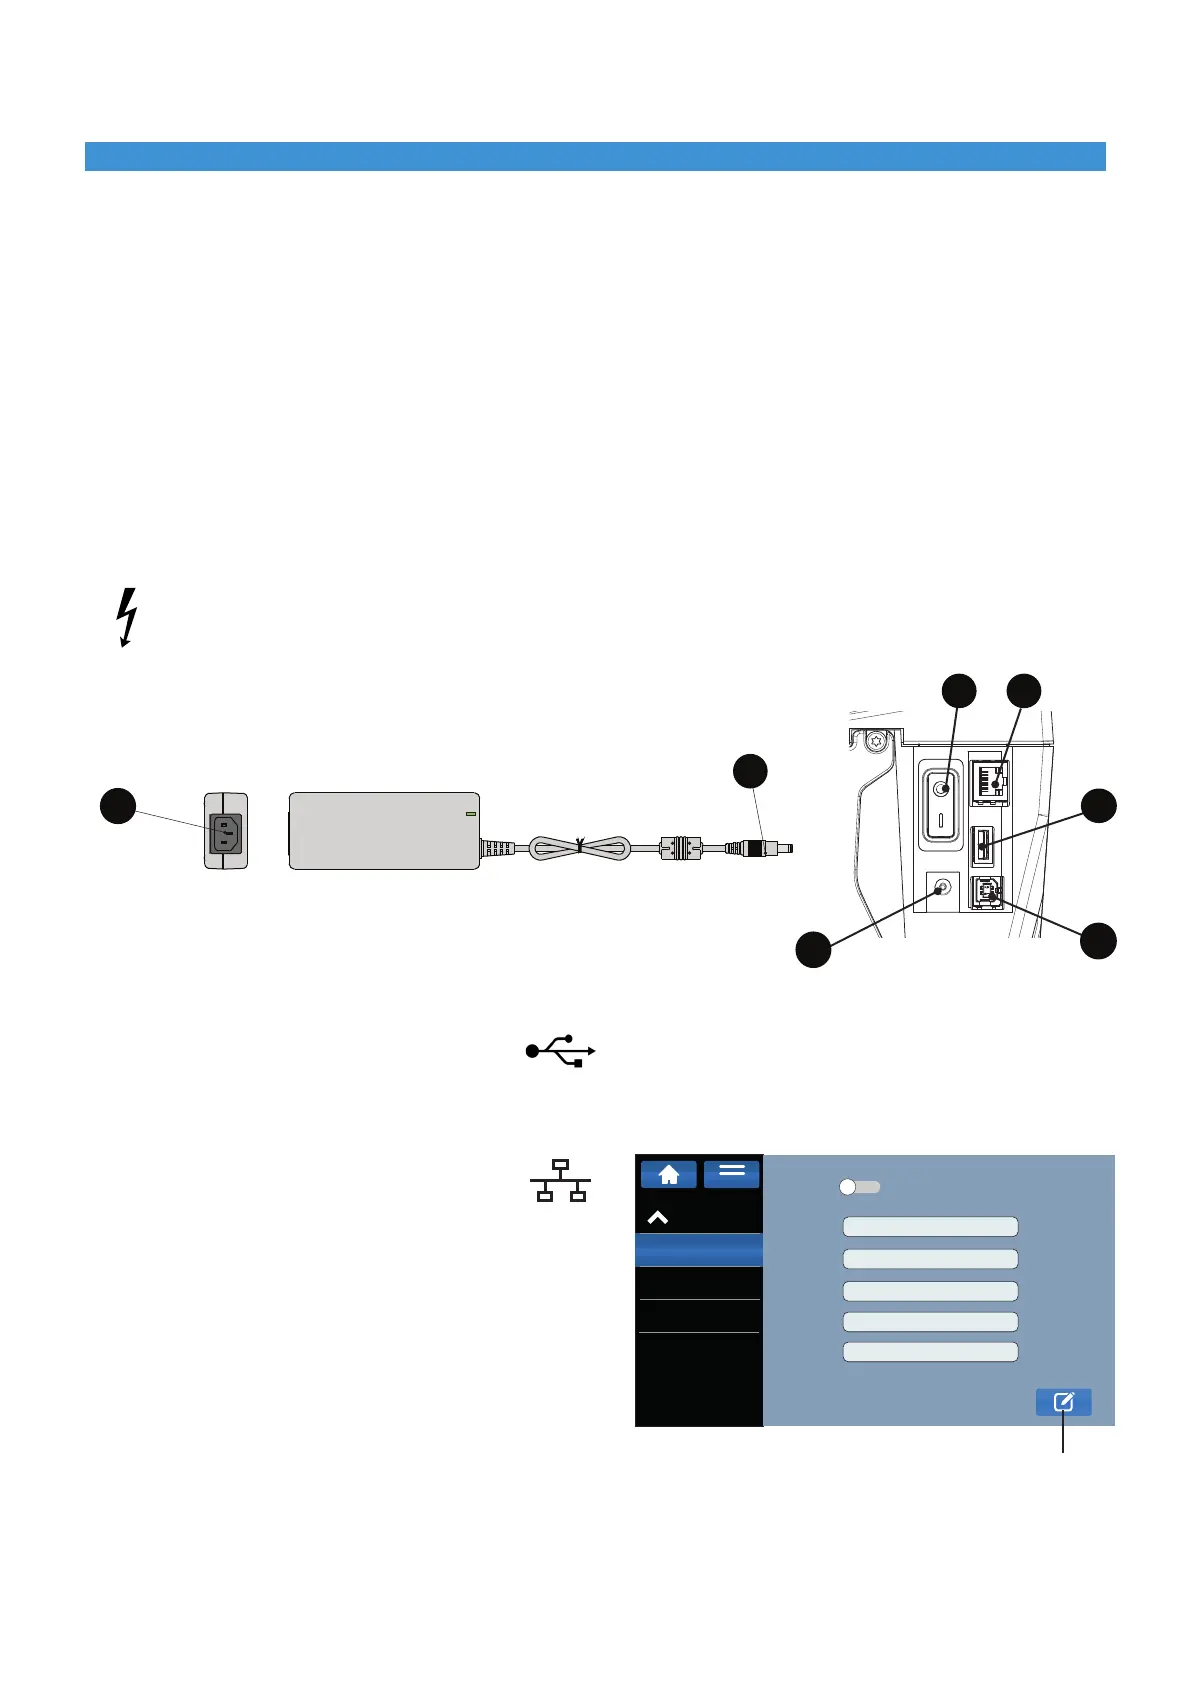
2.2 Connecting the device
The standard interfaces and connections are described in § 2.1.
2.2.1 Mains power supply and switching on
The printer is equipped with a broad spectrum power supply unit. Operation with a mains voltage of 230 V / 50 Hz or
115V/60Hzispossiblewithoutanymodicationtothedevice.
► Makesurethattheprinterisswitchedobeforeconnecting,switch(7)inposition0(Fig.5).
► Connectthepowersupplyunitconnector(D)toport(11)onthebackoftheprinter.
► Connectthepowercabletotheconnector(20)ofthepowersupplyunitandtoanelectricaloutlet.
► Presstheswitch(7)soitisatpositionItoturnontheprinter,afterashorttestcycletheinitialscreenwillappearonthe
display (refer to § 3.1).
Only connect the power supply unit to electrical outlets with protective earth contact.
The electrical outlet must be located near the printer and always be easily accessible when needed.
2.2.2 Battery power supply
The printer can also be powered by a separate battery without being connected to the mains (see § 7).
2.2.3 Direct connection to a computer
► ConnecttheUSBcablefromthecomputertotheconnector(10)onthebackoftheprinterandthenproceedwith
the installation. The printer will be automatically installed and visible in the Control Panel, Devices and Printers of
the PC.
2.2.4 Connection via Ethernet network
► ConnectthecablefromthenetworktotheEthernet
port (8) on the back of the printer.
► FromtheMG4display,select:SettingNetwork
LAN settings.
► Click on EDIT button (Enable DHCP if you want to use
this automatic IP address assignment protocol, if
DHCP is not used, disable it and manually enter the
IP address).
2.2.4.1 ►Add the printer as a TCP/IP device on the PC, setting the IP address shown on the
MG4 display, or the hostname (default = MG4-[printer serial number] e.g. MG4-20AA001).
► SelectCEMBRES.P.A.intheManufacturercolumnandthentheMG4driverinthePrintercolumn.
Click "Next" to complete the installation.
Installation2
D
20
Fig. 5
7
11
EDIT
8
9
10