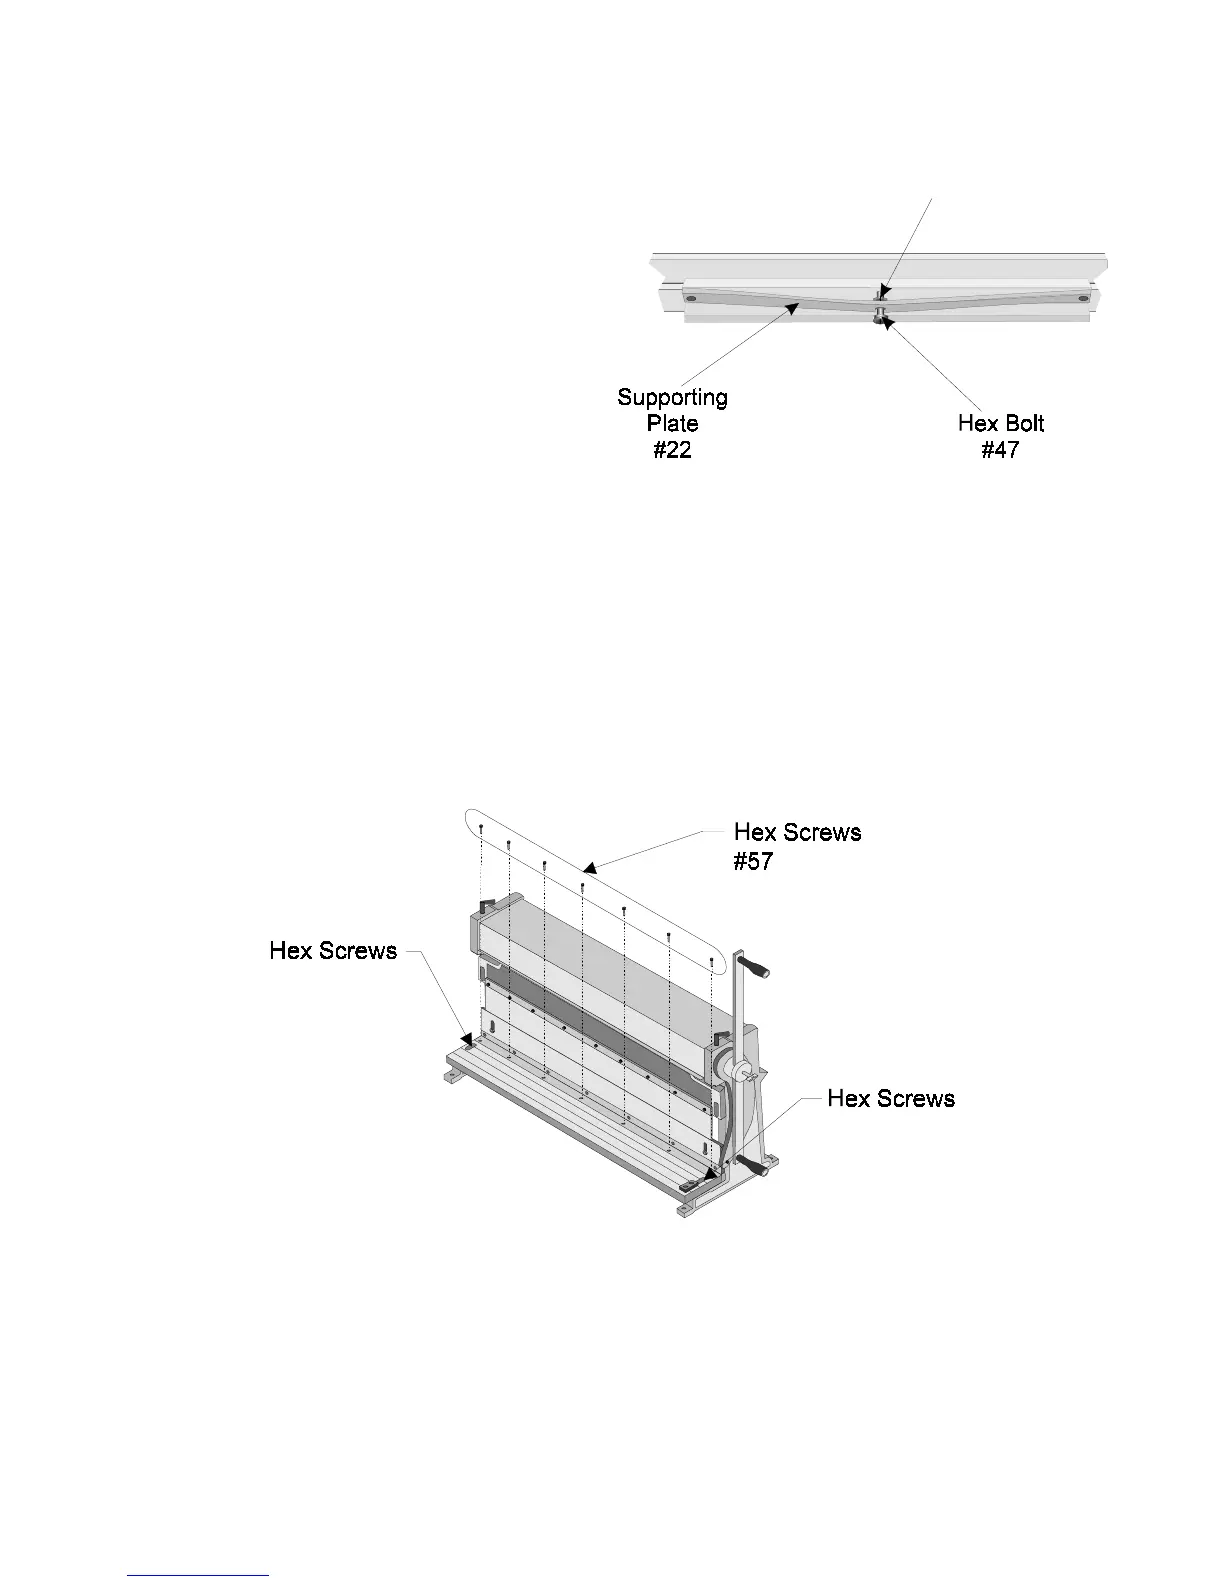
Step 4: If the BLADE is bowed out, away
from the front of the tool, turn the
adjustment NUT (#49) counterclock-
wise (see Figure 3). This will tighten
the SUPPORTING PLATE (#22) and
push the middle of the UPPER
BLADE (#23) out while pulling its
ends in.
Step 5: If the BLADE is bowed in, towards
the back of the tool, turn the adjust-
ment NUT clockwise (see Figure 3).
This will loosen the SUPPORTING
PLATE and pull the middle of the
UPPER BLADE in while pushing
its ends out.
Removal and Installation of Lower Blade
Step 1: Remove the HEX SCREWS (#59) from the lower cutting BLADE (#23) as shown in
Figure 4.
Figure 4 — Removal and Installation of Lower Blade
Step 2: Remove the lower cutting BLADE (#23).
Step 3: Replace the lower cutting BLADE and secure using its HEX SCREWS.
Figure 3 — Upper Blade Alignment
Nut
#49
#59
#59
Page 5 -- SKU: 05907 REV 11/02



 To Next Page