EasyManua.ls Logo

Chamberlain B4603TC User Manual

Chamberlain B4603TC
104 pages
To Next Page IconTo Next Page
Page #1 background imageLoading...
Page #1 background image
1. Take a photo of the camera icon including
thepoints ( ).
2. Send it in by texting the photo to 71403 (US).
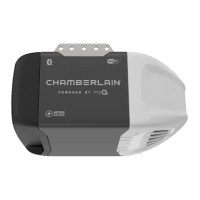
www.chamberlain.com
Please read this manual and the enclosed safety materials carefully!
Fasten the manual near the garage door after installation.
The door WILL NOT CLOSE unless the Protector System® is connected and properly aligned.
Periodic checks of the garage door opener are required to ensure safe operation.
The model number label is located on the left side panel of your garage door opener.
This garage door opener is compatible with myQ® and Security+ 2.0® accessories.
DO NOT install on a one-piece door if using devices or features providing unattended close. Unattended
devices and features are to be used ONLY with sectional doors.
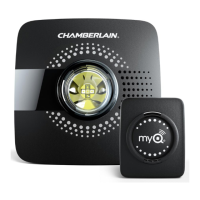
Installation Manual
LED Belt Drive Garage Door Opener
Models B4603TC • B4643TC • B4613TC
B6713TC• B6753TC
FOR RESIDENTIAL USE ONLY
PRE-PROGRAMMED REMOTE
CONTROL INCLUDED
To register your garage door opener to receive
updates and offers from Chamberlain, visit
chamberlain.registria.com or use the icon below:

Questions and Answers:

Chamberlain B4603TC Specifications

General IconGeneral
BrandChamberlain
ModelB4603TC
CategoryGate Opener
LanguageEnglish

Summary

Installation Manual

LED Belt Drive Garage Door Opener

Details the specific type of opener and compatible models.

Safety Symbol and Signal Word Review

Unattended Operation

Explains unattended operation features and restrictions for sectional doors.

Preparation

Check the Door

Guides on checking garage door balance and condition before installation.

Tools Needed

Lists all necessary tools required for the installation process.

Carton Inventory

Lists all parts included in the garage door opener carton.

Hardware

Details all hardware components used in assembly and installation steps.

Assembly

STEP 1 Assemble the Rail and Install the Trolley

Instructions for assembling the rail sections and installing the trolley.

STEP 2 Fasten the Rail to the Motor Unit

Instructions for securely attaching the assembled rail to the motor unit.

STEP 3 Install the Idler Pulley

Guides on installing the idler pulley and properly seating the belt.

STEP 4 Install the Belt

Details the procedure for installing the drive belt around pulleys and trolley.

STEP 5 Tighten the Belt

Instructions for setting the correct belt tension using the spring trolley nut.

STEP 6 Install the Sprocket Cover

Guides on attaching the sprocket cover for safety before operation.

Installation

STEP 1 Determine the Header Bracket Location

Steps to determine the correct header bracket mounting position for various door types.

STEP 2 Install the Header Bracket

Instructions for installing the header bracket on the wall or ceiling.

STEP 3 Attach the Rail to the Header Bracket

How to connect the rail assembly to the installed header bracket.

STEP 4 Position the Garage Door Opener

Guidance on placing the opener unit during installation, using a 2x4 for support.

STEP 5 Hang the Garage Door Opener

Steps for securely hanging the garage door opener unit to structural supports.

STEP 6 Attach the Emergency Release Rope and Handle

Instructions for attaching the emergency release rope and handle to the trolley.

STEP 7 Install the Door Bracket

Steps for installing the door bracket onto the garage door, with options for door types.

STEP 8 Connect the Door Arm to the Trolley

Instructions for connecting the door arm sections to the trolley.

STEP 9 Install the Door Control

Steps for installing the wall-mounted door control panel.

STEP 10 Wire the Door Control to the Garage Door Opener

How to connect the door control wiring to the garage door opener.

STEP 11 Attach the Warning Labels

Instructions for applying critical safety and warning labels to the opener and wall.

STEP 12 Install the Protector System®

Guides on installing the safety reversing sensors for door obstruction detection.

STEP 13 Wire the Safety Reversing Sensors

Wiring instructions for safety reversing sensors without pre-wiring.

STEP 14 Connect Power

Steps for connecting electrical power to the garage door opener.

STEP 15 Align the Safety Reversing Sensors

How to align the safety reversing sensors for proper operation.

STEP 16 Ensure the Door Control is Wired Correctly

Verifies correct wiring of the door control panel for functionality.

Adjustment

1 - Program the Travel

Steps to program the garage door's open and close travel limits.

2 - Automatic Force Set Up

Procedure for the opener to learn and set the force required to move the door.

3 - Test the Safety Reversal System

How to test the safety reversal system for proper function.

4 - Test the Protector System®

Test procedure for the safety reversing sensors.

Battery Backup

STEP 1 Install the Battery

Instructions for installing the battery backup unit into the opener.

STEP 2 Test the Battery

How to test if the battery backup is installed and functioning correctly.

Charge the Battery

Information on charging the battery backup unit for optimal performance.

myQ® App Control

Connect With Your Smartphone

Steps to connect the opener to a smartphone via the myQ® app for remote control.

Camera

Set Up the Camera

Instructions for setting up and using the integrated garage door opener camera.

Operation

Using your Garage Door Opener

Explains how to use the garage door opener with various controls.

Motion Detecting Control Panel

Details the features and operation of the motion detecting control panel.

Remote Control and Keyless Entry

Instructions for programming remote controls and keyless entry devices.

HomeLink®

Information about integrating HomeLink with the garage door opener.

Erase the Memory

How to erase stored remote controls, keyless entries, and Wi-Fi settings.

To Open the Door Manually

Steps to manually open or close the garage door using the release handle.

Maintenance

Maintenance Schedule

Recommended maintenance tasks by frequency (monthly, yearly).

The Remote Control Battery

Information on replacing the remote control battery.

Troubleshooting

Diagnostic Chart

A table listing common symptoms and their solutions for opener issues.

Additional Troubleshooting

Further troubleshooting tips for common issues like stopping, reversing, or connectivity.

Warranty

Chamberlain Limited Warranty

Details the terms and conditions of the limited warranty for the product.

Automatic Garage Door Opener Safety & Maintenance Guide

Routine Maintenance Can Prevent Tragedies

Emphasizes the importance of regular inspection and testing of the opener system.

Garage Door Openers are Not Toys

Advice on teaching children about garage door opener safety and dangers.

Repair Parts

Rail Assembly Parts

Lists part numbers for rail assembly components.

Installation Parts

Lists part numbers for components used during installation.

Garage Door Opener Parts - Model B4603TC

Identifies replacement parts for Model B4603TC.

Garage Door Opener Parts - Model B4613TC

Identifies replacement parts for Model B4613TC.

Garage Door Opener Parts - Model B4643TC

Identifies replacement parts for Model B4643TC.

Garage Door Opener Parts - Models B6713TC, and B6753TC

Identifies replacement parts for Models B6713TC and B6753TC.

Related product manuals