Chiltrix Inc. www.chiltrix.com
Chiltrix Heat Pump Installation
NOTE: The CX34 is shipped with the pump in a separate box attached to the top of the chiller. Please follow
the directions below to install the “C4” Wilo Yonos PARA internal pump.
Internal Pump Installation
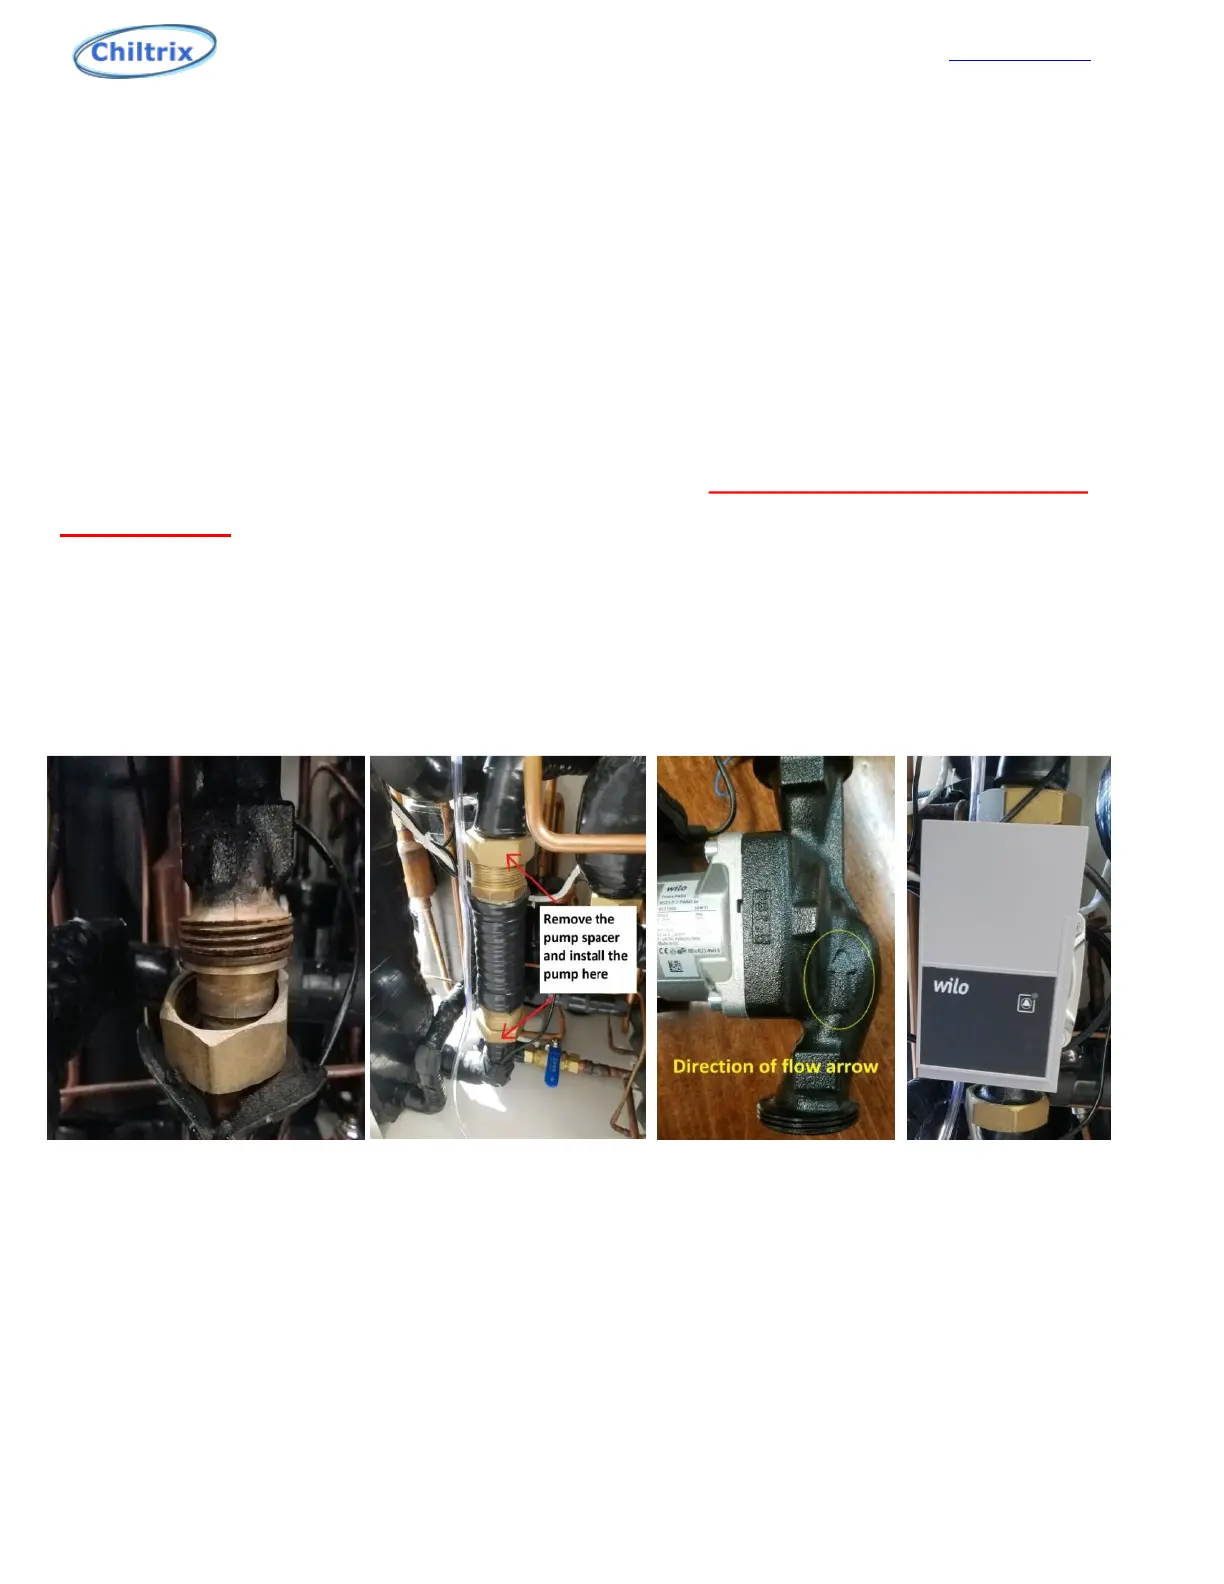
(Remove Top, Front, and Right Side Covers) DO NOT BEND OR STRESS
THE PIPING, this may case a broken joint or leak where it joins the heat
exchanger. Cut the insulation and peel it back out of the way of the
flange nuts. This will allow installation of the pump without bending
either of the pipes. The pump will slide in between the pipes with the
washers.
Peel back the insulation Removing the shipping spacer Verify flow direction (UP) Installed properly
13