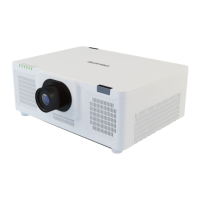
Section 3: Operation
013-100199-04 3-49.
LiteLOC™ Calibration
NOTES: 1) LiteLOC™ Calibration takes up to two minutes. 2) For best results, allow
the projector to warm up for 15 minutes prior to calibration.
LiteLOC™ Calibration defines the range of power needed to maintain lamp
brightness. Select Calibrate LiteLOC for calibration using your projector’s unique
specifications (recommended) rather than standard specifications. The projector will
revert to the default back-up in the event of a power failure.
Intelligent Lens System (ILS
™
) Calibration
This option allows you to choose between three types of lens calibrations. Reference
calibration determines a reference point that is used as a defined starting position for
relative motion of the lens. All positioning is measured from this reference point. A
reference calibration is lost when power is removed from the projector and will occur
on every power up as long as ILS™ is enabled. A motion calibration determines the
characteristics of each motor and values are saved in the projector’s memory. If ILS™
is enabled and a motion calibration has previously been done, the projector will
automatically recall these settings from memory when it’s being powered up and a
motion calibration will not take place. A full calibration performs both a reference
and motion calibration.
Aspect Ratio Overlay
Selecting this option with a checkmark will overlay a number of common aspect ratio
boxes on top of the source image. This is very helpful during the setup of the projector
and can be turned off after desired specifications have been achieved.
The two “Option Card”
entries In the
Configuration menu
identify which optional
input modules (a.k.a.
cards) are present at
INPUT 5 (Option 1) and
INPUT 6 (Option 2). If
either of these option slots
is empty, the
corresponding read-only menu entry does nothing. If there is a module installed, the
corresponding menu entry may activate a submenu of further options pertaining to
that module.
For example, if the Dual SD/HD-SDI module is installed at
INPUT 5 (Option 1). The
Option 1 Card submenu provides controls for configuring the various connections on
this multi-input, multi-output module. As desired for your application, you can define
1) which physical input loops through to which output, and 2) which functional input
(main or PIP signal) loops through to which output.
System Configuration f
OPTIONAL INPUT MODULES
Downloaded from ProjectorsManual.com Manuals