CIAS Elettronica S.r.l. Ed. 1.5
Installation Handbook Page 49 of 57 MANTA 50 – 80
4 ADJUSTMENT AND TESTING
4.1 Adjustment and Testing
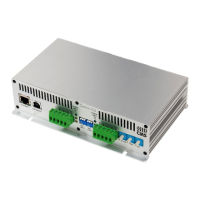
A built in electronic alignment, parameter set and test tool is provided in the receiver head of the
MANTA barrier. This is a very useful system both for installation and periodical maintenance.
4.1.1 Transmitter Set-up
•
To remove the radome unscrew the 3 screws until loose, then release them gently without
removing them completely
•
Check the D.C. power voltage (13.8V ) at terminals 1 and 2 on terminal block MS2 (Fig. 8)
•
Set the Barrier Number
It‘s possible to address each transmitter head in two ways:
a.
Local numbering– no change possible from remote
.
Assigning
(writing) the barrier number:
•
Select a number from 1 to 99 on the proper decimal switches SW2 (units) and SW3
(tens). The value 00 means barrier 100.
If decimal switches SW2 (units) and SW3 (tens) should be positioned on 00, for the
first time it’s necessary to push the button S1 after setting up a barrier number
different from 00.
Reading
the barrier number:
•
It’s enough to read the setting up of rotary switches SW2 and SW3
b. Assigning the barrier number locally, with possibility of changing from remote.
Writing
the barrier number:
•
Rotate the decimal switch SW2 on position 0, rotate the decimal switch SW3 on
position 0
•
Push the button S1
•
Set a new value (from 1 to 99) means of the two switches SW2 (units) and SW3
(tens)
•
Close the micro switch “Tamper”. In this phase leds of Fault (D8) and Tamper (D9)
turn on for 3 seconds, confirming the acquisition of the new value, after that they
will turn off for 3 seconds, to go back at their normal functioning. Open up the micro
switch “Tamper”
NB:
if you wish to prevent possibility of changes from remote of number of barrier number
set, push S1 Reset button.
Reading
the barrier number:
•
Rotate the decimal switch SW2 on position 0, rotate the decimal switch SW3 on
position 0
•
Press and then release the S1 reset button
•
Rotate the decimal switch SW2 (units) until the green led D9 becomes on
•
Rotate the decimal switch SW3 (tens) until the green led D8 becomes on
The reading values will be included between 01 and 99 and will correspond to the actual
barrier number.
NB:
in case you should decide NOT to change the number just visualized, it’s necessary
to close the radome without changing position of decimal switches SW2 and SW3.