Transmigs 220, 250 & 253
1 Unpacking Your Transmig
Carefully unpack the Transmig and check that all items listed in table 1 are present.
Description Quantity
Cylinder Tray 1
Chain Bracket 1
Castor Swivel 2
Wheel 2
Axle 1
Washer ½ inch 2
Fastener (End Cap) 2
Screw M8 12
Screw M5 2
Chain 1
Table 1 – List of Accessory Items
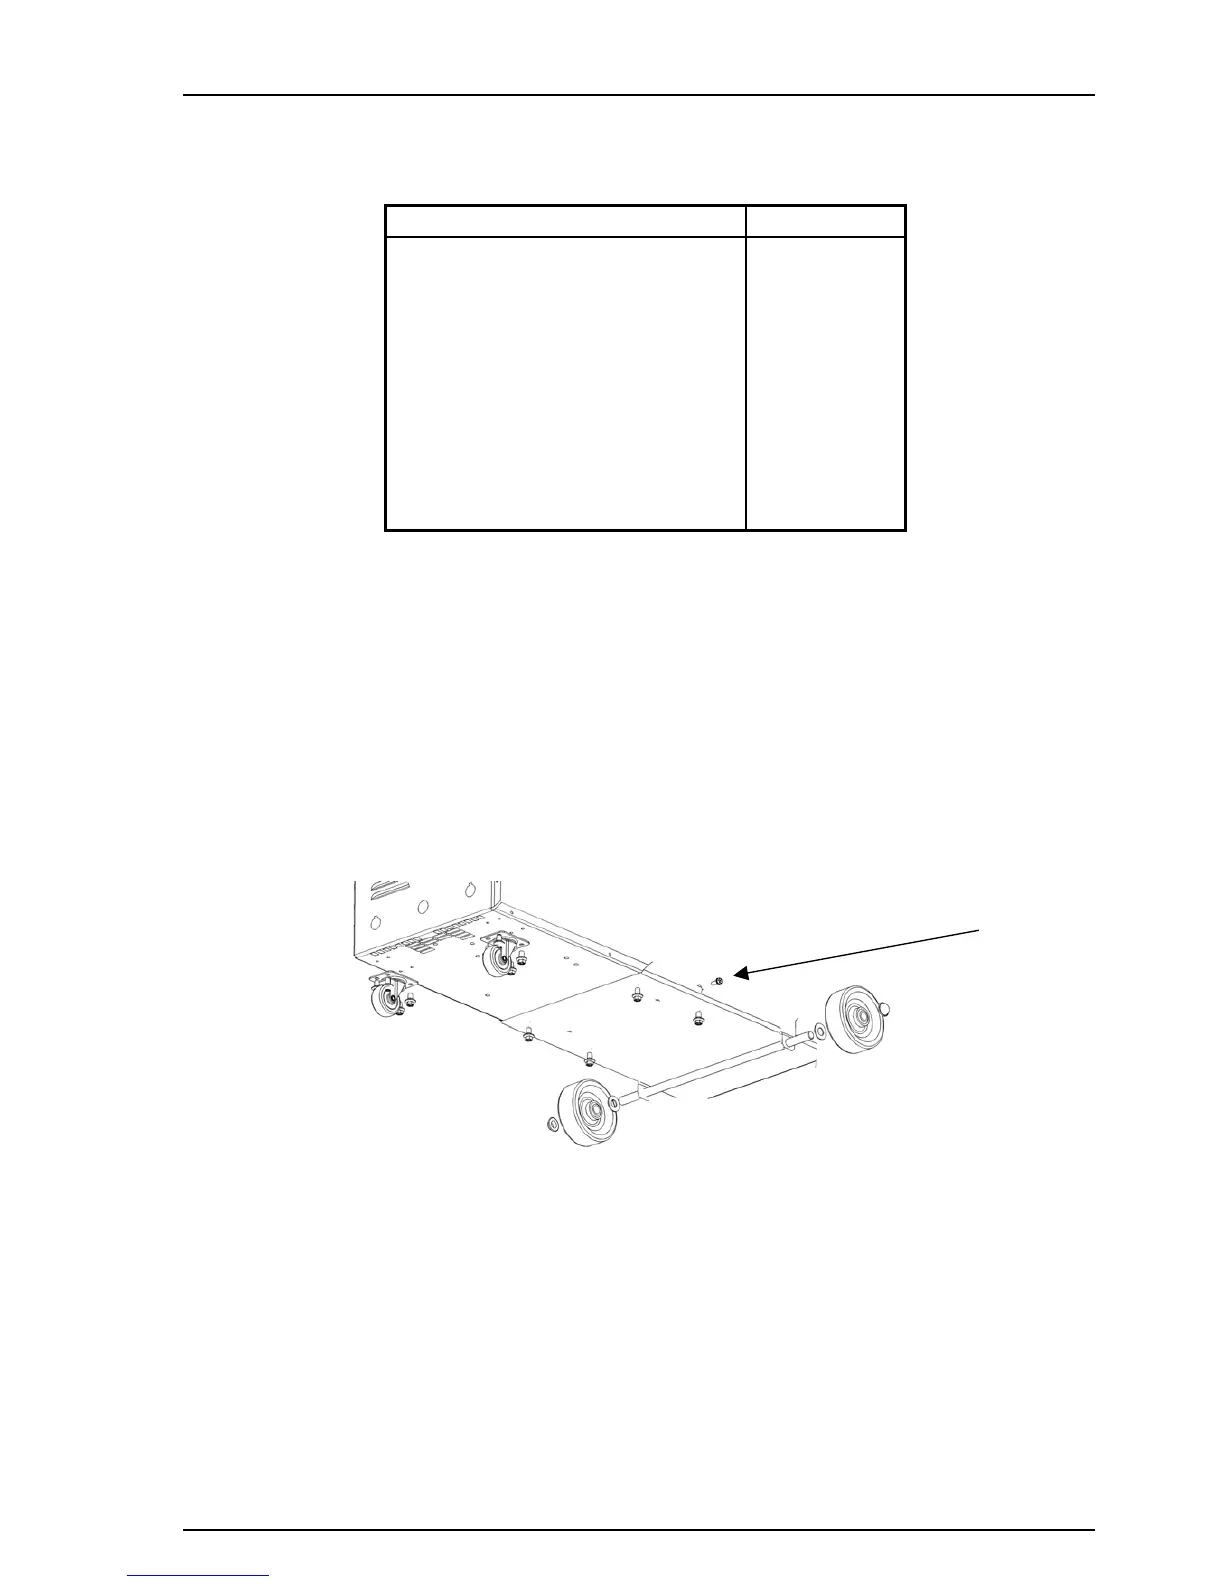
2 Rear Wheel Assembly
a) Insert the axle through the cylinder tray.
b) Install the washers, wheels, and Fastener in the position as shown Figure 1.
3 Front Swivel Castors And Cylinder Tray Assembly
a) Install the two swivel castors in the position as shown in Figure 1 using M8 fasteners.
b) Remove M5 screws, as shown by (A) in Figure 1, from either side of power source.
c) Install assembled cylinder tray in position shown in Figure 1 using the M8 fasteners.
(A)
To be removed
before cylinder
tray assembled
Figure 1 - Castor and Tray Assembly
- 1 -
 Loading...