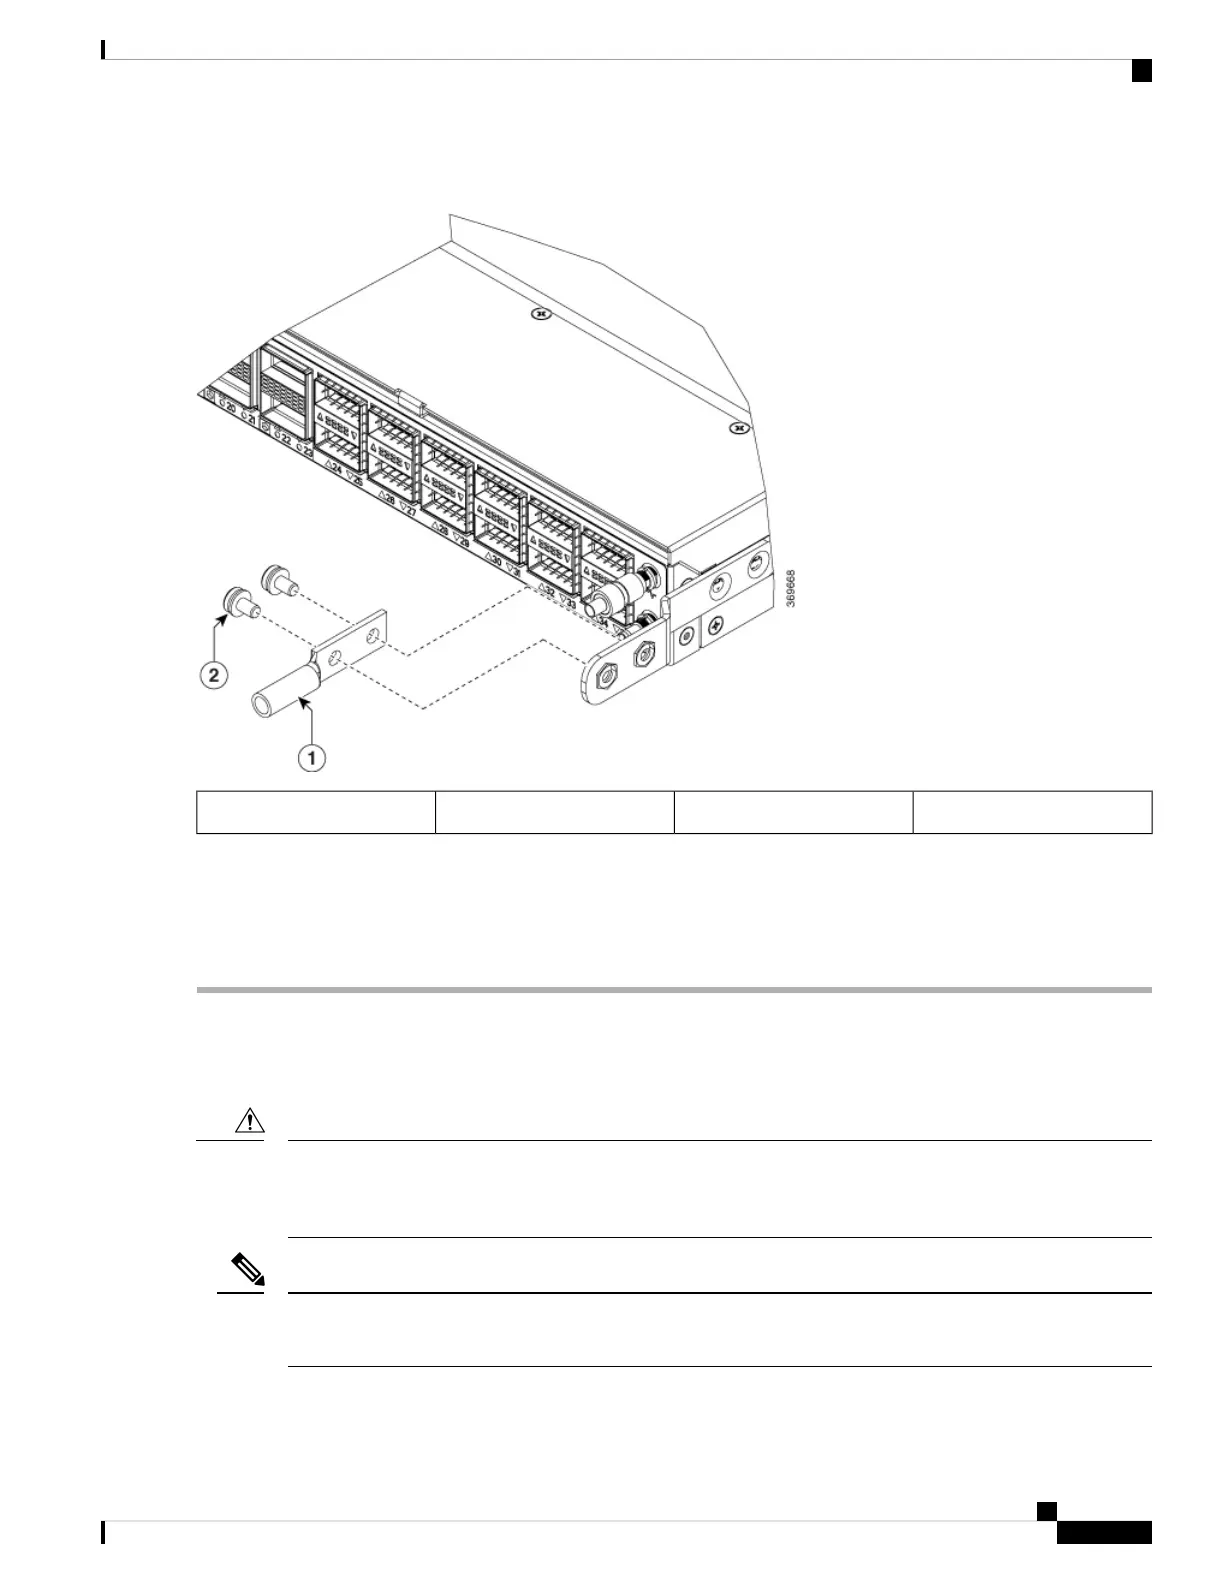
Figure 9: Cisco 8201 Router Ground Lug
M4 x 6mm pan-head screws2Grounding lug1
Step 5 Tighten the pan-head screws to torque value of 11.5 in-lbs (1.3 N-m).
Step 6 Ensure that the lug and cable do not interfere with other equipment.
Step 7 Prepare the other end of the grounding cable, and connect it to an appropriate grounding point in your site to ensure
adequate earth ground.
Connect AC Power to the Chassis
The chassis relies on the protective devices in the building installation to protect against short circuit,
overcurrent, and ground faults. Ensure that the protective devices comply with local and national electrical
codes.
Caution
Cisco 8201 Router—To provide full output power of 2000 W, the nominal voltage rating value ranges between
200V to 240V, depending on the standards in various countries.
Note
The following combinations of power supplies are supported:
Hardware Installation Guide for Cisco 8200 Series Routers
21
Installing the Chassis
Connect AC Power to the Chassis