Quick Start Guide
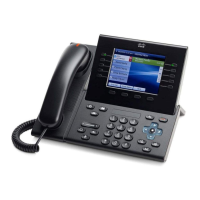
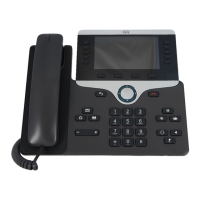
Cisco Unied IP Phone
Model 8961
Contents
1. Dial intercom/outside
2. Hang up
3. Answer
4. Mute
5. Hold
6. Forward All – Follow Me
7. Do Not Disturb
8. Conference
9. Transfer
10. Remain on busy extension – repeat dialer
11. Programming numbers
and conguring quick dial settings
12. Call History
13. Directories
14. Shared Lines
15. Voicemail
16. Tips
1. Dial
To dial, lift the handset and enter a number. Or:
• Press an unlit session button (right side).
• Press the New Call softkey.
• Press the headset button or speakerphone button
Place an intercom call – 4 numerals (extension)
Place an outside call – 0XX
Call a mobile phone – 63XXXX
Dial from call history
As you enter a phone number, matching numbers will be
displayed on your call history. To dial, scroll to a number and
press the Select button in the Navigation pad or click on
the Call softkey.
Redial the last number
Press the Redial softkey.
Speed dial
Press a speed-dial button (if available).
Or, enter a speed-dial code while the handset is down
(no dial tone), then press the Speed Dial softkey.
2. Hang up
To end a call, replace the handset. Or:
• Press the Release button .
• Press the End Call softkey.
• Press the (lit) headset button
or the speakerphone button
3. Answer
To answer an incoming call , lift the handset. Or:
• Press the ashing amber session button
(right side).
• Press the Answer softkey.
• Press the (unlit) headset button
or the speakerphone button
Press the Select button in the Navigation pad.
Call Waiting
If you get a second call
while the rst call is active,
a second session label
displays.
To connect the second call
and put the rst call on hold
automatically, press the
ashing amber session button (right side).
4. Mute
Press the Mute button to toggle Mute on and o.
When Mute is on, the Mute button glows red.
5. Hold
1. Press the Hold button . The hold icon displays
and the session button pulses green.
2. To resume the highlighted call, press the pulsing green
button , the Resume softkey, or the Navigation pad
Select button.
6. Forward All - Follow Me
(Previously 14110 to activate and 14111 to deactivate)
1. Press the Forward All softkey.
2. Enter a phone number, select a number from Call History,
or press the Messages button (to forward to voicemail).
Look for Forward All icon , on your screen.
To cancel call forwarding, press the Forward O softkey.
7. Do Not Disturb Optional
• Press the Do Not Disturb button to toggle
DND on , or o .
• When on, Do Not Disturb (DND) mutes the ringer and may
block visual notication for new calls.
• The phone status can be changed through the personal portal.
Did you know?
Call the Switchboard 3800/88 I Call selection (previously 87) - is now a button I Call mobile phones 63xxxx