Draft 1A - CISCO CONFIDENTIAL
2-9
Cisco Aironet 1240AG Series Access Point Hardware Installation Guide
OL-7293-01
Chapter 2 Installing the Access Point
Mounting Above a Suspended Ceiling
Step 7 Use a wrench or pliers to tighten the Keps nuts. Do not overtighten.
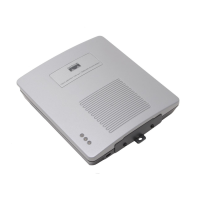
Step 8 Attach the access point to the mounting plate.
Mounting Above a Suspended Ceiling
The access point mounting plate is designed to be integrated into the T-bar grid above the tiles of a
suspended ceiling. Using a T-bar box hanger and bracket mounting clip (not supplied) such as the
Erico 512A and BHC, you orient the access point antenna just above the top surface of a standard ceiling
tile. You may need to modify a thicker tile to allow room for the antenna.
Caution Only the fiber-optic power injector (AIR-PWRINJ-FIB) has been tested to UL 2043 for operation in a
building’s environmental air space; no other power injectors or power modules have been tested to UL 2043
and they should not be placed in a building’s environmental air space, such as above suspended ceilings.
It may be helpful to refer to Figure 2-5 before proceeding.
Figure 2-5 Above Suspended Ceiling Parts ------ TBD ------
1
Suspended ceiling T-rail
5
Bracket mounting clip
2
T-rail clip
6
Access point mounting plate
3
Height adjustment screw
7
Access point
4
T-bar box hanger
95740
4
5
6
7
3
3
1
2
2
1
 Loading...