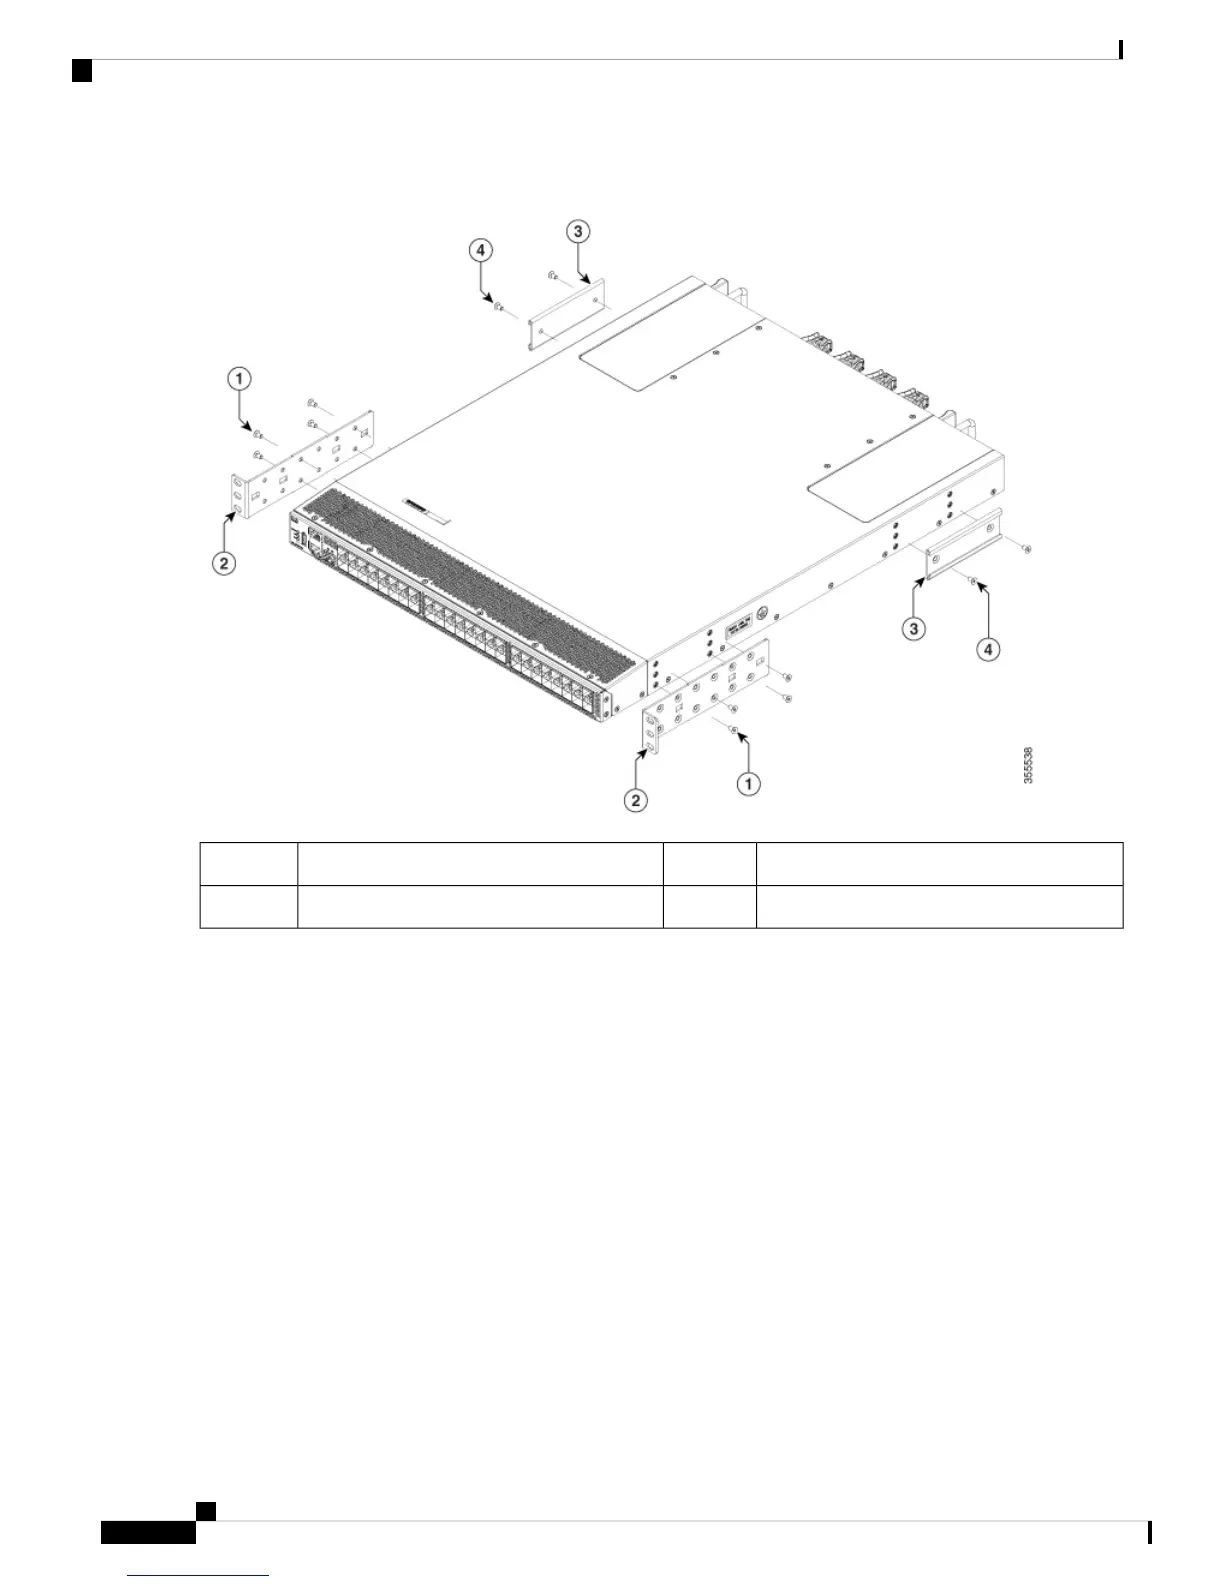
Figure 10: Installing Rack-Mount Brackets on the Front Side of the Chassis
Rack-mount guide3.Four M4 screws1.
Two M4 screws4Rack-mount bracket2.
3. Secure the rack-mount bracket to the chassis using the four M4 screws and tighten each screw to 12 in-lb (1.36 N·m)
of torque.
4. Repeat Step 1 for the other rack-mount bracket on the other side of the switch, and be sure to position it in the same
distance from the front of the switch.
Step 2 Install the two rack-mount guides on the chassis, as follows:
1. Align the two screw holes on a rack-mount guide to the middle two screw holes in the remaining six screw holes on
a side of the chassis.
2. Attach the guide to the chassis using two M4 screws. Tighten the screws to 12 in-lb (1.36 N·m) of torque.
3. Repeat Step 2 for the other rack-mount guide on the other side of the switch.
Step 3 If you are installing the chassis into an ungrounded rack, you must attach a customer-supplied grounding wire to the
chassis, as explained in Grounding the Switch. However, if you are installing the chassis into a grounded rack, you can
skip this step.
Step 4 Install the slider rails into the rack or cabinet, as follows:
Cisco MDS 9148T 32-Gbps 48-Port Fibre Channel Switch Hardware Installation Guide
28
Installing the Cisco MDS 9148T Switch
Installing the Switch in a 4-Post Rack