EasyManua.ls Logo

Cisco MERAKI MR72 User Manual

Cisco MERAKI MR72
19 pages
To Next Page IconTo Next Page
Page #1 background imageLoading...
Page #1 background image
MR72 Installation Guide
The Cisco Meraki MR72 is a dual-band enterprise class 802.11ac cloud-managed access point. Designed for high
capacity and high density, the MR72 meets the needs of the most demanding environments, and also includes the first
ever cloud-managed third radio dedicated to optimizing the RF environment and securing the airwaves.
The Meraki MR72 has an operating temperature of -40o to 60o C.
Package Contents
The MR72 package contains the following:
MR72 Cloud-Managed Access Point
Mount cradle
Wall screws
Wall screw anchors
Grounding screws
Mounting straps
Understanding the MR72
Your Meraki MR72 has the following features:
LED indicator
Your MR72 is equipped with a multi-color LED light on the bottom edge of the unit to convey information about system
functionality and performance:
Orange - AP is booting (permanent Orange suggests hardware issue)
1

Other manuals for Cisco MERAKI MR72

Question and Answer IconNeed help?

Do you have a question about the Cisco MERAKI MR72 and is the answer not in the manual?

Cisco MERAKI MR72 Specifications

General IconGeneral
BrandCisco
ModelMERAKI MR72
CategoryWireless Access Point
LanguageEnglish

Summary

Understanding the MR72

MR72 Hardware Features

Ethernet Port

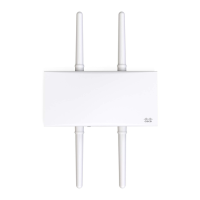
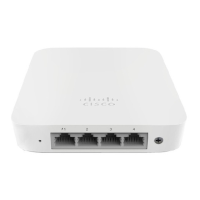
Details the Gigabit Ethernet RJ45 port for WAN uplink, supporting 802.3af power.

Factory Reset Button

Details the function and operation of the factory reset button for rebooting and restoring settings.

Pre-Install Preparation

Configure Your Network in Dashboard

Outlines steps to add an MR72 to your Meraki network via the dashboard.

Check and Upgrade Firmware

Recommends firmware upgrade before mounting for optimal performance.

Assigning IP Addresses to MR72s

Installation Instructions

Choose Your Mounting Location

Provides guidance on selecting an optimal mounting location for performance.

Install the MR72

Describes the two-step process of mounting the MR72 using the cradle.

Remove the Mount Plate from the Access Point

Mount Cradle Installation Methods

Mount the MR72

Power the MR72

Powering with 802.3at PoE Injector

Details powering the MR72 using an optional 802.3at PoE injector.

Powering with 802.3af PoE Switch

Verify Device Functionality and Test Network Coverage

Check LEDs

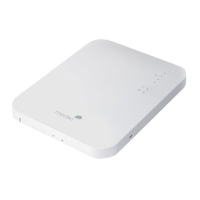
Instructs to check device LEDs for status indicators like solid green or flashing blue.

Related product manuals