Send document comments to ucs-docfeedback@cisco.com
20
Cisco UCS B200 Blade Server Installation and Service Note
OL-22473-02
Removing a Blade Server Cover
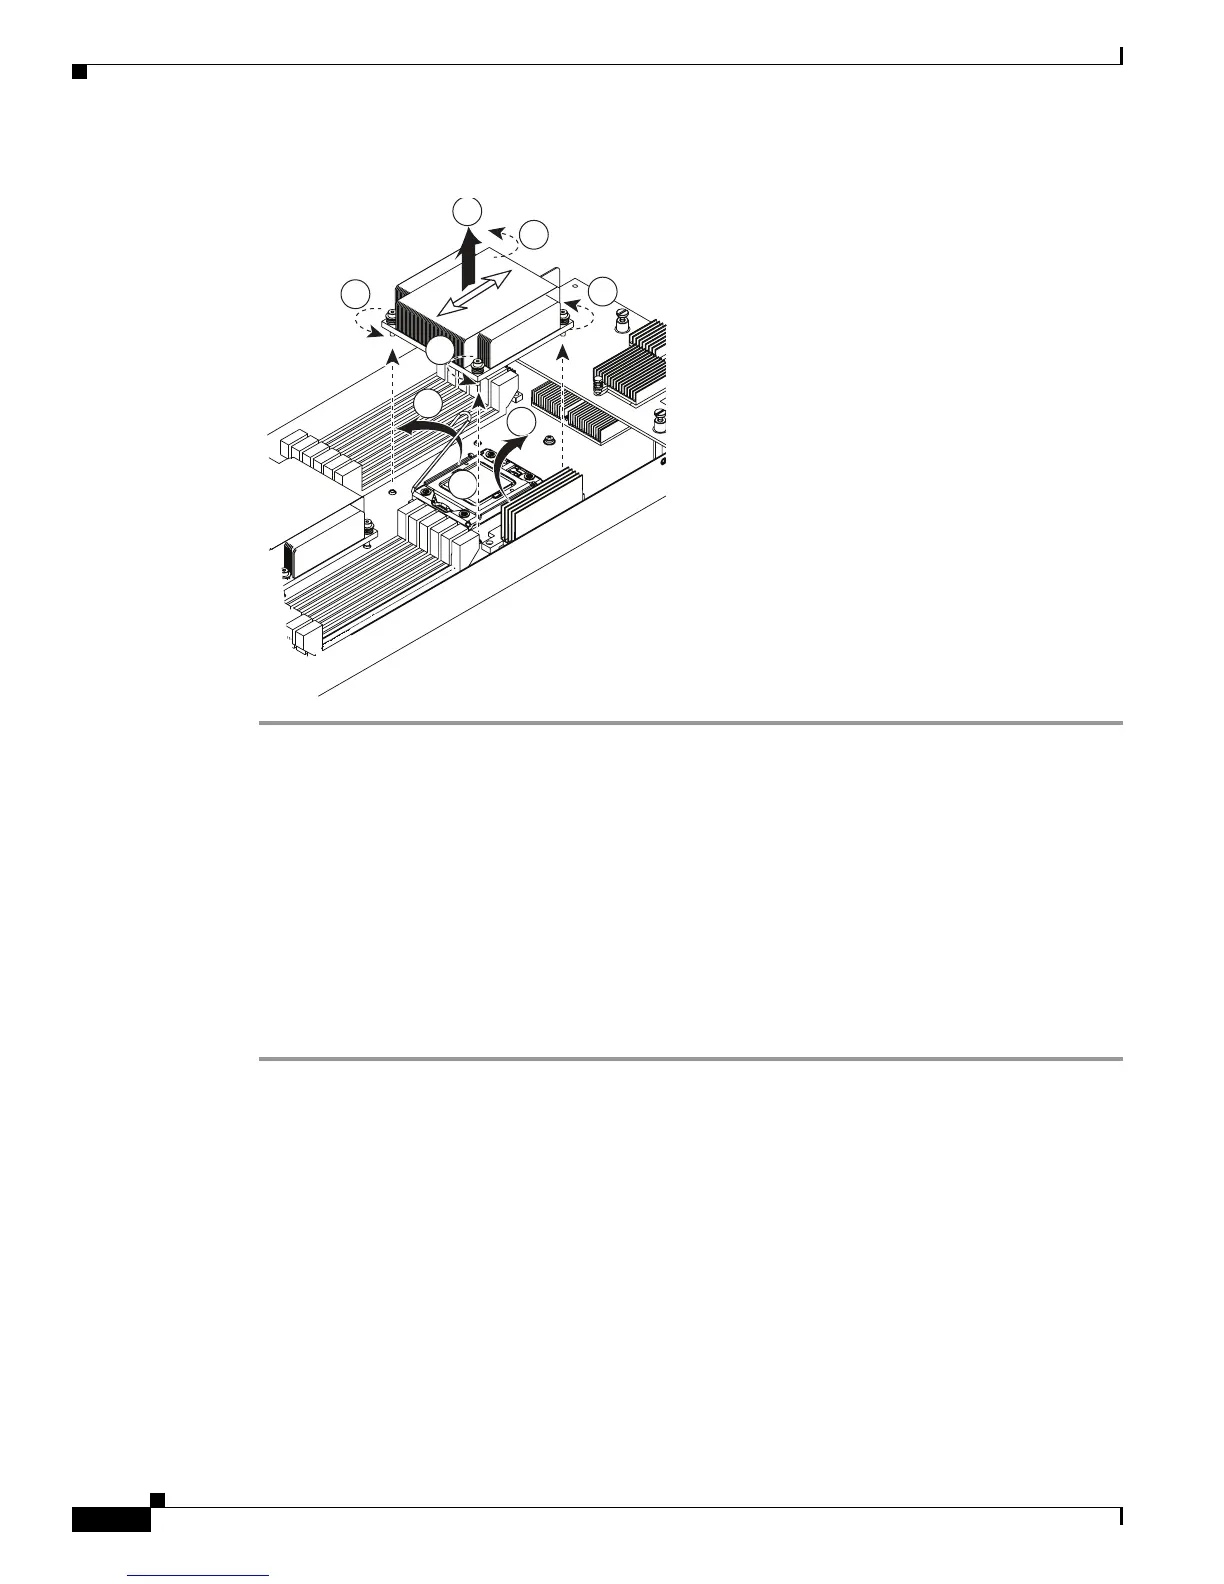
Figure 10 Removing The Heat Sink and Accessing the CPU Socket
Installing a CPU and Heat Sink
Before installing a new CPU in a server, verify the following:
• The CPU is supported for that model server.
• A BIOS is available and installed that supports the CPU/DIMM and server combination.
• The service profile for this server in UCS Manager will recognize and allow the new CPU. This is
especially important if you have been using a single processor and install a second processor.
To install a CPU and heat sink, follow these steps:
Step 1 Place the CPU on the base with the notches aligned to the pins on the base. See Figure 11, callout 1.