3
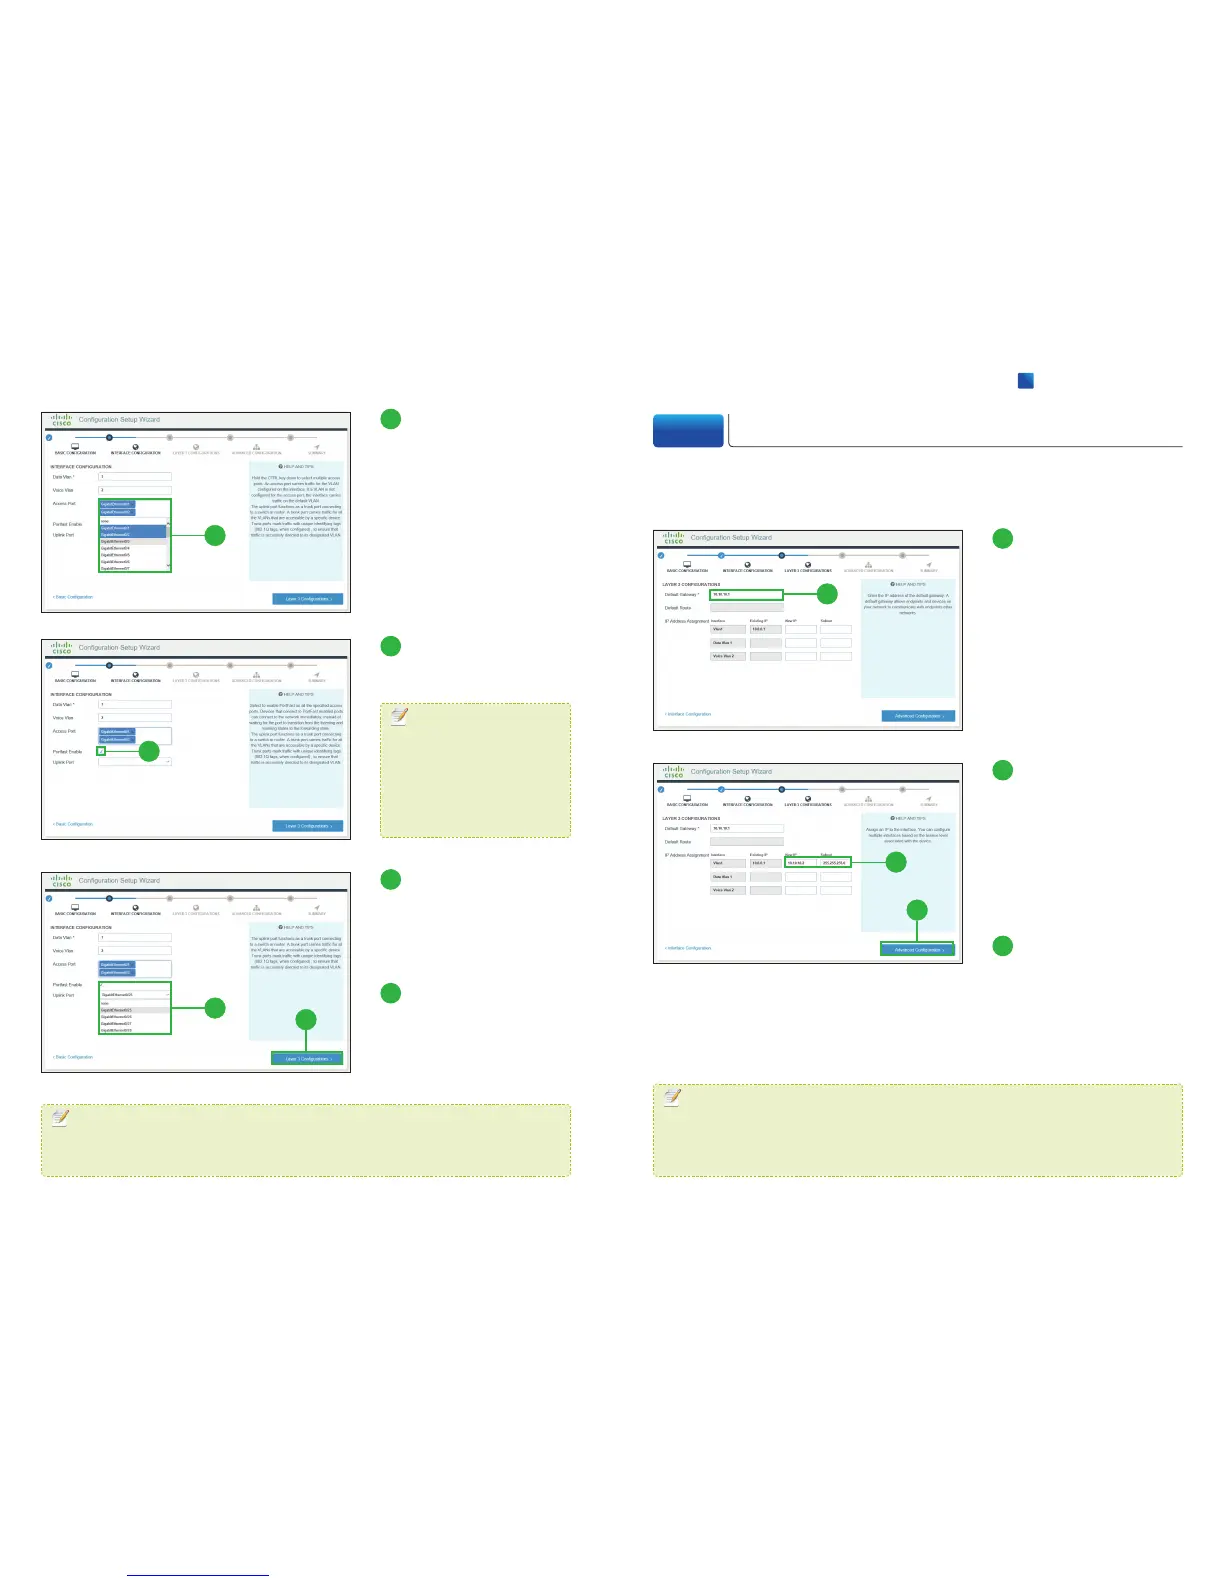
Select Access Ports.
You can skip this step if you want
to use all the RJ-45 Ethernet
ports as access ports.
4
Click [PortFast Enable].
You can skip this step.
5
Select Uplink Ports.
The uplink port functions as a
trunk port connecting to a switch
or router. You can skip this step.
6
Click [Layer 3
Configurations]
The LAYER 3 CONFIGURATION
window appears.
3
5
4
6
MEMO
You can configure each ports in the Web UI or CLI (Command Line Interface) after
completing the Configuration Setup Wizard.
MEMO
The PortFast immediately
brings ports to the forwarding
state from a blocking state,
bypassing the listening and
learning states.
2-5 Layer 3 Configuration
Configure the Layer 3 information. As a minimum information in order to connect the
switch to the network, the [Default Gateway] field is required.
1
1
Enter the IP address of
the Default Gateway.
2
Enter the IP address
and subnet mask for
the switch in the [New
IP] and [Subnet] of
[VlanX] row.
You can configure only one L3
interface on the switch.
3
Click
[
Advanced
Configuration
]
.
The ADVANCED
CONFIGURATION window
appears.
2
3
MEMO
The step
❷
is not required, but recommended. By assigning an IP address to the
switch here, you can easily access to the Web UI by entering the IP address into a web
browser address bar, after completing the Configuration Setup Wizard.
 Loading...