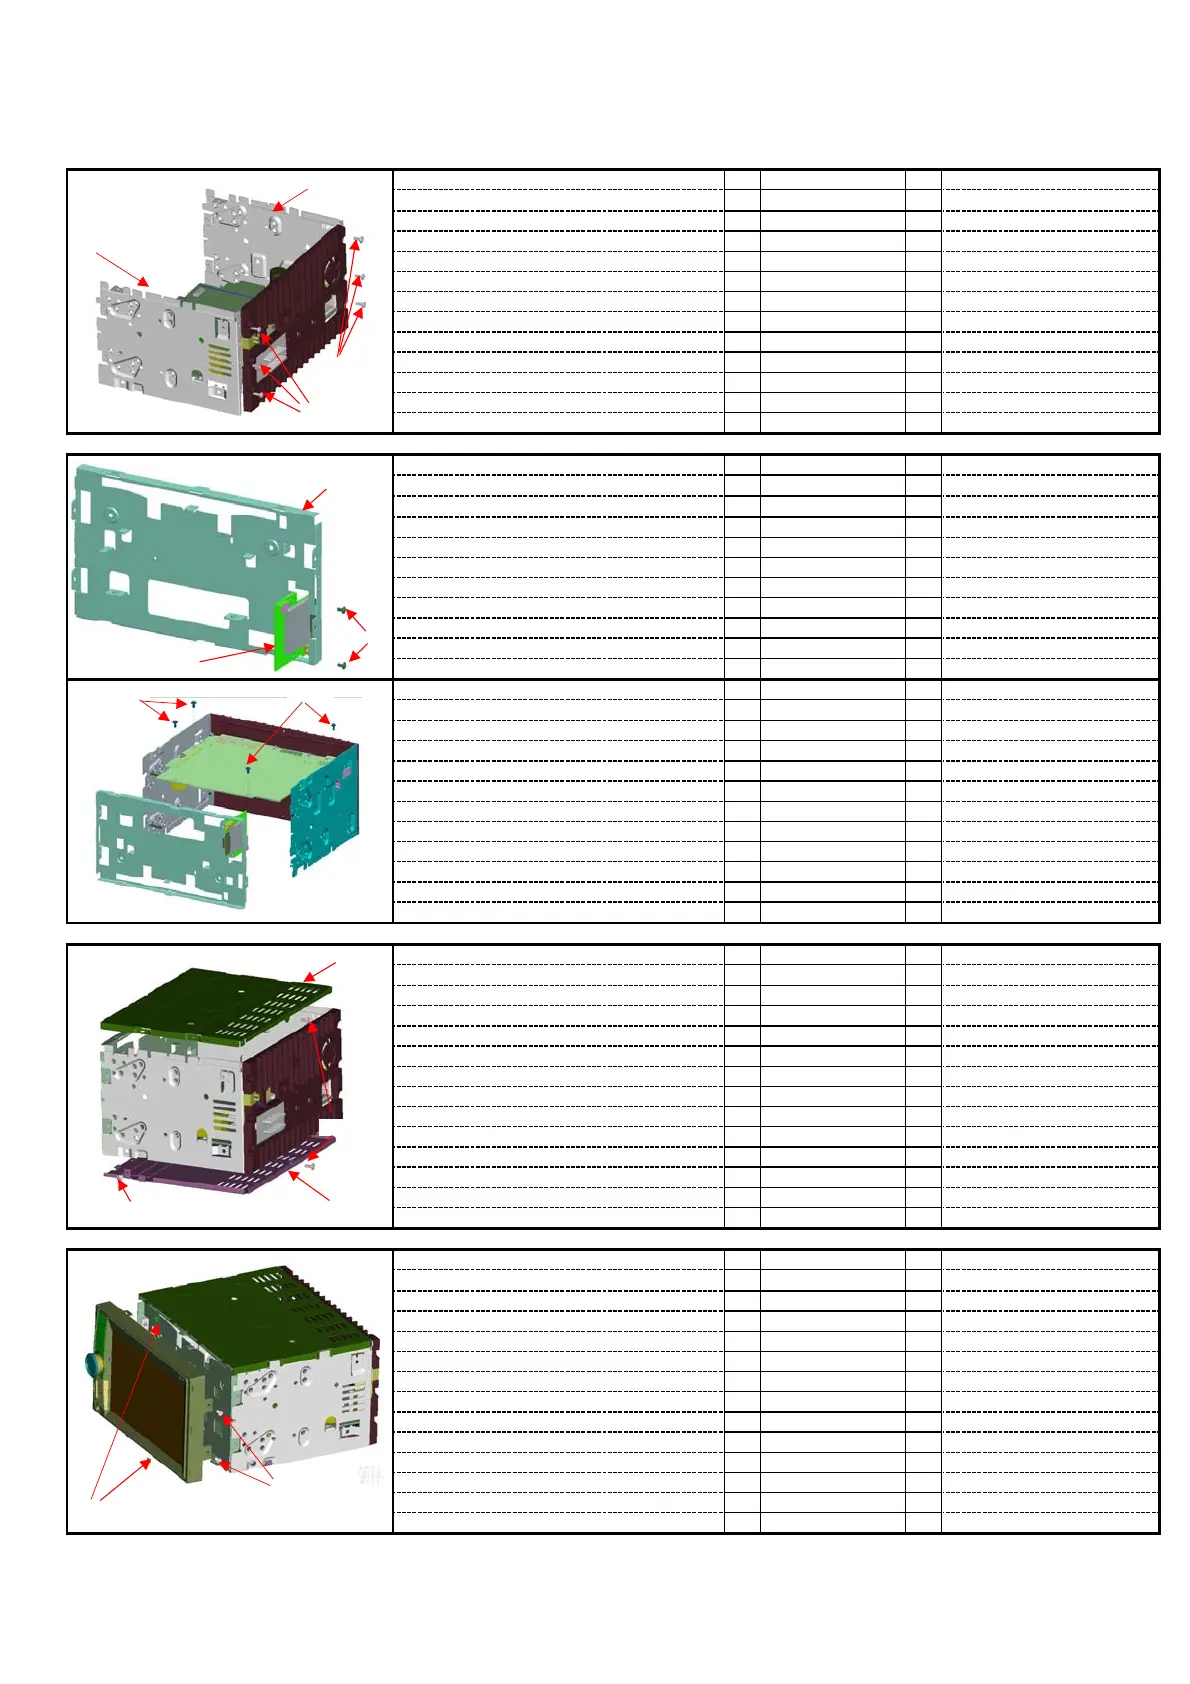
2-3.Installation of R&L Bracket
①
1
② 1
③ 6
2-4.Installation of Panel Bracket
①
1
② 2
③ 1
① 4
2-5.Installation of T&B Cover
1. Install the top cover① onto the head unit. ① 1
2. Install the bottom cover③ onto the head unit. ② 2
③ 1
④ 2
2-6.Installation of Panel ASSY
①
4
② 2
total 6 screws.
842RN6908SD001
panel bracket①, and use 2 screws② to fix it. 121104050025
1. Install the SD PCB assembly③ onto the rear 121000002871
121104070017
1. Install the L_Bracket① and R_Bracket② onto 121000021221
the MB assembly 121000011219
1. Install the rear panel bracket onto unit,
121104070007
and fasten the 4 screws① on the bottom.
121000002878
121104070017
3. fix the screws② on the back of the
bottom cover.
heat sink to fasten the top cover and
121000002876
121104070007
4. Install 2 screws④ on the sides of the
bottom cover.
1. Plug the FPC and GPS cable in the
121040000222
corresponding sockets between head unit 121045000040
and front panel
and use screws② to fix upper and lower sides,
2. Fasten the screws③ on the heatsink,
and another 4 screws① to fix right and left side.
2. Install the front panel onto the unit,
① Panel
Bracket
②Scerw×
③SD ASSY
①L Bracket
③Scerw×6
R Bracket
③Scerw
①Scerw×4
Scerw
②Screw×2
③Bottom
Cover
④Screw×2
① Top
Cover
① Screw×4
②Screw×2
 Loading...