13
Parts & Service: 020 8988 7400 / E-mail: Parts@clarkeinternational.com or Service@clarkeinternational.com
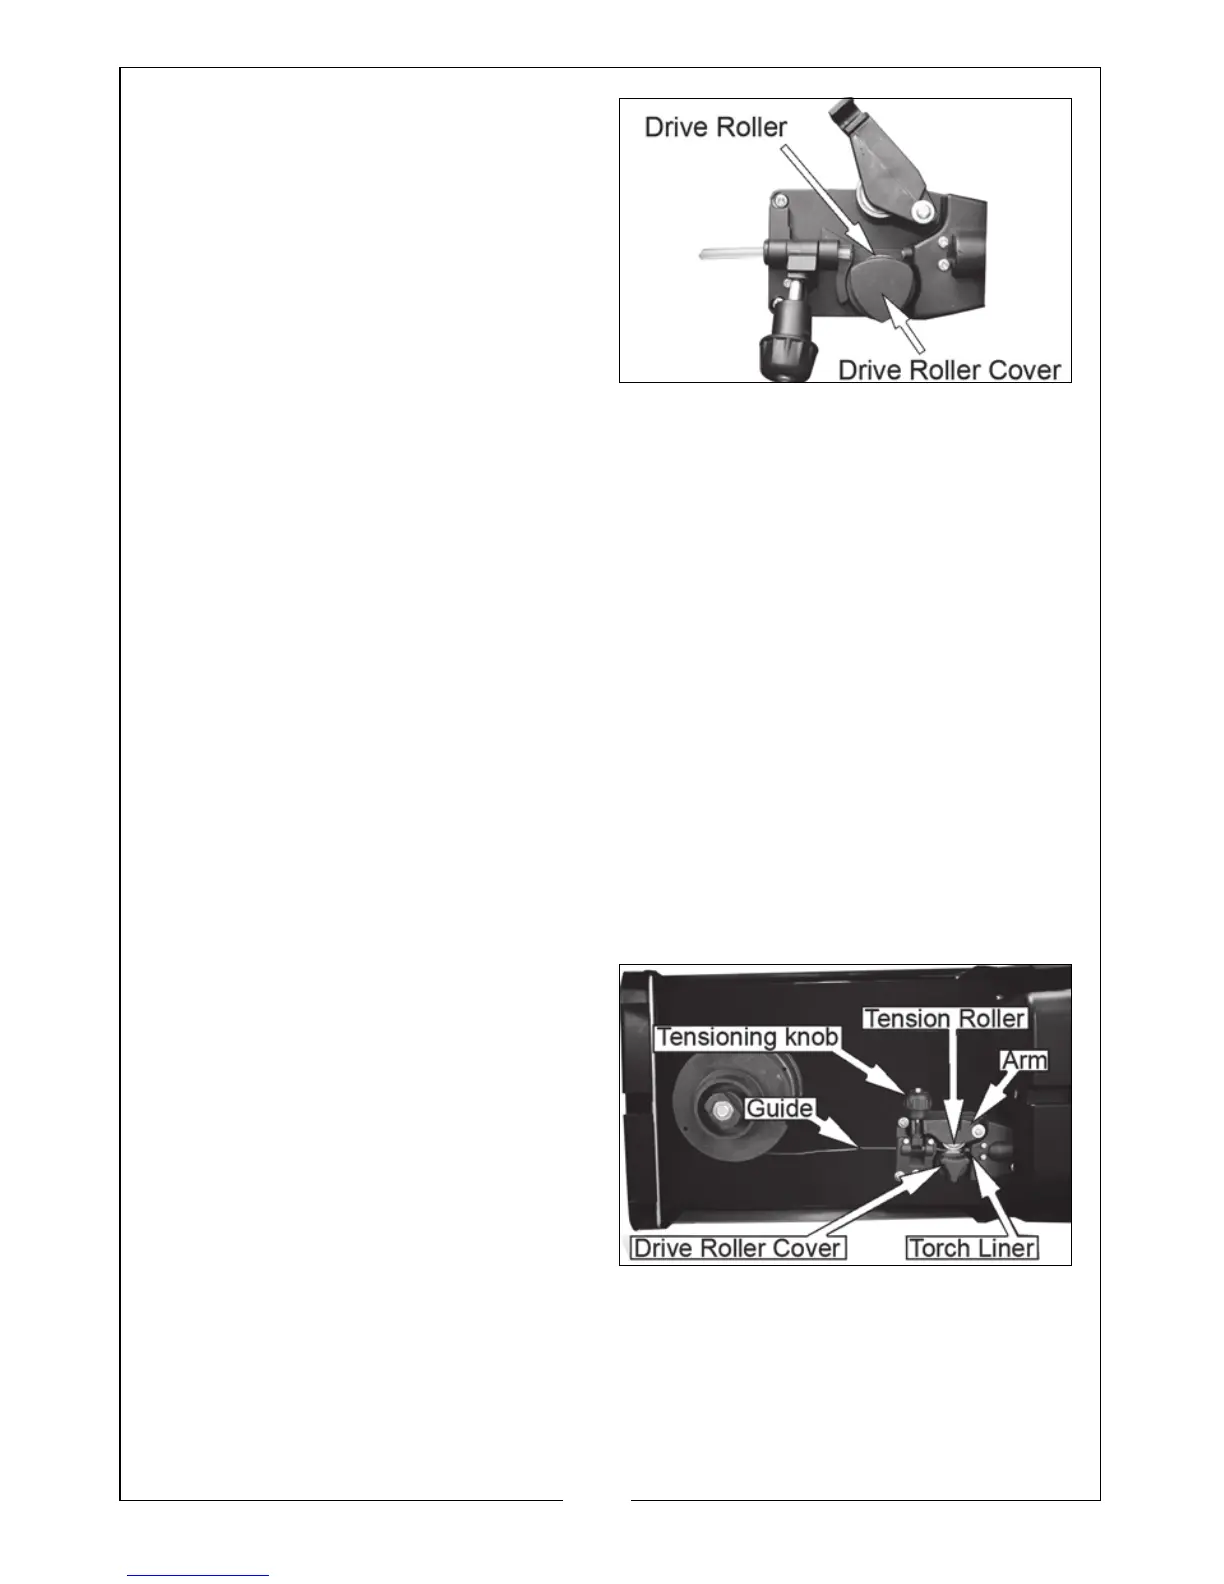
5. Pull the roller off the drive spindle.
• The groove size is stamped on
the corresponding side of the
roller. Select the groove size
according to the size of the
wire you are using and put the
roller back on the spindle with
your chosen side facing you.
6. Replace the drive roller cover
back onto the drive spindle with
the opening facing right.
7. Ensure that the flanges at the base of the drive roller cover, seat fully into
the circular recess in the main moulding and then rotate the drive roller
cover through 90° to lock it in place.
THREADING THE WIRE
IMPORTANT: Do not release the tension on the wire as it will unravel causing
feeding problems later.
1. Pull out the end of the wire from the spool, taking care not to release the
tension.
• We recommend you cut off and discard the first 10 cm of wire from
the spool to avoid burrs and then straighten the next 15 cm of wire
to help with feeding.
2. Loosen the tensioning knob and pivot it towards you.
3. Lift up the arm.
4. Pass the wire through the guide,
over the drive roller and into the
torch liner.
• Push about 10-15 cm into the
torch liner.
5. Lower the arm and replace the
tensioning knob.
• Tighten the tensioning knob
sufficiently to hold firmly, but do
not fully tighten.
NOTE: Correct tension will allow the wire to feed into the torch liner
smoothly, but will allow the drive roller to slip in the event of a
blockage.
 Loading...