console port of the E20.
2. Power up the E20 unit. This may require a restart if the hardware is already powered up.
3. As the console output appears, press any console key before cOS Core has fully started.
4. The boot menu will now be displayed on the console.
5. Choose the menu item Reset Options.
6. Various reset options are now displayed on the console. For a full reset, select the menu
option Reset to Factory Defaults.
A complete description of the boot menu and its options can be found in the separate cOS Core
Administrators Guide.
Performing a Factory Reset Manually
As an alternative to resetting using the boot menu, the E20 can be reset manually. The steps for a
manual reset are as follows:
1. The progress of the reset can be followed using a local console connection. If that is
required, open a console display window connected to the E20 local console port.
2. Power off the E20.
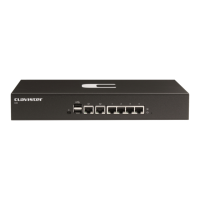
3. Push in the recessed reset button on the front of the E20 with a suitable pointed tip tool. A
paper-clip could be used.
The recessed unlabeled pinhole button is directly to the right of the E20 Ethernet ports.
4. Holding the button in, power up the E20.
5. Continue holding in the button for at least 30 seconds longer after power is applied.
6. If a console was connected in step 1, the console output will indicate that the hardware has
been reset to its factory defaults.
7. Release the button and the Clavister Security Gateway can now be configured as though it
was brand new and had not previously been configured.
Important: Any console password will be reset to no password
If a console password was set this will also be reset to the factory default of no password.
If required, the console password should be set later by choosing the boot menu option
Enable Console Password.
Chapter 5: Resetting to Factory Defaults
69