16
www.infraredsauna.com
A. Begin at the top edge of the glass.
B. Align the silicone weather stripping with the edge of the glass.
C. Press the weather stripping firmly onto the glass, ensuring it adheres properly.
D. Continue applying the weather stripping downward, maintaining even pressure to avoid gaps or bubbles.
Important: This silicone weather stripping is oen mistaken for trash inside the cartons. It comes as a long, card-
board-covered wrap, but it is an essential part for sealing your glass sauna door and ensuring proper insulation. Be sure
not to discard it!
ADD THE SILICONE WEATHER STRIPPING TO THE LEFT SIDE GLASS
13
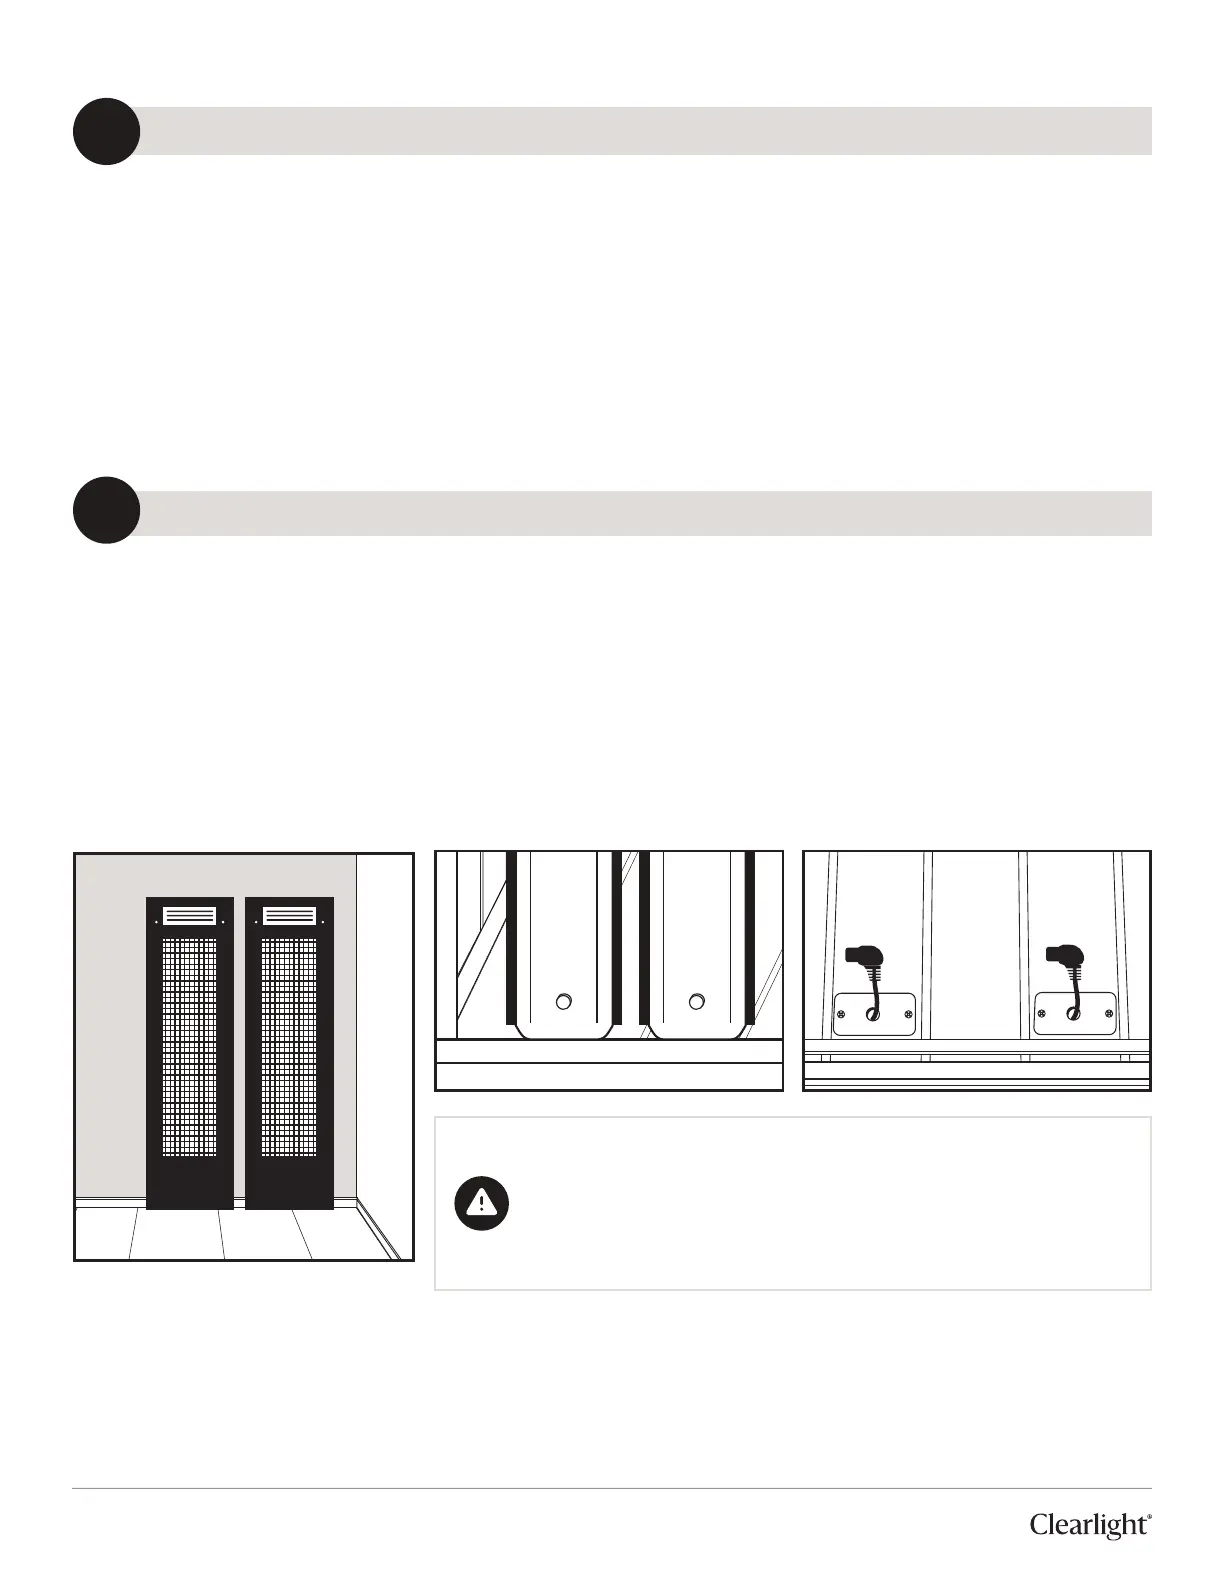
INSTALLING FRONT HEATERS (Repeat this step for all 4 front heaters)
14
1. Locate the front heaters.
Two will go on each side of the door
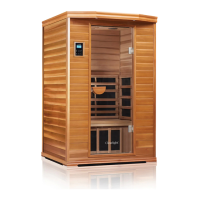
2. Align the le front heater and plug the connector that
comes out of the boom of the heater into the plug coming
out of the floor.
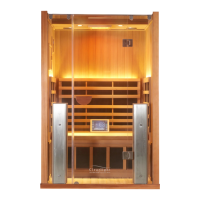
3. Align the hole in the back of the heater with the hole in the
front wall glass. Using the included screws and washers,
secure the heater to the glass through the open hole.
4. Place one washer on the inside and one on the
outside glass
so that the glass is protected from
the metal.
5. Secure both screws in the heater
A. Do not overtighten
6. Repeat this process for the other heaters.
WARNING! The infrared heaters in your sauna are a potential
BURN HAZARD.
DO NOT touch the infrared heaters when they are in operation
and allow them to cool before servicing.