29/3228/32
11.
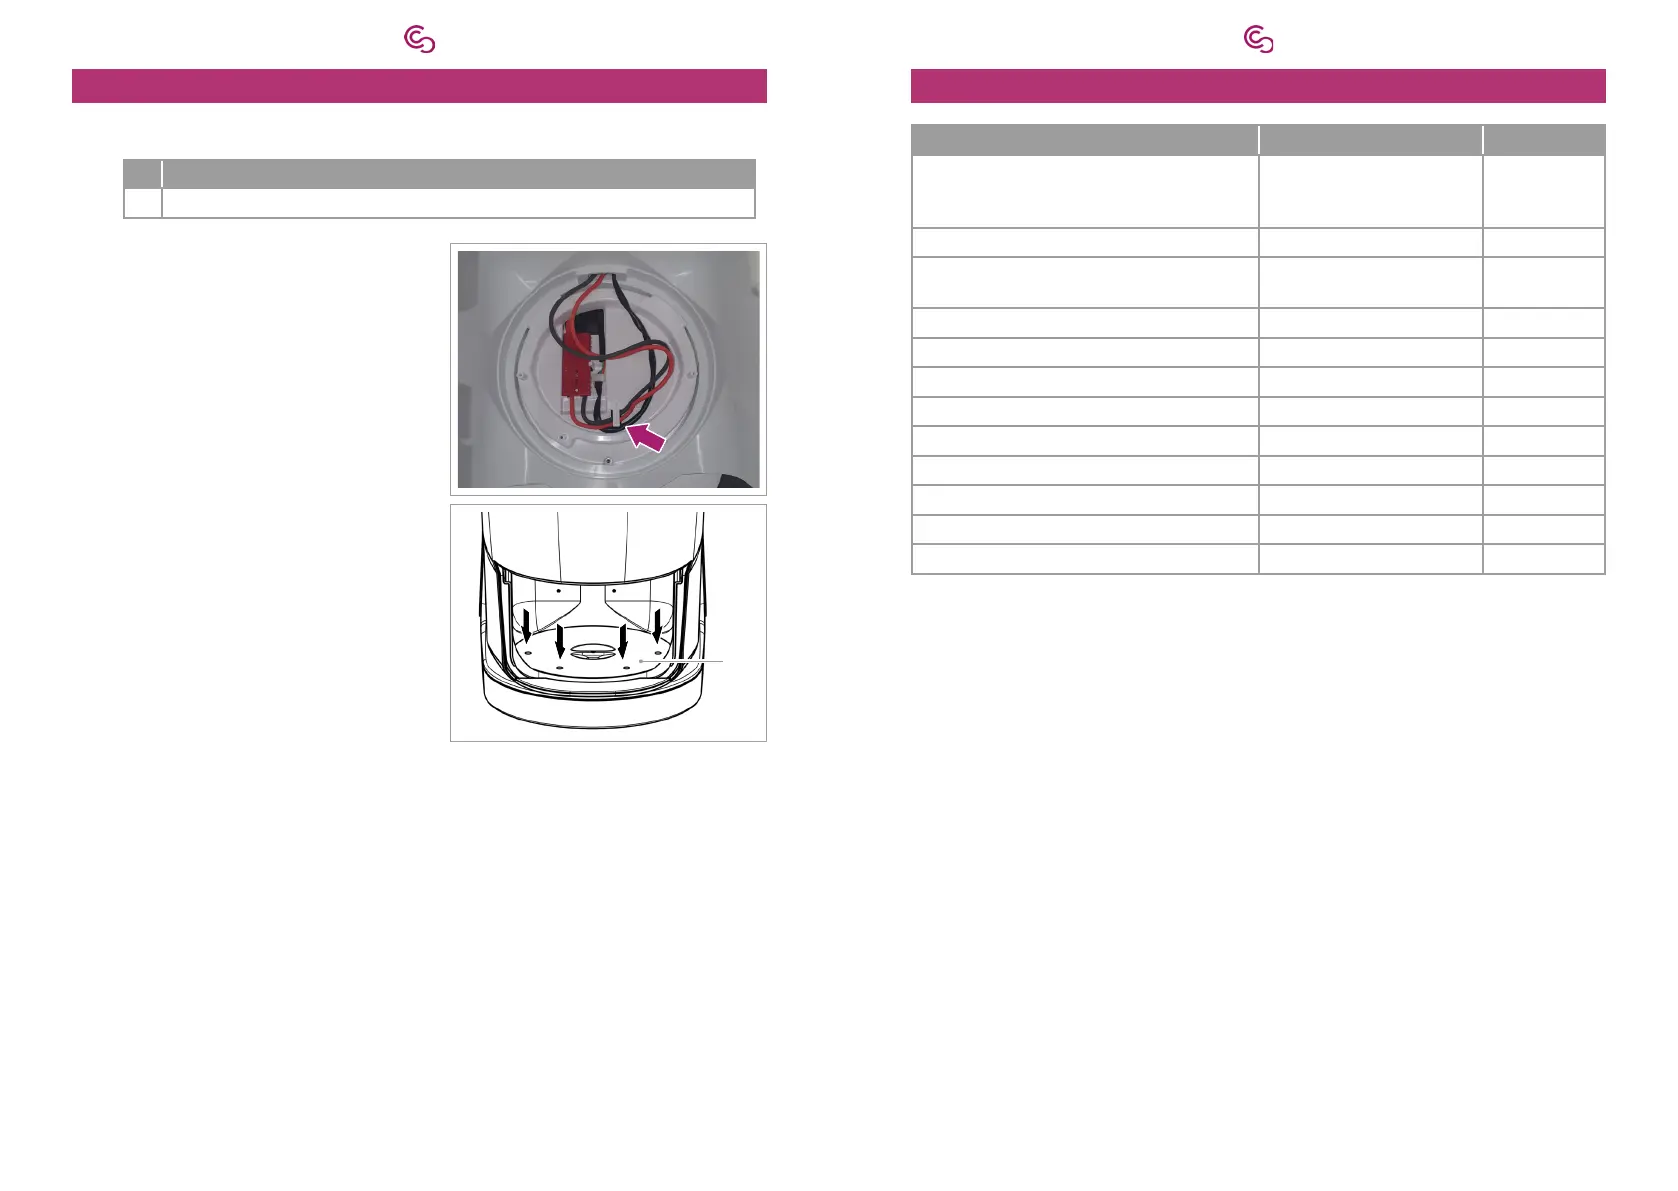
11.1. Connect the Clesana C1
No. Tools and consumables
1 Screwdriver Torx TX20
1. Connect the control cable of the control
panel with the control cable from the
base body.
2. Connect the power cable coming from
of the base body.
3. Snap the housing plug (red) into the
4. Lay the power and control cable in the
5.
with 4 x screws and screwdriver Torx
TX20.
6.
7. Put on the lid unit.
1
11.2. Check the funcon
1.
– Clesana C1 can be rotated.
–
– The tray snaps into place upon closing.
–
2. Switch on the voltage.
ª Start the Clesana C1.
3.
4.
12.
Characterisc Value Unit
Height
Width
L-Adapter/round base length
515
363
516/461
mm
mm
mm
Seat height 478 mm
Weight of C1 with L-Adapter/with round
base
13.8/13.1
Supply voltage 11.8–15 V
Rated voltage 12 V
22 A
0.28 W
265 W
1.7 ±0.17 Wh
0.55 ±0.06 Wh
Usage temperature 5–40 °C
—
 Loading...