Disassembly
Removing the Keyboard 2 - 17
2.Disassembly
Removing the Keyboard
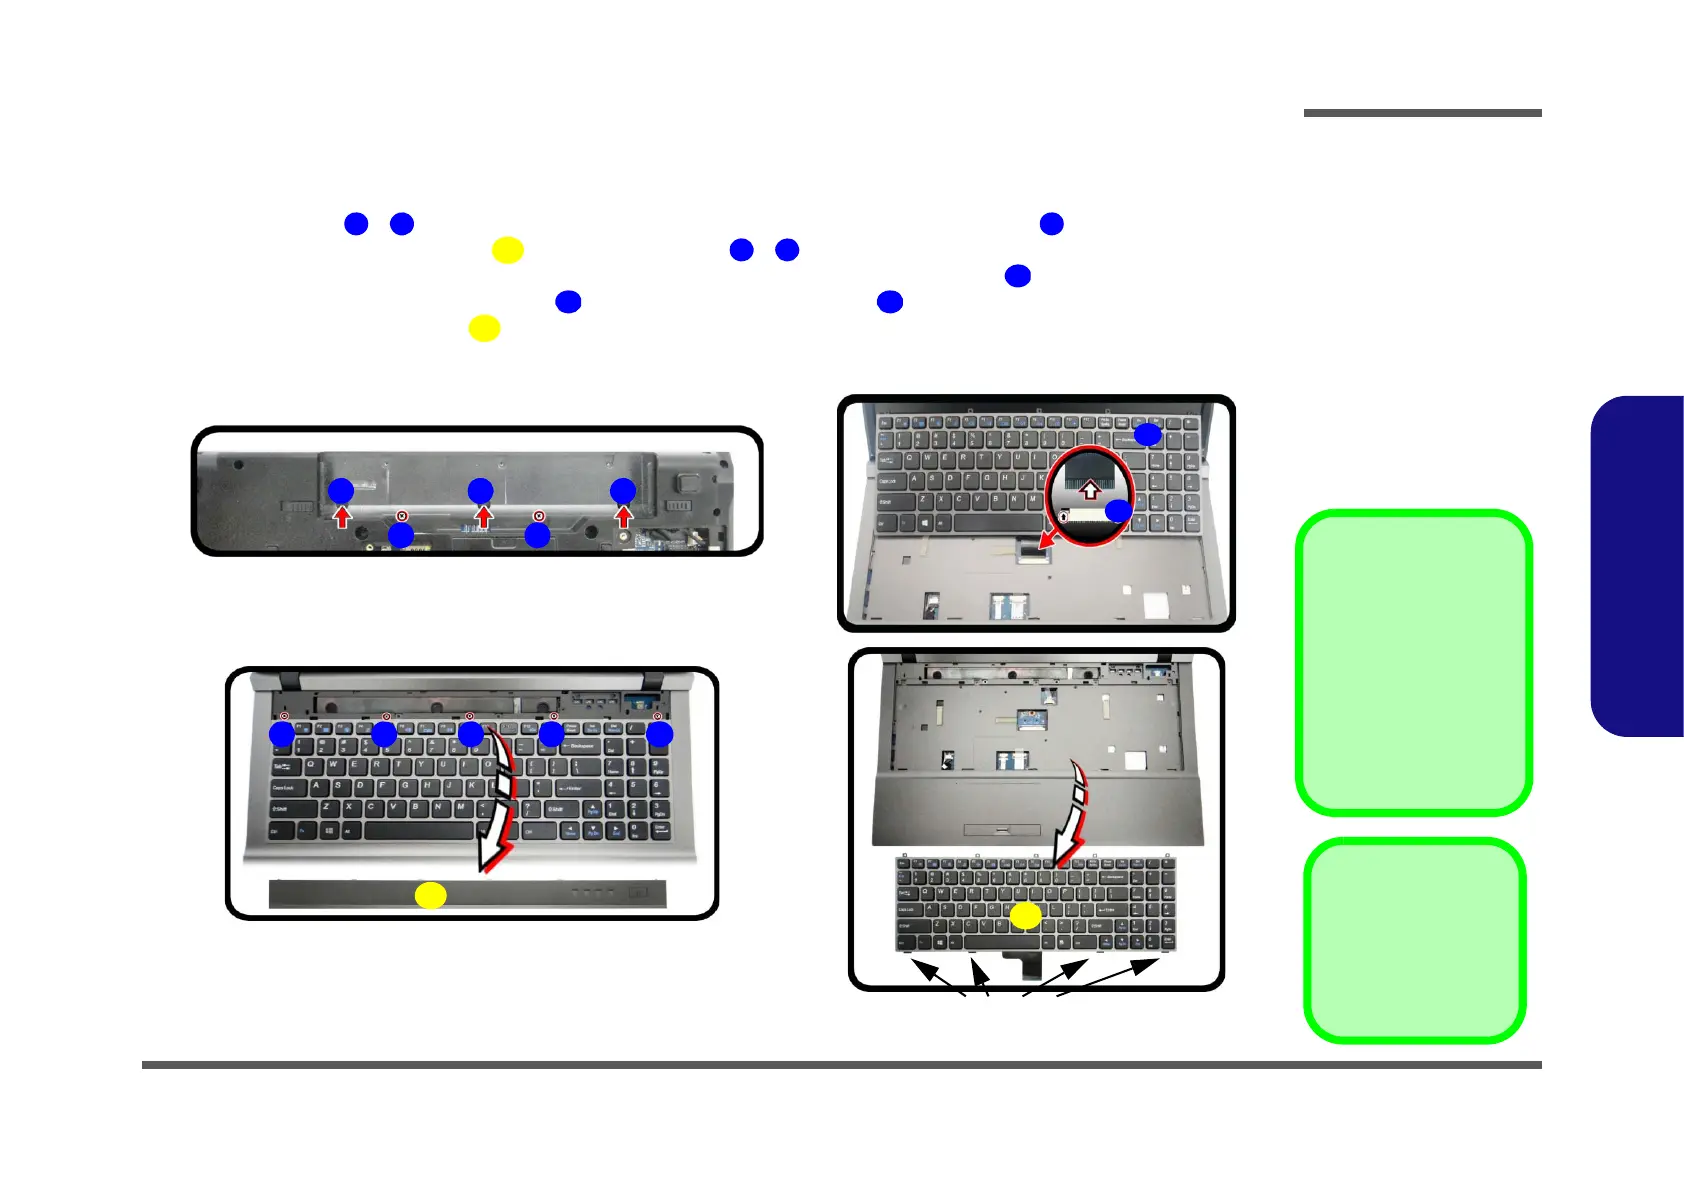
Figure 12
Keyboard Removal
a. Remove screws from the
bottom of the computer.
b. Lift the center cover
module and remove
screws from the key-
board.
c. Carefully lift the key-
board up and disconnect
the keyboard ribbon ca-
ble from the locking col-
lar socket.
d. Remove the keyboard.
1. Turn off the computer, remove the battery (page 2 - 5), and the component bay cover (page 2 - 8).
2. Remove screws
- from the bottom of the computer and carefully push out at point .
3. Lift up the center cover module
and remove screws - from the keyboard (Figure 12b).
4. Carefully raise the keyboard up, being careful not to bend the keyboard ribbon cable .
5. Disconnect the keyboard ribbon cable from the locking collar socket (Figure 12c).
6. Carefully lift up the keyboard off the computer (Figure 12d).
7. Reverse the process to replace the keyboard (make sure to reconnect the keyboard cable).
Re-Inserting the
Keyboard
When re-inserting the
keyboard firstly align the
four keyboard tabs at the
bottom (Figure 12e) at
the bottom of the key-
board with the slots in the
case.
a.
Keyboard Tabs
1
3
2
5 8
b.
c.
9
12
10
11
6 7
d.
4
3 3
4. Center Cover
module
12. Keyboard
•7 Screws