9
c l i m a t e m a s t e r. c o m
C o n s o l e s
R e v. : 0 8 / 1 3 / 1 0
T H E S M A R T S O L U T I O N F O R E N E R G Y E F F I C I E N C Y
System Cleaning and Flushing
Cleaning and flushing the unit and system is the single
most important step to ensure proper start-up and
continued efficient operation of the system. Follow
the instructions below to properly clean and flush the
system:
DO NOT FLUSH SYSTEM THROUGH THE UNIT!
To prevent injury or death due to electrical shock or
contact with moving parts, open unit disconnect before
servicing unit.
1. Verify that electrical power to the unit is
disconnected and that the circulation pump is
de-energized.
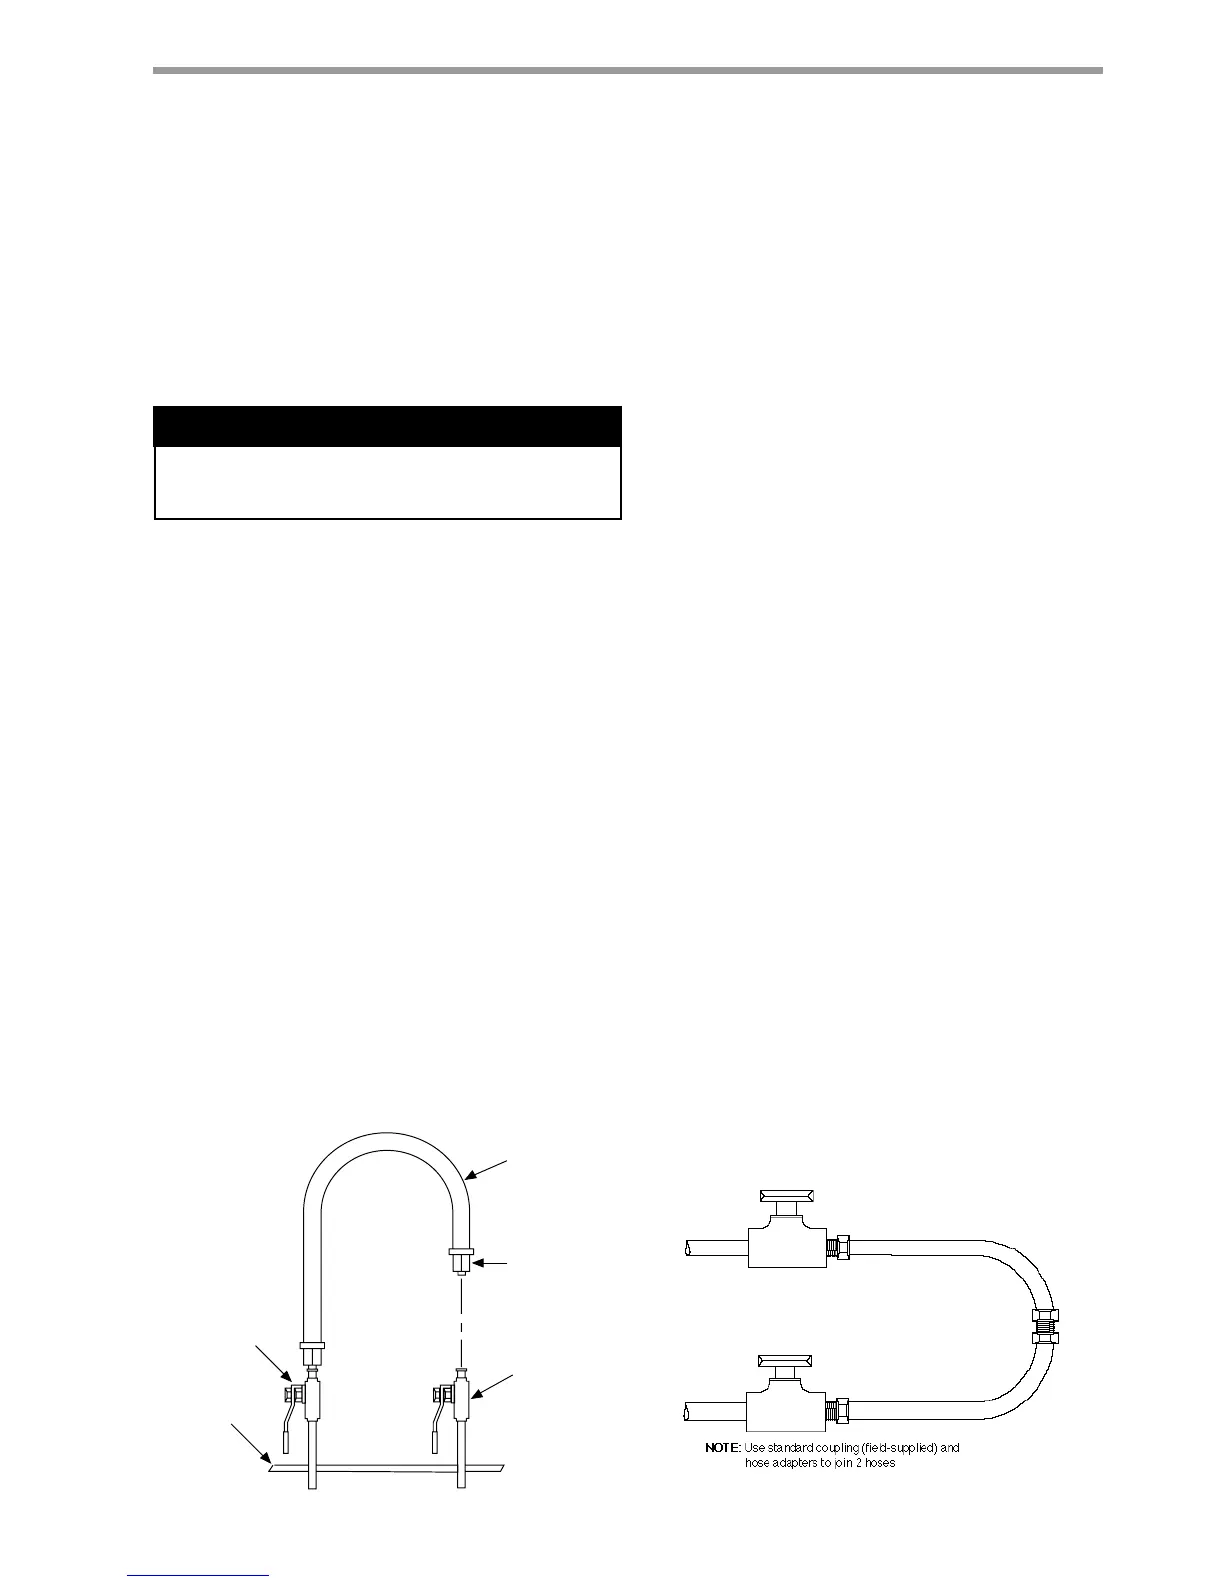
2. Connect the supply hose directly to the return
riser valve. Use a single length of flexible hose as
illustrated in Figure 2 below.
NOTE: When one hose is too short to make the
connection without exceeding the minimum bend
radius of the hose, substitute two length of flexible
hose joined together with a field-supplied, standard
MPT coupling. Use the adapter provided with the
hose kit as shown in Figure 3.
3. Fill the system with water, leaving the air vents
open. Bleed all air from the system but do not
allow the system to over flow. Check the system
for leaks and make any required repairs. Adjust
the water and air level in the expansion tank.
4. With strainers in place, start the pumps.
Systematically check each vent to ensure that all
of the air is bled from the system.
5. Verify that make-up water is available and
adjusted to properly replace any space remaining
when all air is evacuated. Pressure test and inspect
the system for leaks and make any additional
repairs required.
Start-Up Preparation
6.
Open the drain at the lowest point in the system.
Verify that make-up water replacement rate equals
rate of bleed. Continue to bleed the system until
the water appears clean or for at least three hours
whichever is longer.
7. Completely drain the system.
8. Refill the system with clean, chemically treated
water. Since water varies for each locality, contact
a local water treatment company for the correct
cleaning chemicals to use in your area.
CAUTION: To avoid possible damage to piping
systems constructed of plastic piping, DO NOT
allow loop temperature to exceed 43 °C.
9. Set the boiler to raise the loop temperature to
approximately 29.4°C. Circulate the solution for
a minimum of 8 to 24 hours. At the end of this
period, shut off the circulating pump and drain the
solution. Repeat system cleaning if necessary.
10. When the cleaning process is complete, remove
the short-circuit hoses. Connect the hoses to the
proper supply and return connections to the unit.
Refill the system and bleed off all air.
11. Test the system pH with litmus paper. The system
water should be slight alkaline (pH 7.5 to 8.5). Add
chemicals as appropriate to maintain acidity levels.
CAUTION: DO NOT use "Stop-Leak" or any similar
chemical agent in this system. Addition of these
chemicals to the loop water will foul the system and
will inhibit unit operation.
12. When the system is successfully cleaned, flushed,
refilled and bled, check the main system panels,
safety cutouts and alarms. Set controls to properly
maintain loop temperature.
Figure 3