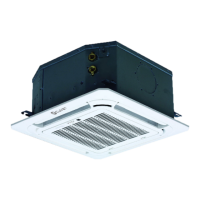
Installation
Page 131
For Box 2 950x950,
770mm / 30.3” (Suspension bolt)
830mm / 32.7”(Body)
900mm / 35.4”(Ceiling opening)
950mm / 37.4”(Panel)
950mm / 37.4”(Panel)
670mm / 26.4”
(Suspension bolt)
830mm / 32.7” (Body)
900mm / 35.4” (Ceiling opening)
Refrigerant piping side Drain hose side
2. Drill 4 holes 5cm (2”) deep at the ceiling hook positions
in the internal ceiling. Be sure to hold the drill at a 90°
angle to the ceiling.
3. Using a hammer, insert the ceiling hooks into the pre-
drilled holes. Secure the bolt using the included washers
and nuts.
4. Install the four suspension bolts
5.Mount the indoor unit. You will need two people to lift
and secure it. Insert suspension bolts into the unit’s hang-
ing holes. Fasten them using the included washers and
nuts
Adjust the position to ensure the gaps between the indoor
unit and the four sides of false ceiling are even. The
bottom of the unit should be 24mm / 0.9in(compact
cassette) /10 - 25mm (0.4-0.98”)(super-slim cassette)
higher than ceiling board. Generally, L should be half the
length of the suspension bolt or long enough to prevent
the nuts from coming off.
For Box 2 650x650,
Wall
Ceiling board
Main body
L
24mm (0.9”)
For Box 2 950x950,
L
52~51
631
CAUTION:
Ensure that the unit is completely level.
The unit is equipped with a built-in drain pump and
float switch. If the unit is tilted against the direction of
condensate flows (the drainpipe side is raised), the float
switch may malfunction and cause water to leak.
 Loading...