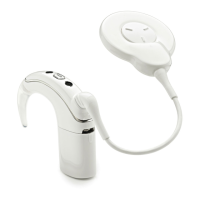
3. To attach the new coil cable,
push the coil cable plug into
the coil until it clicks into
place.
4. Push the coil cable into the
coil cable socket on the
processing unit until it clicks
into place.
Remove the coil cable only if you are changing it to a different one
or fitting a microphone protector sleeve. Always leave the coil cable
connected when storing your processor overnight in the Dry & Store
unit. To avoid breaking the coil cable, do not pull on the coil cable and
do not twist the coil cable plug.
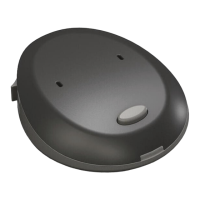
Change the coil magnet
Coil magnet strength should always be determined by the clinician. If
the magnet needs to be changed:
1. Remove the magnet from
the coil by turning the
magnet counter-clockwise.
2. Insert the new magnet into
the coil hole from the top of
the coil. The side with the
grips should face upwards.
3. Turn the magnet clockwise
until it is in position.
Notes:- If your clinician gives you a Cochlear
™
Nucleus® CP800 Series Coil Magnet
Reverse Polarity, use it as described for a normal magnet.
- If your clinician uses the strongest magnet (a Cochlear
™
Nucleus® CP800
Series Coil (6M)), it is part of the coil, and cannot be changed as described here.
© Cochlear Limited 2016 CP802 Sound Processor User Guide - 25