D018433_01_CR4405_User_Manual
3
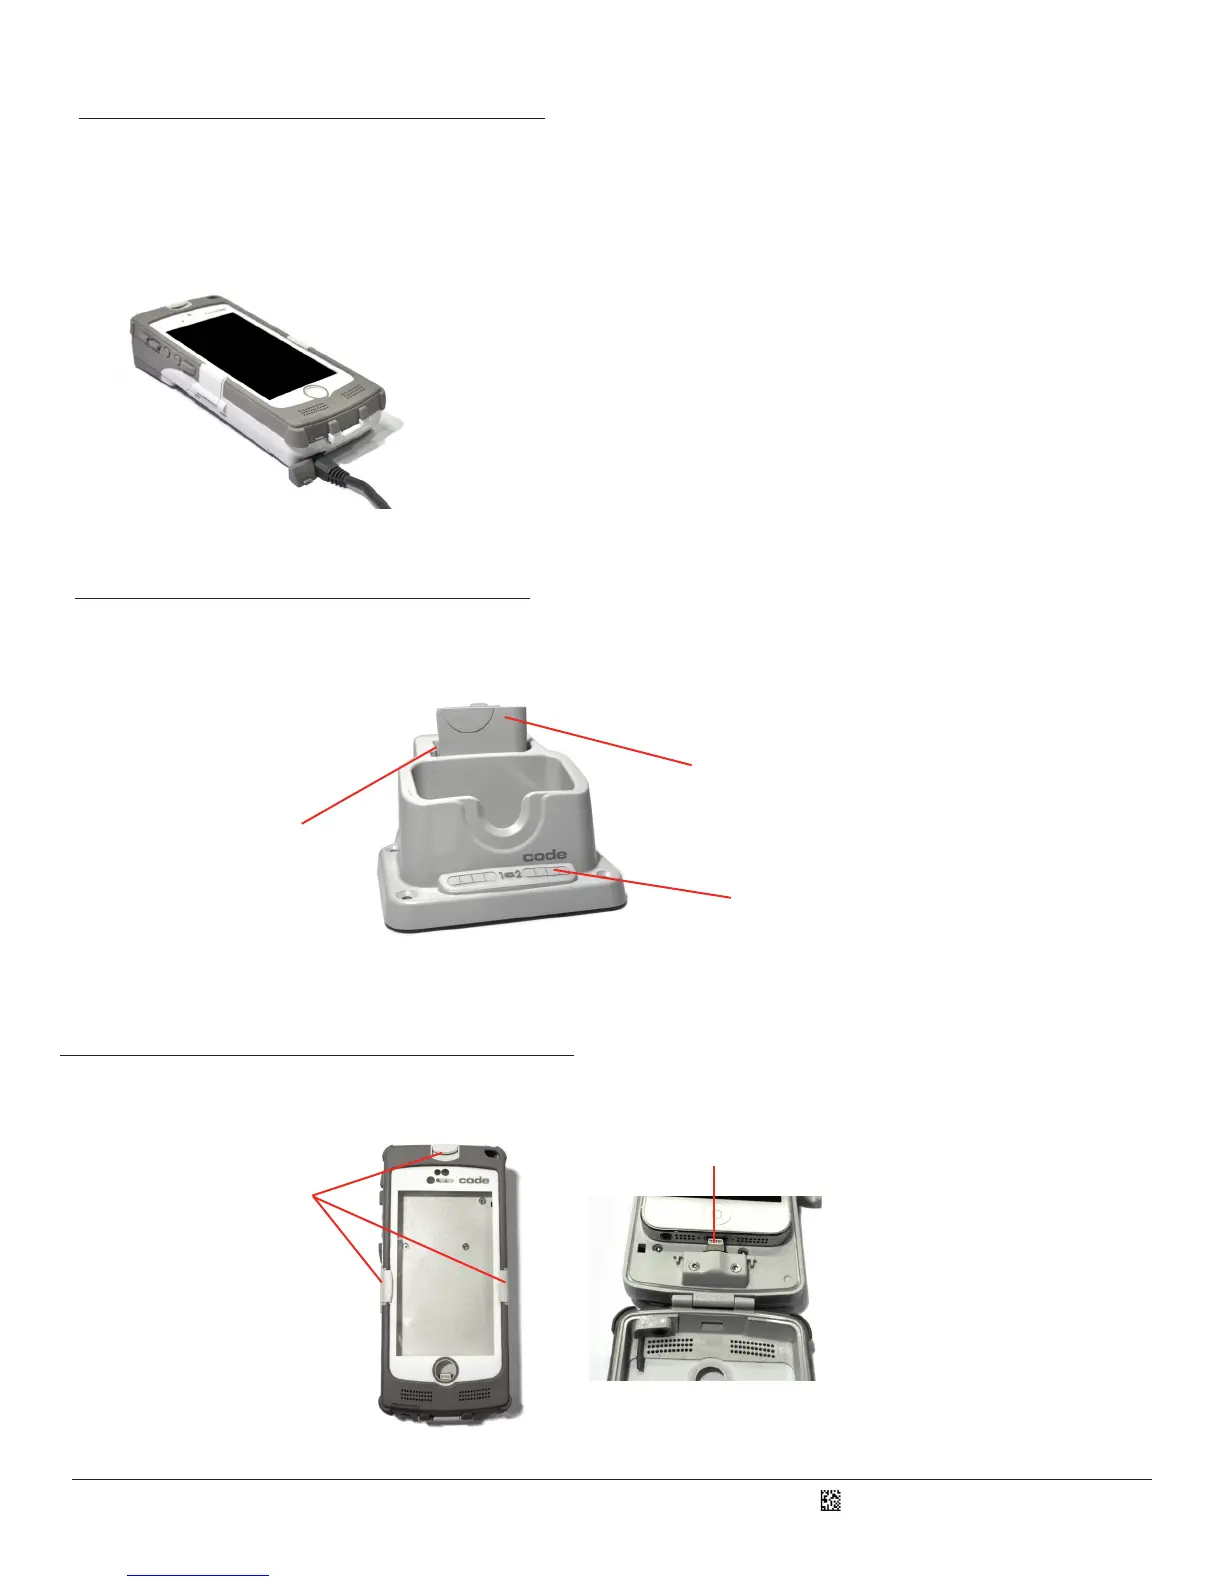
5.0 - iPhone Installaon in the Sled
Open the three security latches on the sled (Figure 13). Slide the phone on to the connector (Figure 14). Close the cover and secure
the latches. Phone removal is done in reverse. Be careful to not bend the electrical connector outward while sliding the phone away
from it.
3.2 - USB Direct Connecon to Sled
1. Plug the Micro-B side of the USB cable into the sled (Figure 11).
2. Plug the other side of the USB cable into a computer USB port (Figure 6).
3. During charging, the LED located at the top right corner of the sled (Figure 9) will light up according to Figure 10.
NOTE: The USB cable provided was custom developed to reduce charge me. Using a non-Code cable may signicantly increase the charge me.
Figure 11
4.0 - Charging a Spare Sled Baery
A spare sled baery can be docked for charging in the rear bay of the Charging Staon (Figure 12). Similar to LED Bank 1, upon
baery inseron all four LEDs of LED Bank 2 will rapidly ash indicang readiness to charge, and then display spare baery status
according to Figure 8.
Figure 12
Spare Baery Cartridge
Rear Charging Bay
Rear Charging Bay LEDs
Security
Latches
Figure 13
Figure 14
Connector