16
MACHINE PREPARATION
18. SOLUTION TANK / DETERGENT SOLUTION (FOR SYSTEMS WITHOUT CDS)
Verify that the key switch is in position "0" (for the electric version, check that the power cable is
unplugged from the mains), engage the parking brake, pulling the lever and lock the handle with the
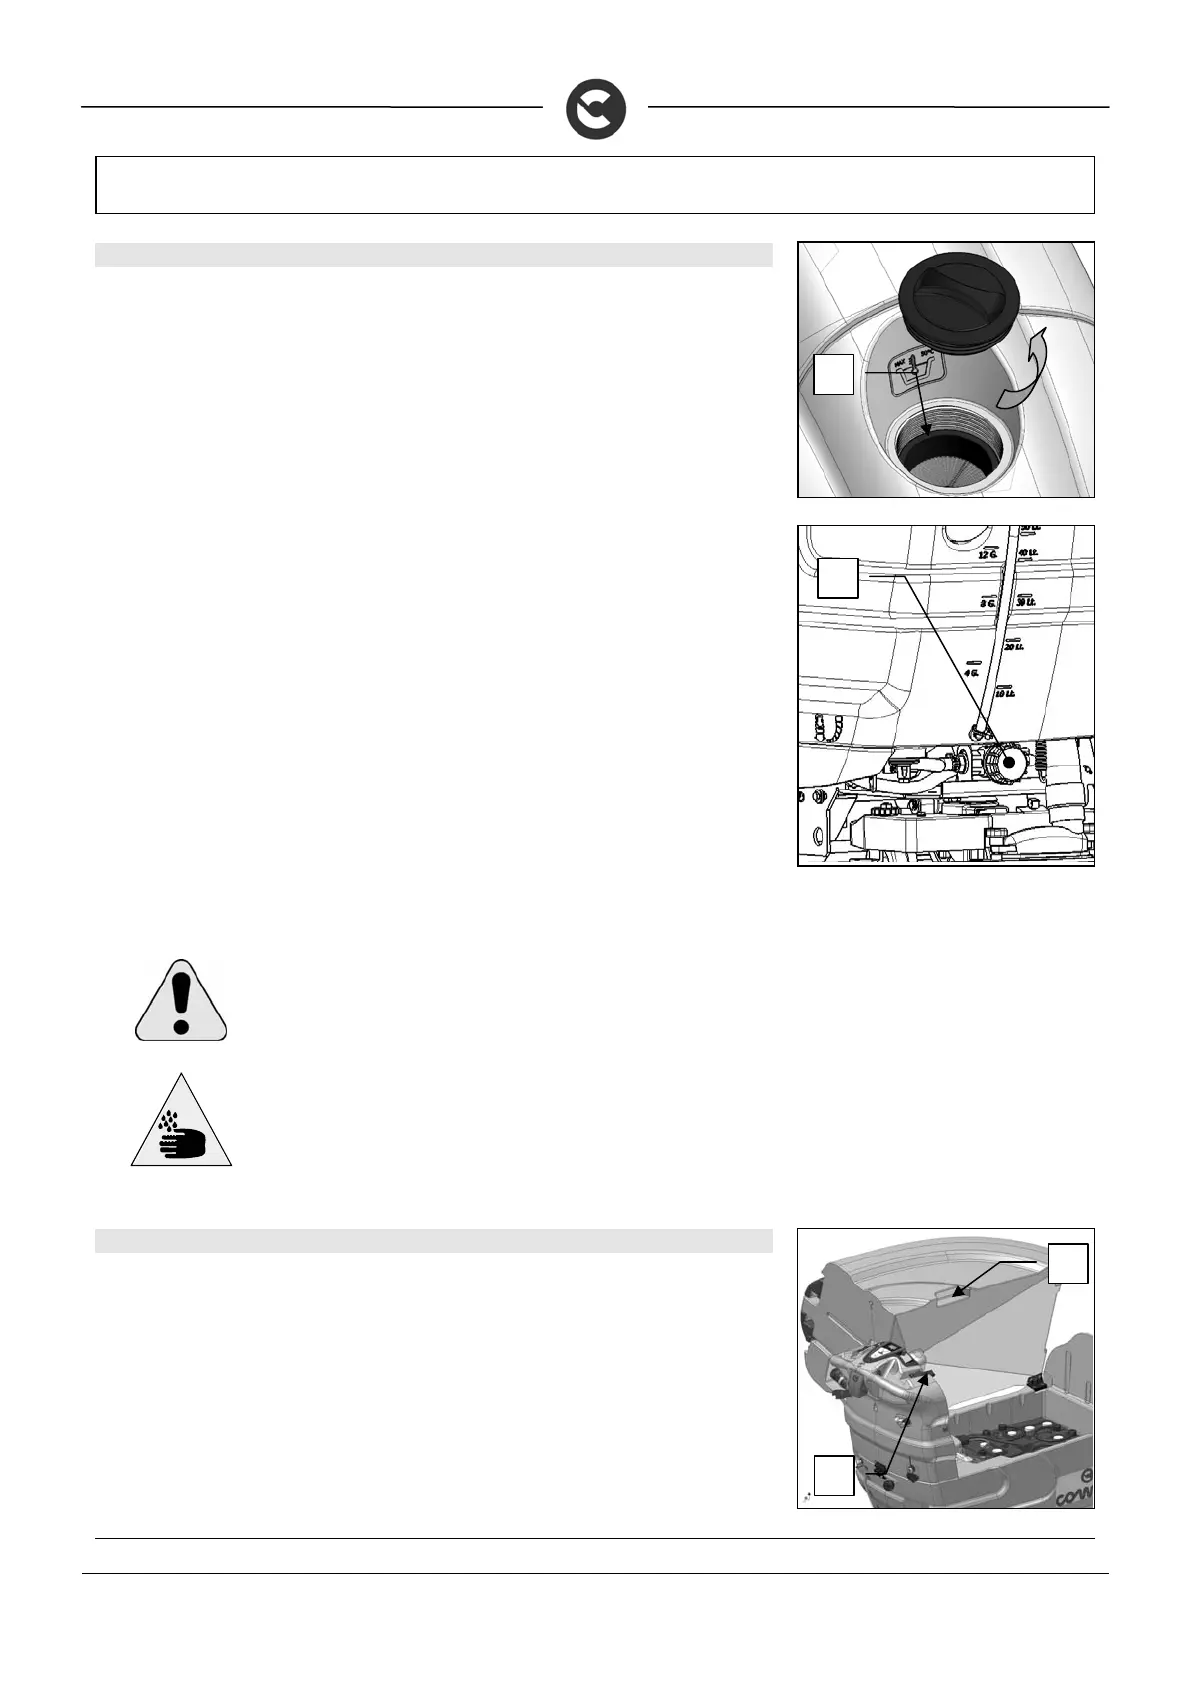
pin, check that the recovery tank is empty, if full empty it. Remove the front inlet cap and check the
solution filter (1) is correctly assembled.
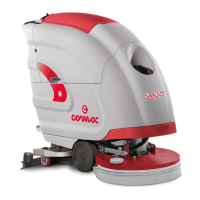
Check the filter cover (2) beneath the solution tank is correctly closed.
Fill it with clean water at a temperature not exceeding 50°C.
Add the liquid detergent to the tank in the concentration and manner indicated on the detergent
manufacturer's label. The formation of excess foam could damage the suction motor, so only use the
minimum amount of necessary detergent.
ATTENTION: always use detergents whose manufacturer's label indicates
their suitability for scrubbing machines. Do not use acid or alkaline products or
solvents without this indication.
In addition, you are advised to always use low foam detergents.
Do not use pure acids
ATTENTION: you are advised to always wear protective gloves, to avoid the
risk of serious injury to your hands
19. SOLUTION TANK / DETERGENT TANK (FOR SYSTEMS WITH CDS ONLY).
1. Check the switch key is on “0”.
2. Apply the parking brake by pulling the lever and blocking the handle with the pin.
3. Make sure the recovery tank is empty before opening, if full empty it.
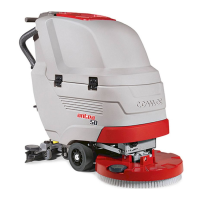
4. Release the hinges (1) on the handlebars.
5. Rotate the recovery tank as far as it will go, using the side handle (2).
6. Unscrew the cap (3) of the canister in the compartment (behind the batteries) and fill it with liquid
detergent in the manner indicated on the label supplied with the machine.
1
2
1
2