11
Selective intercom addresses
You must set the intercom address on all the riser’s internal units.
You can assign the same intercom address to a maximum of 3 internal units.
For group calls, select the desired intercom codes simultaneously (max. 3).
Advanced configuration
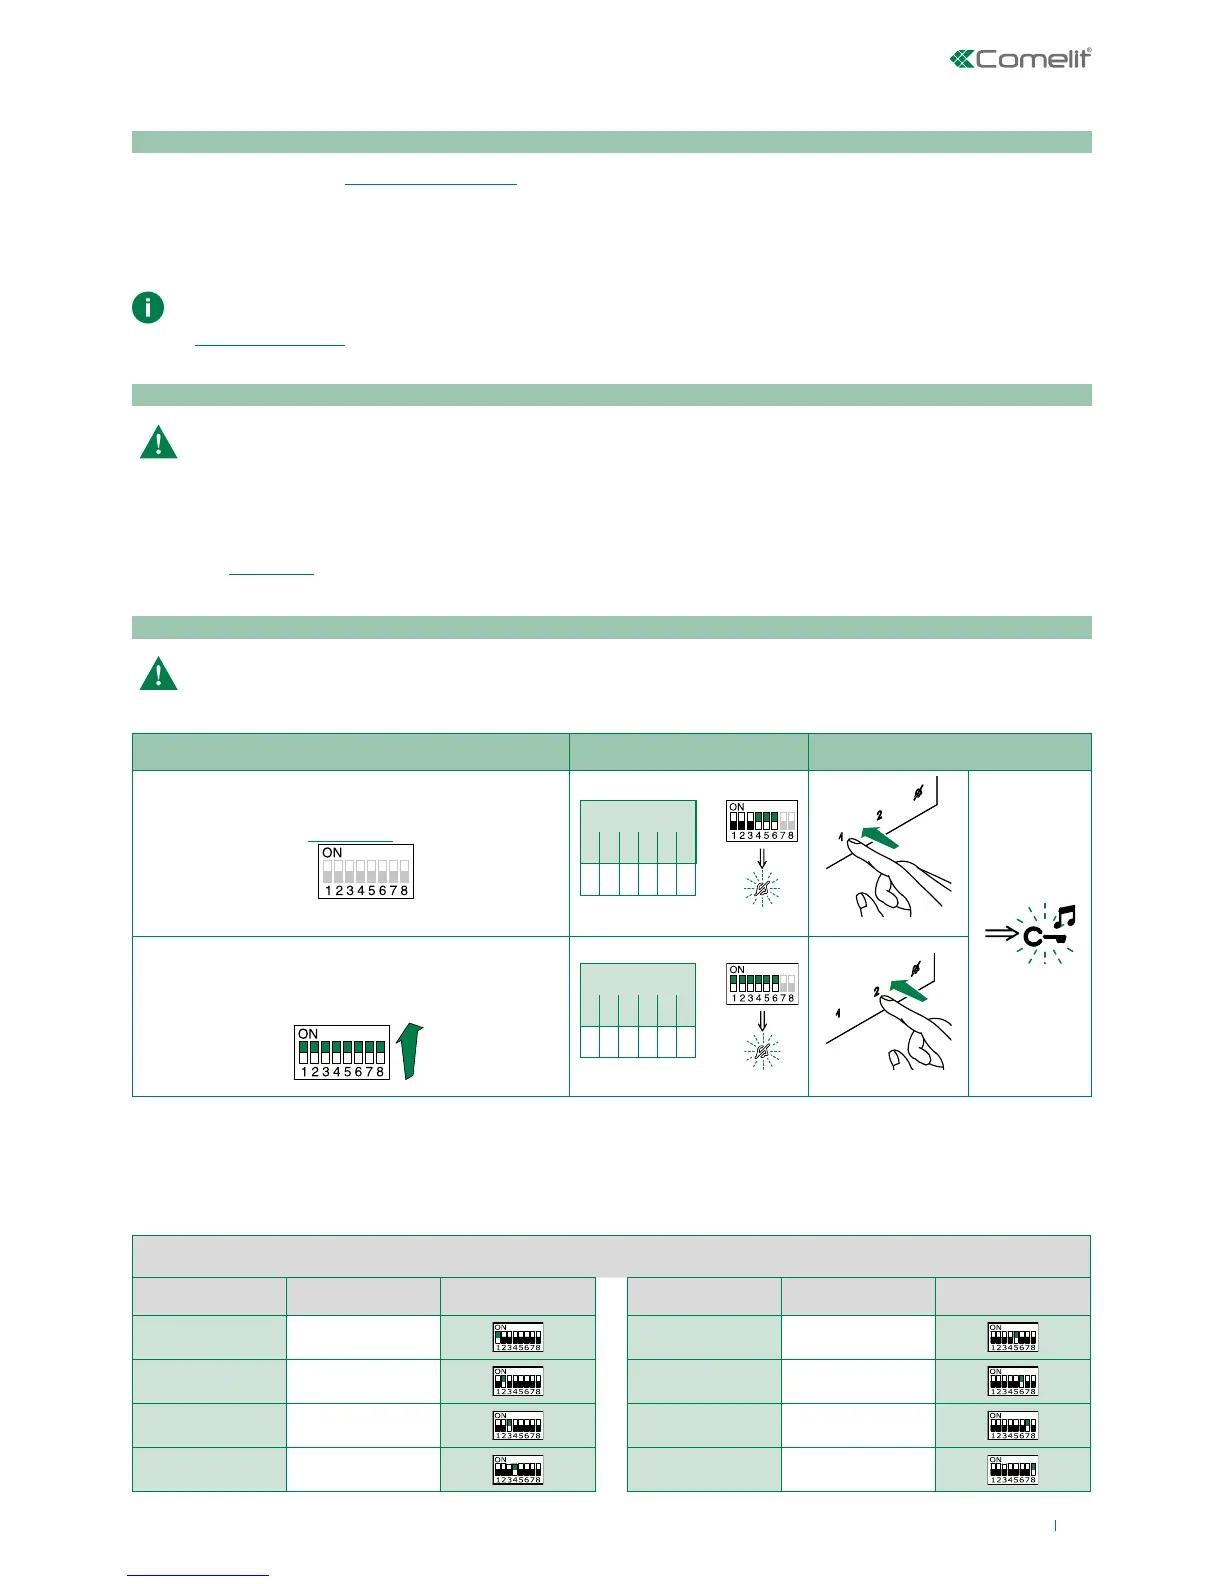
1) 2) 3)
Programming; set code,
"TABLE B"
S1
S2 DIP
1 2 3 4 5 6
0 0 0 1 1 1
S2
Cancellation
S1
S2 DIP
1 2 3 4 5 6
1 1 1 1 1 1
S2
TABLE B
Codice DIP switch ON S1 Codice DIP switch ON S1
1 1
5 5
2 2 6 6
3 3 7 7
4 4 8 8
If the default settings (Table "Basic configuration") do not reflect requirements, the buttons can be programmed dierently by
carrying out the steps below.
After programming, set S2 DIP switches 1-2-3-4 to the combination 1111. With these DIP-switch settings, the buttons
control the programmed functions.
The NON-programmed buttons control the basic configuration functions 0000. To restore the user code setting on
S1, see “addressing table”
Warning
Intercom calls: introduction
General and selective intercoms CANNOT be used together on the same riser.
General intercom: call from one internal unit to one or more internal units identified by the same call address as used
by the external unit.
Selective intercom: call from an internal unit to one or more internal units identified by a dedicated call address
(see"TABLE B") which is different from the call addressed used by the external unit.
Selective intercom address: programming/cancellation
Take note of the S2, S1 settings and restore on completion of programming