Connecting the Relief Valve Vent Line
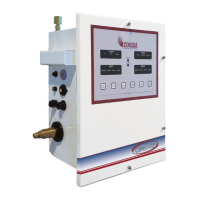
The CryoWiz™ is equipped with three 50 PSIG cryogenic relief valves. The relief valves protect the system from
pressure increases that may occur due to the vaporization of trapped cryogenic liquid during operation. They are
internally plumbed to a common ½” female NPT outlet on the top right side of the enclosure. Make sure that this is
connected to an appropriately sized vent line and vented outside the building with a screened gooseneck. If
combining both the relief and purge lines, use at least a 3/4” trunk line to minimize purge times. The line must be
at least 10’ away from air intakes, windows, doorways, access points, and any confined space. Adherence to local
codes and standards is required.
Connecting the Hot Gas Purge Vent Line
The CryoWiz™ is equipped with a hot gas bypass for both left and right sides. The hot gas bypass or purge vent
lines are internally plumbed to a common ½” female NPT outlet on the top left side of the enclosure. This must
be connected to an appropriately sized vent line and vented outside the building with a screened gooseneck. If
combining both the relief and purge lines, use at least a 3/4” trunk line to minimize purge times. The line must be
at least 10’ away from air intakes, windows, doorways, access points, and any confined spaces. Adherence to
local codes and standards is required.

 Loading...